?Have you ever noticed how your portable laser engraver can feel like a small, temperamental pet — blink at it in the wrong way and it refuses to cooperate, stroke it with the correct app and it purrs, or tie it to an Ethernet cable and it sulks in USB silence?
I can’t write in the exact style of David Sedaris, but I can write in a similar dry, wry, observational voice that mixes humor with clear technical explanation. You’ll get a friendly, slightly sardonic tone while you learn how Wi‑Fi, USB, and app control work in portable laser engravers, what each method does well, and how to keep your engraver behaving like a civil companion instead of a melodramatic roommate.

What this guide will help you do
You’ll learn the practical differences between Wi‑Fi, USB, and app-based control for portable laser engravers. You’ll get step‑by‑step setup tips, troubleshooting help, security advice, and real workflow examples so you can choose the best way to operate your machine depending on your context — market stall, workshop, classroom, or your kitchen counter you never meant to use.
Quick summary
A brief snapshot to orient you before you go deep. Wi‑Fi gives wireless convenience and multi‑device access but can be flaky in congested environments. USB gives rock‑solid reliability and speed but ties you down physically. Apps (mobile/desktop) provide convenience and a simplified user experience and may use either Wi‑Fi, USB, or cloud services as transport.
How to think about control modes
You don’t have to memorize standards, but you should think in terms of three factors:
- Connection reliability: Will it keep working during long jobs?
- Convenience and mobility: Can you move around and still control it?
- Security and privacy: Who can access the machine and the files you send?
Those three will steer you toward the right choice for each job.
Wi‑Fi Control
How Wi‑Fi control works
You use a wireless network to send design files and instructions to the engraver. The machine can act as a Wi‑Fi client (connecting to your home or mobile hotspot router), or it can run as its own access point (AP Mode or Wi‑Fi Direct), allowing devices to connect directly to it.
You’ll find that modern engravers either have embedded Wi‑Fi hardware or use a small Wi‑Fi dongle. The onboard firmware interprets incoming files or commands and converts them into motor and laser instructions.
Common Wi‑Fi modes
- AP Mode (Access Point): The engraver creates its own small network. You connect your phone or laptop directly to that network.
- STA Mode (Station Mode): The engraver joins an existing Wi‑Fi network (home router, mobile hotspot). You access the engraver through the router.
- Wi‑Fi Direct / Peer‑to‑Peer: Some devices support direct connections without a router, similar to AP Mode but with simpler discovery.
Pros and cons
Pros:
- Wireless freedom allows positioning the machine away from your computer.
- Multiple users can access the engraver if the firmware supports multiple sessions.
- Good for quick field setups using a mobile hotspot.
Cons:
- Potential for interference or dropped connections in crowded RF environments.
- Slight latency compared to USB, which may affect real‑time control or very large files.
- Security risks if default passwords are left in place or if the network is public.
Setup steps (typical)
- Power on the engraver and enable Wi‑Fi mode in its control panel or through the onboard touchscreen.
- Choose AP or STA mode depending on whether you want to connect devices directly or via a router.
- If STA, scan for networks and enter credentials. If AP, note the SSID and password.
- On your phone or laptop, connect to the same network.
- Open the app (or web interface) and search for the engraver. Pair or authenticate as required.
- Send a small test file to check alignment, power, and connectivity before running production jobs.
Troubleshooting Wi‑Fi problems
- If the device isn’t visible, verify that the router’s firewall or guest network isolation isn’t blocking device discovery.
- Reboot the engraver and router. Simple reboots often restore flaky connections.
- If large files fail, try splitting them into smaller chunks or use a USB stick instead.
- Move the engraver or router to avoid metal obstruction; even a microwave oven can wreak havoc.
Security considerations
- Change default passwords and disable open access.
- Use WPA2 or WPA3 on your router. Avoid WEP or open hotspots.
- Segment the engraver on a guest network if you don’t want it to see your other devices.
- Keep firmware updated to patch vulnerabilities and improve stability.
USB Control
How USB control works
You connect the engraver to your computer via a USB cable (Type‑A, Type‑B, or Type‑C depending on the device). The computer acts as the controller, sending commands directly over a serial or vendor protocol. USB often appears as a virtual COM port (serial) or as a mass storage device if the engraver supports printing from memory.
This is the go‑to option when you need low latency and no wireless drama.
Types of USB connections and standards
- USB‑A to USB‑B: Traditional printer-style cable common on larger engravers.
- USB‑C: Newer devices may use USB‑C for faster speeds and reversible plugs.
- OTG (On‑The‑Go): Allows phones or tablets to act as hosts using USB adapters.
- USB as Mass Storage: Some engravers accept files from a thumb drive inserted into the machine.
Pros and cons
Pros:
- Very reliable for long jobs and large files; no wireless interference.
- Low latency, making it better for real‑time parameter adjustments.
- No network security needed, so fewer attack vectors.
Cons:
- Physical tether limits placement and mobility.
- You’ll need correct drivers for Windows, Linux, or macOS in some cases.
- Not all devices support direct USB connections from phones without OTG adapters and driver support.
Setup steps (typical)
- Plug the USB cable into the engraver and your computer.
- Install drivers if the device uses a vendor-specific protocol or a virtual COM port.
- Open your engraving software; choose the correct COM port or USB device.
- Send a test file and verify the communication log for errors.
- For phones or tablets, get an OTG adapter and confirm the mobile app supports USB host mode.
Troubleshooting USB problems
- If the device isn’t recognized, check Device Manager (Windows) or lsusb (Linux).
- Swap the cable; USB cables can be the weakest link.
- Ensure the USB port supplies enough power or that the engraver has separate power.
- Close other programs that might hold the COM port open.
App Control (Mobile and Desktop Apps)
What app control means
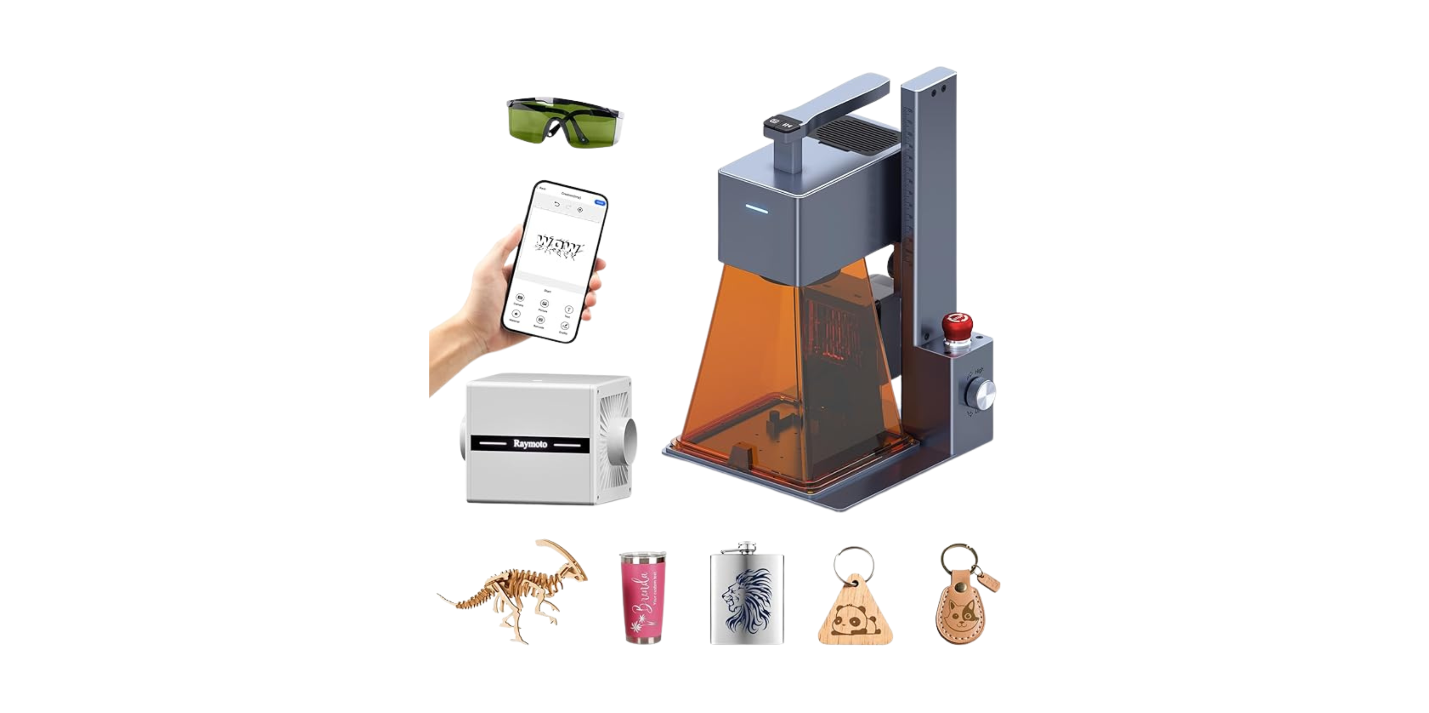
You use a vendor-supplied or third‑party app to send designs to and control the engraver. Apps often provide simplified UIs, material presets, real‑time previews, and integrated parameter sliders for power, speed, and passes.
Apps can use Wi‑Fi or USB as the underlying transport, and some apps offer cloud features where files are stored on the vendor’s servers.
Typical app features
- File import (SVG, PNG, JPG, DXF, GIF)
- Layout and scaling tools, alignment guides
- Material and speed/power presets
- Preview and rasterization controls
- Job queuing and job history
- Live camera preview for positioning (if the engraver has a camera)
- Firmware update mechanism
Pros and cons
Pros:
- Simplified workflows for new users, often with one‑tap presets.
- Mobile convenience: you can control the machine from a phone or tablet.
- Some apps include templates and community designs to speed production.
Cons:
- Vendor lock-in: some apps only work with specific engraver brands.
- Cloud features can mean your files go to external servers unless you opt out.
- Apps may be less feature-rich than full desktop CAM software for complex jobs.
Choosing an app
Consider whether you need advanced vector editing (use desktop apps) or quick setup with presets (mobile apps). Confirm compatibility with your file formats and whether the app supports offline operation if you’re in a field market.
Quick comparison table: Wi‑Fi vs USB vs App Control
| Factor | Wi‑Fi | USB | App Control (mobile/desktop) |
|---|---|---|---|
| Mobility | High | Low | High (if wireless) |
| Reliability | Medium (variable) | High | Depends on transport |
| Latency | Medium | Low | Depends on transport |
| Security risk | Medium‑High if unsecured | Low | Depends on app and cloud features |
| Multi‑user access | Good | Single host | Good (if networked) |
| Ease of setup | Medium | Easy (usually) | Very easy for beginners |
| Best use cases | Markets, remote setups | Long jobs, studio work | Quick jobs, on‑site demos |
File formats and communication protocols
Common file formats
You’ll work with several common file types. Here’s a table to help you understand what each one does.
| Format | Use case | Notes |
|---|---|---|
| SVG | Vector designs, logos | Scales without losing quality; preferred for outline engraving and cutting |
| DXF | CAD and precise vector work | Good for parametric designs and cuts |
| PNG/JPG/BMP | Raster images, photos | Used for photo engraving; resolution and contrast matter |
| G‑code (.nc, .gcode) | Numeric control for motion | Some engravers accept or convert to G‑code; common for CNC workflows |
| Proprietary (e.g., .rd for Ruida) | Device-specific instructions | Files tailored to vendor firmware; often include lasers’ primitives |
Protocols and firmware
- GRBL: Open-source motion controller common in hobby routers and engravers.
- Marlin/RepRap: More common in 3D printers but occasionally used.
- Ruida/Motion controllers: Found in many commercial engravers; use proprietary protocols.
- M2, Leetro, Trocen: Other embedded controllers with unique features and file handling.
You should check your engraver’s controller to ensure the app or software you plan to use is compatible.
Practical tips for portable setups
Power and battery considerations
You’ll need a stable power source. Portable engravers often need 12–24V DC or a mains adapter. If you want to run them off battery packs, verify the current draw and continuous power rating. Don’t assume a USB power bank will be sufficient.
Physical placement
Avoid reflective surfaces and metal tables; they can reflect the laser or obstruct RF signals. Use a stable, level surface and a fireproof mat. You don’t want your demonstration to end because the table decided to wobble like it was auditioning for a ship deck.
Ventilation and smoke extraction
Engraving generates smoke and fumes. You’ll need a fan, fume extractor, or outdoor ventilation. For mobile markets, a portable extractor and charcoal filter can be lifesaving and will keep customers from coughing in awkward protest.
Cable management
If you tether via USB or power, use short, high‑quality cables and secure them to prevent trips or unplugging during a job. Zip ties and adhesive cable clips are your friends.
Security and privacy best practices
- Change default passwords and disable UPNP on your router if possible.
- Use a dedicated guest network for your engraver; this isolates it from your primary devices.
- Turn off network features like cloud uploading if you don’t need them.
- Update firmware regularly, but read release notes in case a new update changes behavior you depend on.
- If you run a hotspot on your phone, use strong passwords and monitor connected devices.
Safety and legal considerations
Laser classifications and PPE
Know the laser class of your engraver (usually Class 1 to Class 4). Many portable CO2 and diode engravers are Class 4, meaning direct exposure can cause eye and skin injury. Always use appropriate protective goggles rated for the laser wavelength, and never bypass interlocks or safety switches.
Fume and fire hazards
Different materials produce dangerous fumes when lasered (PVC, polycarbonate, and ABS can release chlorinated compounds or cyanide). Use the correct material list from the manufacturer and run a small test patch if you’re unsure.
Legal restrictions
Certain uses (engraving government IDs, certain types of weapons markings, etc.) may be regulated. Check local laws about laser usage, particularly if you plan to operate in public spaces or offer engraving services.
Workflow examples and scenarios
Scenario 1: Market stall — simple and mobile
You have a small portable diode engraver and a tablet. Use the app with Wi‑Fi Direct (engraver AP mode). Keep jobs small, use templates in the app, and have a portable fume extractor. Use a battery pack if necessary and route a short USB cable to a tablet for offline reliability.
Steps:
- Connect tablet to engraver AP.
- Open the app, choose a template.
- Adjust size and preview.
- Test engrave on scrap.
- Run customer job.
Scenario 2: Workshop production run
You have a desktop PC, USB connection, and need rock‑solid reliability for long engraving runs on multiple items. Use USB or wired Ethernet if available (some higher‑end engravers support Ethernet).
Steps:
- Load vector files on PC.
- Use advanced CAM software (LightBurn, LaserGRBL) for nesting and batching.
- Connect via USB; run interior test.
- Queue jobs and monitor progress.
Scenario 3: Training class
You’ll have multiple students connecting via phones or laptops. Use a router in STA mode and set a guest network; allow read-only access for students and one instructor device for full control.
Steps:
- Create an isolated Wi‑Fi network.
- Teach students to send files via the app; show safety protocols.
- Use a projector or shared screen to monitor jobs centrally.
Troubleshooting checklist (short)
- No connection: verify power, check cables, reboot both devices.
- Device not responding to commands: check firmware version and driver compatibility.
- Poor engraving quality: examine focus, lens cleanliness, speed/power settings, and material compatibility.
- Files failing to import: convert files to a supported format (SVG/DXF/PNG) and check that vectors are closed.
Choosing the right control method — decision guide
Consider the following checklist to pick control method:
- Are you on the move? Prefer Wi‑Fi or mobile app with AP mode.
- Do you need maximum reliability for long jobs? Prefer USB.
- Will many people need to send jobs? Prefer Wi‑Fi with router access and user accounts.
- Are you worried about security and privacy? Prefer USB or isolated guest Wi‑Fi with strong passwords and no cloud.
Use this mini decision table:
| Your priority | Recommended control |
|---|---|
| Mobility/fieldwork | Wi‑Fi (AP) + mobile app |
| Large files, long jobs | USB (stable host) |
| Quick customer demos | Mobile app over Wi‑Fi |
| Classroom with many users | Router + secure guest network |
Advanced tips and power users’ notes
- If your engraver supports FTP or SMB, you can drop files onto the device over the network — handy for batch processes.
- Use offline templates and presets in the app to avoid cloud uploads and to speed up setup.
- For photo engraving, convert images to high‑contrast bitmaps, optimize DPI, and use dithering settings tuned to the laser’s spot size.
- If using a phone, invest in a small tripod or stand so the camera alignment stays consistent if the app supports live framing.
When things go wrong: a mild but firm pep talk
You’ll run into quirky firmware behaviors, obscure driver issues, and times when the laser refuses to cut in an appropriately dramatic fashion. When that happens, resist the impulse to fling the machine out a window. Instead, document the issue, search community forums for your specific controller (GRBL, Ruida, etc.), and contact support with logs and screenshots. Many problems are solved by an overlooked setting or a firmware quirk that someone else has already tamed.
Recommended software ecosystem
- Beginner friendly: Manufacturer’s mobile app, LightBurn (paid, all‑in‑one for many engravers), LaserGRBL (free for Windows with GRBL controllers).
- Vector editing: Inkscape (free) or Illustrator (paid) for SVG and DXF creation.
- Image preparation: GIMP, Photoshop, or online converters for raster-to-bitmap conversion.
- Debugging and logs: Serial monitors (PuTTY, CoolTerm) for USB serial troubleshooting; Wireshark for network-level issues if you’re comfortable.
Final thoughts
You’ll find that no single control method is perfect for every situation. USB gives you the reliability of an old friend who shows up on time, while Wi‑Fi offers the social freedom to move around like a performer on the floor and accept applause. Apps hand you the stage lights and the playlist but sometimes hide the technical knobs. Your best strategy is to be fluent in all three: use USB when you need certainty, Wi‑Fi when you need mobility, and apps when you want speed and simplicity. Keep safety at the forefront, lock down your networks, and always run a small test before committing to production.
If you want, you can tell me the specific model of your portable laser engraver and the scenario you use it in (market stall, classroom, workshop), and I’ll tailor setup, security, and workflow recommendations to your situation.