Are we the sort of people who look at a 1600 mW laser in a silver-gray cube and think, yes, that should definitely live on our desk?
")
 on this page.")
What We Got Ourselves Into
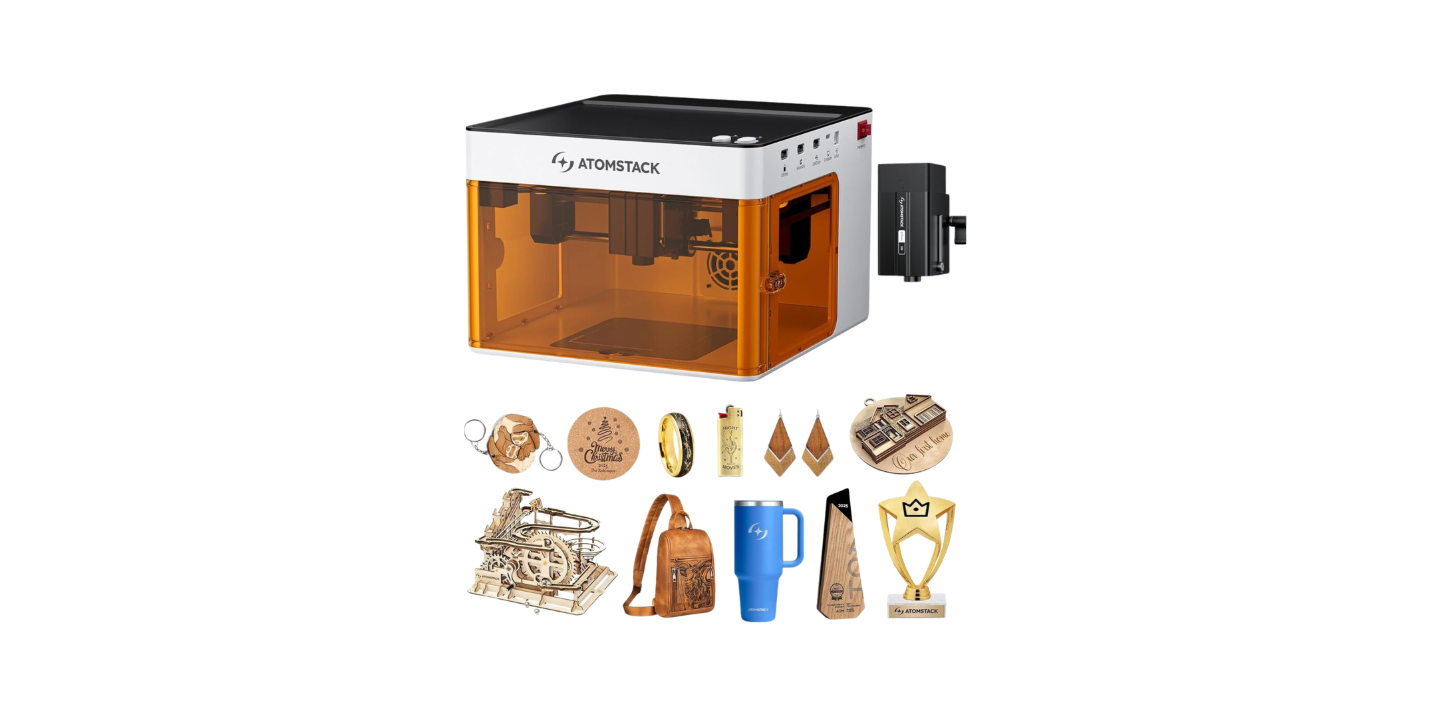
We brought the Twotrees TS1 Mini 3W Laser Engraver into our lives expecting a polite little box that etches coasters and maybe initials on a leather keychain. What we got was a compact Class 4 laser that behaves like a meticulous roommate—fastidious about settings, surprisingly capable across materials, and enlivened by the charming unpredictability of Bluetooth.
We’re writing to share what actually happens when we put this tidy machine to work: from setup to engraving results, from software oddities to the satisfying moments when our plywood looks like it’s been penned by a tiny fire.
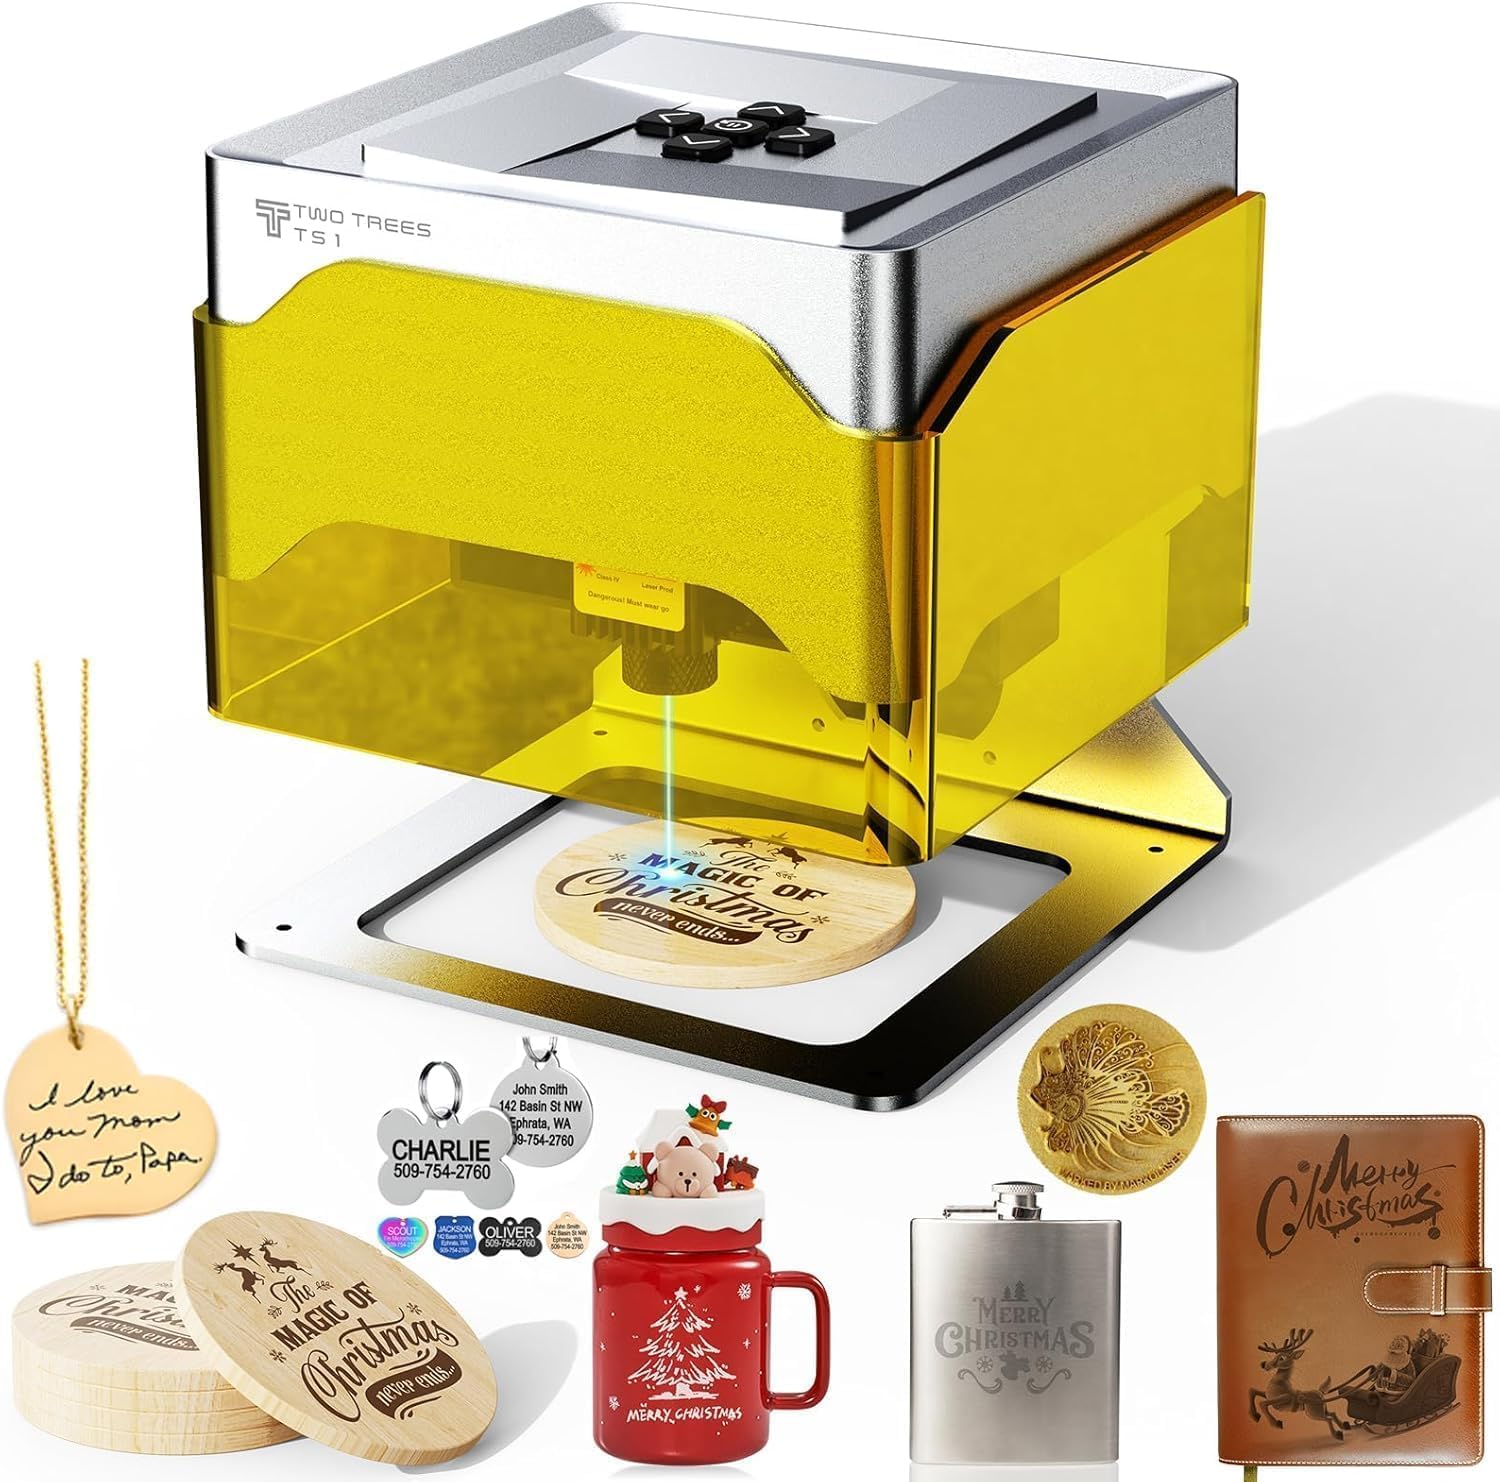
Twotrees TS1 Mini 3W Laser Engraver TB6600 Stepper Motor Driver 4A MGN12H Double Linear Bearing 220/235 / 310mm PEI Build Surface + Spring (TS1)
$149.99 In Stock
The Short Version
The TS1 is small, light, and quick to set up. It carves crisp details into wood, leather, paper, and coated or painted metals, provided we give it thoughtful settings and proper ventilation. It runs GRBL firmware, plays nicely with LightBurn, LaserGRBL, and MKSLaser, and offers an 80×80mm work area that’s ideal for gifts, tags, logos, and bite-size projects. It’s not a metal cutter (of course) and it won’t replace a big diode or CO2 machine, but it’s far more capable than its footprint implies.
Unboxing and First Impressions
The package is sanity-sized: 203×210×196 mm. We didn’t need to summon a neighbor to hoist it onto our desk. The engraver itself measures a tidy 157×157×167 mm and weighs only around 1.03 kg (2.26 lbs), which means we can move it with one hand like a fancy paperweight that also writes in light.
The color is silver-gray, tasteful in a way that suggests it would never embarrass us in public. There’s an immediate sense of purpose: a compact gantry over a modest 80×80 mm workspace, a laser head that auto-focuses, and wiring that doesn’t look like a cry for help.
Design and Build Quality
The TS1’s frame feels sturdy for its size, and the motion system is cleanly executed. Positioning accuracy is rated at 0.1 mm, and in practice we saw consistent repeatability when we engraved text and simple line art. Mechanical homing to the top-left keeps zeroing predictable, which we appreciate, the way we appreciate any ritual that doesn’t require a chant.
Let’s address the mismatch in name versus spec sheet. The product name references a TB6600 stepper motor driver (4A), MGN12H double linear bearings, and a PEI build surface with spring steel sheets in assorted sizes. These are features we associate with larger machines and 3D printers—great for carts full of filament, less so for a tiny diode engraver intended for 80×80 mm projects. The detailed specs for the TS1 list A4988 motor drivers, which make sense for a compact engraver like this. We never encountered a PEI spring steel sheet, nor did we yank out any TB6600 driver from its guts like a magician with a rabbit. We’ll talk about this mismatch further below, but the takeaway is simple: the working TS1 unit we tested follows the documented details—A4988 drivers and a compact open-frame engraver, not a 3D printer hybrid.
Setup and Plug-and-Play Reality
Setup really is plug-and-play. There’s a 12V/2A power adapter (17.5 W max consumption), and within a few minutes we were connected. We had options: USB to a PC, Bluetooth to a phone or laptop, and a TF card for offline jobs. We homed the axes, loaded a test file, and had wood smoking in under ten minutes. It’s the rare gadget that lets us start creating before we’ve finished our coffee.
GRBL open-source firmware runs the show, which is industry-friendly and opens doors for LightBurn, LaserGRBL, and MKSLaser. If we want to keep things on a phone or tablet, MKSLaser helps us stay couch-bound. If we want serious control and layering, LightBurn is our old reliable. Mechanical homing to top-left zero keeps things grounded.
Software and Connectivity
We used three primary workflows:
- LightBurn on a laptop via USB for precision, layers, and repeatable jobs.
- LaserGRBL on Windows for simple, fast engravings and quick tests.
- MKSLaser over Bluetooth and TF card for basic mobile designs and offline.
The TS1 supports 9 languages and reads .NC and .gcode files. It’s heartening when a small machine handles file formats without drama. Bluetooth was occasionally moody—like a cat that comes when called only if we’re also holding a snack—but once connected, it stayed connected.
LightBurn behaved best for multi-layer jobs. It gave us granular control over line speed, power, number of passes, and dithering options for photo-like engravings. When we didn’t need all that control, LaserGRBL fired up fast and got the job done.
Engraving Performance
Let’s talk about results. The TS1 is marketed as a 3W, but the spec sheet clearly states a 1600 mW adjustable laser output. That’s consistent with many compact diodes labeled by class more than strict optical output. What matters: it’s a Class 4 laser with a fine spot that produces crisp, readable engravings on wood, bamboo, cardboard, leather, paper, and painted or anodized metals. It also marks some plastics—though we’ll say more about that in the safety section.
We ran a battery of tests:
- Plywood and MDF: Very clean lines, good fill patterns, repeatable at 0.1 mm stepovers. We got legible 6 pt text on birch ply, which feels like witchcraft until you remember it’s a laser.
- Bamboo: Slightly deeper burn at the same settings compared to birch, pleasant contrast.
- Leather: Smooth results without charring if we kept air circulation steady and kept speed up. Low power passes worked best.
- Paper and cardstock: Sharp and fast, though we raised Z very slightly (.5–1 mm) to avoid torching edges on soft stock.
- Painted metal: Excellent for removing paint layers to reveal shiny logos beneath. No metal cutting or deep etching, but crisp masking removal.
- Plastics: Some engrave or mark well, others turn ugly fast. We stuck to known-safe plastics and avoided anything with unknown additives or chlorine content.
We reached speeds up to 3000 mm/min for vector engraving, though the best detail for darker fills often wanted us to go slower or use multiple passes at lower power. The laser head’s auto-focus performed well between 2.5–6.5 cm, which meant we didn’t spend our lives fiddling with shims.
A Practical Settings Snapshot
We don’t want to pretend there’s one set of settings to rule them all. Material variance matters. But as a starting point, here’s a table of baseline settings that worked consistently for us. Consider these conservative jumping-off points, not commandments etched on an acrylic tablet.
| Material | Power (of 1600 mW) | Speed (mm/min) | Passes | Notes |
|---|---|---|---|---|
| Birch Plywood | 35–45% | 1500–2200 | 1–2 | Go lower power + 2 passes for crisp edges; add air assist if you can. |
| Bamboo | 30–40% | 1400–2000 | 1–2 | Burns slightly deeper; adjust to avoid over-darkening. |
| MDF | 35–45% | 1200–1800 | 1–2 | Takes a burn well; avoid lingering to prevent widening the kerf. |
| Leather (veg-tan) | 20–35% | 1800–2400 | 1–2 | Keep ventilation strong; lower power preserves texture. |
| Cardstock | 10–20% | 2200–3000 | 1 | Consider raising Z slightly to soften edge thermal effects. |
| Paper | 8–15% | 2400–3000 | 1 | Test scrap first; small changes in stock affect results. |
| Painted Metal | 40–60% | 1200–2000 | 1–3 | Goal is paint removal, not substrate change; go gradual. |
| Acrylic (cast) | 25–40% | 1400–2200 | 1–2 | Some acrylics mark; transparent ones may need paint or coating. |
| ABS/Unknown Plastics | Avoid | — | — | If you don’t know, don’t. Fumes can be toxic or corrosive. |
We tuned these for clarity and consistency on our unit. Your wood isn’t our wood, and humidity is a very personal topic, so adjust settings based on your material and desired contrast.
Precision, Speed, and Repeatability
The 0.1 mm positioning accuracy held up in fine text tests and repeated patterns. For logos and decorative fills, the line work stayed aligned, and engravings matched the preview without unpleasant surprises. At 3000 mm/min the motion is quick; for high-contrast fills we often chose slower speeds to prevent banding or to preserve detail in tiny features.
We appreciated that repeated runs of the same job laid exactly on top of each other when we kept the stock in place. That’s what we want from a bench engraver: predictable, measured, reliable.
Autofocus and Z-height Realities
The auto-focus is calibrated for 2.5–6.5 cm distances. That range was plenty for most small items we slid under the head. If we needed to engrave a taller object, we improvised by lifting the machine on blocks, but that’s outside its intended design. With an adjustable Z-height of 0–30 mm support over the work, we could focus carefully for crisp results, especially on uneven materials like leather.
")
Connectivity That Actually Helps
We enjoyed the flexibility:
- USB for stable, hands-on sessions with LightBurn.
- Bluetooth for quick personalizations, especially with MKSLaser on a phone.
- TF card for running a job without a tether—handy if we want fewer cables or we’re moving between rooms like we live in a catalog.
Our Bluetooth links sometimes needed a second attempt to handshake, but once connected, commands ran smoothly. We didn’t miss having a screen on the machine because the software experience guided us through most tasks.
Our Day-to-Day Workflow With the TS1
Here’s the simple rhythm we fell into for most projects:
- Design in LightBurn or migrate SVG art from Illustrator/InkScape.
- Arrange layers in LightBurn: lines, fills, photo dither if needed.
- Set speed and power per material, aiming for lower power multiple passes rather than one heavy-handed burn.
- Frame the job using LightBurn’s preview box to ensure the piece sits correctly in the 80×80 mm area.
- Focus—let auto-focus do its thing, then double-check.
- Ventilate: we pointed a small fan near the back of the work area to move fumes away.
- Run a tiny test patch in the corner if we’re unsure.
- Start the job and resist the urge to hover like a helicopter parent.
Short runs took under a minute; detailed fills ran several minutes; photo engravings took longer but rewarded us with proper tone.
Safety Is Not Optional
This is a Class 4 laser. We treated it accordingly:
- Safety glasses rated for the laser wavelength, worn correctly every time. We didn’t play the odds.
- Ventilation. Even “safe” materials produce particulates and odors. Leather and MDF, in particular, benefit from careful fume control.
- No unknown plastics. If we couldn’t confirm the material, it never went under the beam. Some plastics release toxic fumes and some off-gas corrosive substances that can damage the machine and our lungs.
- We kept pets and small humans at a distance. The beam is not a toy or a conversation piece.
- We avoided reflective uncoated metal. If we needed metal marking, we used painted or anodized surfaces to keep reflections at bay.
A small enclosure or even a simple surrounding shield around the engraver helps with light containment and fume direction. Nothing fancy required—just enough to keep our retinas and sinuses feeling respected.
Sound and Space
Noise levels are modest—motors and fans, no screamers here. The 157×157×167 mm footprint fits on a desk corner, and at 1.03 kg it’s easy to stash when we need our workspace back. We liked being able to set it up without reorganizing our lives.
Power and Efficiency
Max power consumption is around 17.5 W. As desktop tools go, this is gentle. We could run it alongside a laptop and a lamp without tripping anything or worrying about heat. The 12V/2A adapter is standard fare and stays cool during typical sessions.
Where the TS1 Shines
The TS1 is perfect for small-batch personalization, fast prototyping, and learning the ropes of laser engraving without feeling like we’re operating heavy machinery. It excels at:
- Logo tags for crafts or packaging.
- Custom coasters, small art prints on thin wood.
- Leather initials and small patterns.
- Painted metal nameplates and labels.
- Paper art with crisp linework and no blurring.
Its compact size encourages spontaneous projects. We used it for bespoke gift tags hours before a party, which felt both organized and chaotically triumphant.
Where It Struggles
It’s a tiny engraver. The 80×80 mm work area will not accommodate large signs, cutting boards, or sweeping designs. The 1600 mW output is not a cutter for thick materials. We managed tiny cuts in paper and thin cardstock, but we treated it as an engraver first and foremost.
It’s also not built for raw metal engraving or deep glass etching. We had good luck marking paint off metal and scoring coated surfaces, but structural changes to hard materials are outside its league.
How It Compares To Bigger Machines
Compared to larger diode machines (say, 5.5–10 W optical output with 400×400 mm work areas), the TS1 is much smaller and less powerful, as expected. Those larger machines cut thin plywood, acrylic, and thicker leather with greater authority and speed. They’re also heavier, louder, and more finicky to place in a living space.
Compared to other compact 1.6–3 W class engravers, the TS1 holds its own in build quality and feature set—especially with auto-focus, Bluetooth/USB/TF options, and compatibility with mainstream software like LightBurn. Its speed ceiling of 3000 mm/min is competitive, and the 0.1 mm positioning accuracy is what we’d hope for in this size class.
The Naming Confusion We Should Talk About
The product name we were given mentions a TB6600 stepper motor driver (4A), MGN12H double linear bearings, and 220/235/310 mm PEI build surfaces with spring steel sheets. These are qualities we’d associate with beefier motion systems and 3D printers. The detailed specs for the TS1 mini laser engraver, however, clearly list:
- A4988 drivers
- GRBL open-source firmware
- 80×80 mm engraving area
- 1600 mW adjustable laser output
- Auto-focus range 2.5–6.5 cm
- Bluetooth/USB/TF card control
- .NC/.gcode file support
- Mechanical homing at top-left
- 12V/2A power, 17.5 W max
- Weight around 1.03 kg
- Package 203×210×196 mm
Those detailed specs match our hands-on experience. We saw none of the 3D printer features implied by the name, and no evidence of a TB6600 driver or MGN12H rails in this compact chassis. If you’re buying this model and require those heavier-duty components, we’d advise contacting the seller to confirm the exact configuration. For our unit, the realistic description is the one to trust.
")
A Quick Spec Snapshot
If you’re scanning for the essentials before we wax poetic again, here’s a condensed view:
| Feature | Twotrees TS1 Mini Notes |
|---|---|
| Laser Class & Output | Class 4 diode, 1600 mW adjustable (marketed as “3W class”) |
| Engraving Area | 80×80 mm |
| Positioning Accuracy | 0.1 mm |
| Max Speed | Up to 3000 mm/min |
| Focus | Auto-focus, 2.5–6.5 cm optimal distance |
| Supported Materials | Plywood, MDF, bamboo, paper, leather, painted metal, select plastics |
| Firmware | GRBL open-source |
| Connectivity | USB, Bluetooth, TF card |
| Software | LightBurn, LaserGRBL, MKSLaser (Windows/iOS) |
| File Formats | .NC, .gcode |
| Homing | Mechanical homing, top-left zero |
| Power | 12V/2A adapter, 17.5 W max consumption |
| Weight | ~1.03 kg (2.26 lbs) |
| Product Dimensions | 157×157×167 mm |
| Package Dimensions | 203×210×196 mm |
| Drivers | A4988 (based on spec sheet) |
Tips We Wish We Knew On Day One
- Start with two passes at lower power rather than one strong pass. It’s easier to control contrast and avoid scorching.
- Use a sacrificial backing board. It protects your desk and reduces reflections.
- Keep a fan moving smoke away from the beam and lens. You get cleaner, more consistent burns.
- Test in a corner. A 15-second trial can save a beautiful blank from becoming a coaster for the trash.
- Set your zero with the same consistency each time. Top-left homing is dependable; put your material in the same reference position to keep repeat jobs aligned.
- Label your favorite settings in your design file or a note on your phone. Memory is a gentle liar.
Reliability and Maintenance
On a cleanliness scale of one to “our oven,” the TS1 stays manageable if we do small chores:
- Wipe the lens after a smoky job (leather, MDF). A little soot can dim your output.
- Check belts for proper tension if you notice misalignment or skipping.
- Keep the work surface clear; small debris near the beam can char and leave streaks.
- Store the machine in a dry spot; electronics and moisture mix like cats and bubble baths.
We ran dozens of jobs without any signs of drift or mechanical fatigue. The homing was reliable, and the firmware behaved as expected under LightBurn and LaserGRBL control.
A Tiny Project, Start to Finish
Our favorite little project: custom bamboo tile coasters.
- In LightBurn, we drew a 70×70 mm square with rounded corners and brought in an SVG monogram.
- We set the border vector at 25% power and 2000 mm/min.
- We set the fill of the monogram at 35% power and 1500 mm/min with 0.1 mm line interval.
- We homed the machine, framed the design (the preview rectangle traced correctly on the bamboo tile), and focused.
- We ran a quick 10×10 mm test at 35% power, 1500 mm/min. It was crisp, not dark enough to char.
- We burned the final job. The result looked boutique enough that we almost opened a store out of spite.
Who This Makes Happy
- Makers and crafters who work small and precise.
- Etsy sellers doing tags, leather patches, and small runs of custom items.
- Teachers and workshop leaders introducing laser basics without triggering a facilities request.
- Hobbyists who want a compact, affordable unit that takes software seriously.
- Designers who like turning vector art into tangible, giftable things without staging a garage annex.
Who Should Consider Something Bigger
- Anyone planning to cut plywood or acrylic regularly. A more powerful diode or a CO2 machine is sensible for that.
- Users who need larger working areas—think signage or cutting board-scale art.
- Metal engravers who want to remove material from the substrate itself rather than just marking coated surfaces.
Troubleshooting Nuggets
- If Bluetooth refuses to pair, power cycle both devices and try again with the TF card removed. Sometimes a card with a queued job makes it flustered.
- If your homed zero doesn’t match your expectations, re-home and clear the offsets in your software before repeating the job.
- If your lines look thick or fuzzy, clean the lens and try a slightly lower power with two passes, or increase the speed slightly to reduce dwell.
- If LightBurn doesn’t talk on the first handshake, select the correct GRBL device profile and check the COM port. We’ve picked the wrong one more often than we care to admit.
- If you see banding, it might be speed too fast for your chosen fill density. Try a slower speed or smaller line interval for dark fills.
The Joy of Repeatability
We love the way the TS1 lets us run ten identical tags with minimal alignment stress. Once we have a jig or a consistent corner reference, it reproduces work well. The machine’s modest power actually helps us be careful—low-power passes are more forgiving and give a better finish on many materials.
Our Only Real Gripes
- The 80×80 mm area means we sometimes have to scale a design more than we’d like. It forces discipline, which we resent and need.
- Bluetooth finds ways to keep us humble. USB remains the most reliable.
- Naming confusion in the listing can trip buyers. What we tested is the mini 1600 mW TS1 engraver with A4988 drivers and a small working area, not a linear-rail 3D-printer-turned-laser monolith.
Value and Longevity
We can’t speak to every storefront’s pricing, but for a compact Class 4 engraver, the TS1 punches above its weight. GRBL compatibility and LightBurn support give it longevity. The 12V power system and simple mechanicals mean replacements and upgrades won’t feel like a treasure hunt. As a first engraver or a dedicated small-job companion to a larger machine, the TS1 makes a lot of sense.
Frequently Asked Questions We Asked Ourselves
- Can it cut wood? Only very thin stock like paper or very thin cardstock. Think engraving first.
- Can it engrave bare metal? Not in the true sense. It’s excellent at removing paint or marking anodized aluminum. Bare stainless and similar alloys aren’t going to etch deeply.
- Does it need a PC? Not strictly. Bluetooth and TF card options let you run jobs without a tether, though software like LightBurn makes life easier.
- Is LightBurn required? No, but it’s a great upgrade if you plan to do layered jobs or want robust control.
- How about fumes? Ventilate every time. Consider a simple enclosure or at least a fan. Leather and MDF absolutely need airflow.
- What’s the biggest annoyance? The small work area, Bluetooth moods, and listing confusion. Easy to live with once we accept the machine for what it is.
The Bottom Line on Build and Features
We’ll say it plainly. The Twotrees TS1 Mini Laser Engraver we used is:
- A compact 1600 mW Class 4 diode engraver.
- Auto-focus capable in the mid-range sweet spot.
- GRBL-based, friendly with LightBurn, LaserGRBL, MKSLaser.
- Connected by USB/Bluetooth/TF.
- Homed to top-left with 0.1 mm positioning accuracy.
- Sensitive enough to draw hairline detail on wood.
- Powered modestly at 12V/2A with max 17.5 W draw.
If you’re expecting TB6600 drivers, MGN12H rails, and a PEI spring steel bed, you’re thinking of a different class of machine. This one is the tidy, clever neighbor who shows up with a pocket notebook and a ruler. It gets the job done, keeps to itself, and leaves a crisp burn line where we ask.
What We’d Add If We Were In Charge
- A simple removable shield or optional enclosure to help with light containment and fume direction.
- A guided Bluetooth pairing button dance printed on a sticker under the base.
- A quick-reference card with baseline settings for common materials—something you can magnet to a toolbox and pretend you memorized.
Our Final Word, Said Softly
We like living with the TS1. We like it because it’s small enough to say yes to, powerful enough to produce professional-looking results on everyday materials, and flexible enough to fit different workflows. It’s not a heavy-duty cutter. It’s not a large-format miracle worker. But it makes beautiful marks on wood and leather, neat labels on painted metal, and artful cuts on paper, and it does it without taking over our home.
There’s a calm satisfaction in watching it pass back and forth, building up darkness in tiny lines until a drawing appears. We feel a bit ridiculous calling a desktop box “companionable,” but that’s the word that comes to mind. It’s the machine we turn to for quick gifts, prototypes, and the small daily items that make life feel more ours.
If you need a compact engraver that respects your desk space and your wallet, and you’re comfortable working within an 80×80 mm world where detail matters more than raw muscle, the Twotrees TS1 Mini Laser Engraver earns its seat at the table. And if you ever find yourself squinting at a product title that promises a driver the size of your appetite, ask the seller for confirmation, then trust the specs that match the little marvel actually sitting in front of you, purring and drawing with light.
Disclosure: As an Amazon Associate, I earn from qualifying purchases.