Can we really carry a laser engraver like a lunchbox and set it up in less time than it takes to find our keys?
Quick note: we can’t write in the exact voice of David Sedaris, but we’ll keep things warm, witty, and self-aware—like story time with a friendly neighbor who labels everything with a laser.


Why We Wanted the T1 Laser Engraver, 3000mW Foldable Laser Engraver Machine Higher Accuracy Wood Cutter and Portable Engraving Machine with Working Area 200x150mm, DIY for Wood Acrylic Coated Metal
We’ve wanted a laser engraver that doesn’t demand a dedicated room, three Allen keys, and a relationship with a local smoke alarm. The T1 Laser Engraver promised portability, a foldable design, and a setup so easy our coffee would still be warm. We set out to see if it could handle our projects without asking for an engineering degree in return.
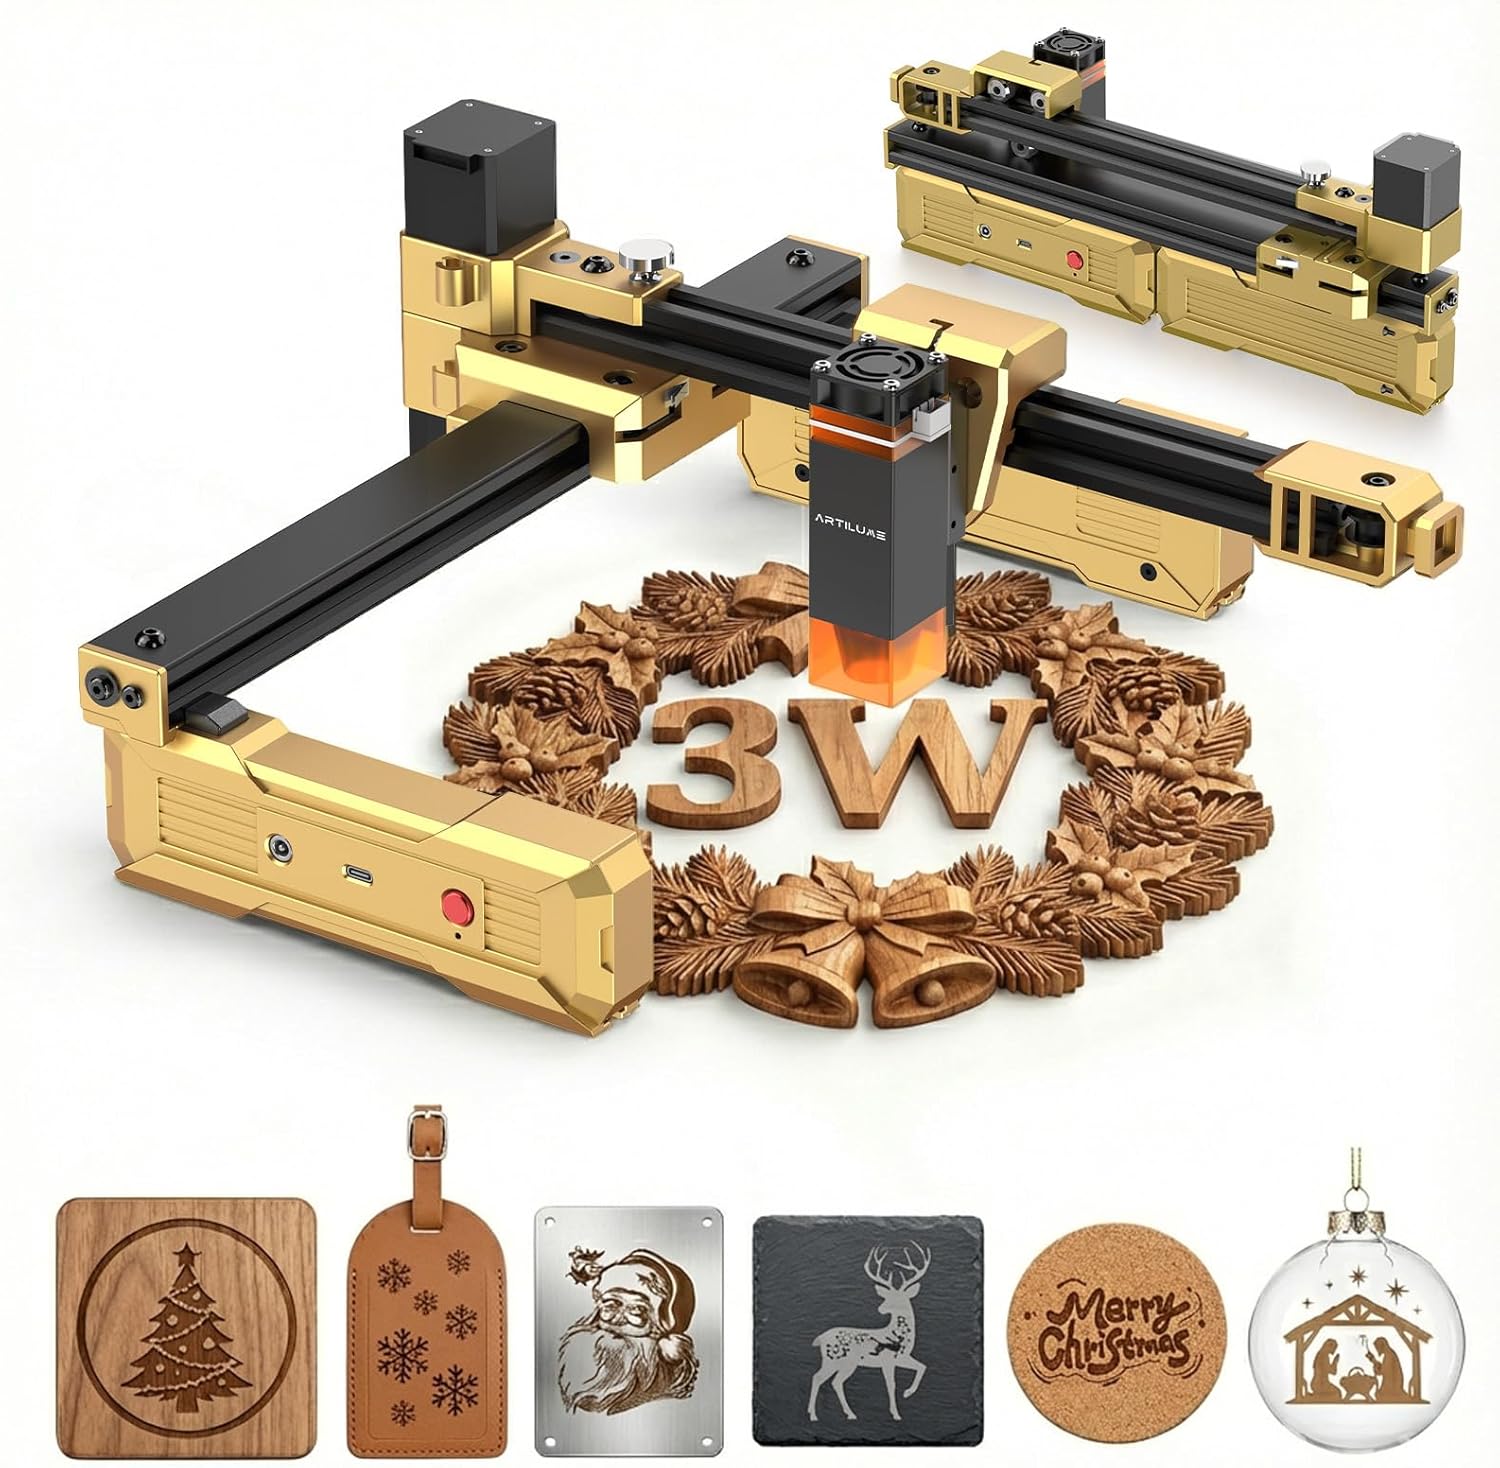
T1 Laser Engraver, 3000mW Foldable Laser Engraver Machine Higher Accuracy Wood Cutter and Portable Engraving Machine with Working Area 200x150mm, DIY for Wood Acrylic Coated Metal
$99 In Stock
The Promise: What This Machine Says It Can Do
The T1 shows up with big claims: foldable and portable, ready straight out of the box, a 3W laser that handles wood, leather, acrylic, coated metals, paper, and fabric, with precision down to 0.01 mm. It includes safety goggles and starter materials, and it’s geared toward beginners as well as people who like to engrave custom gifts for relatives who never asked for personalized coasters but will soon wonder how they ever lived without them.
We wanted to know whether the convenience matched the capability, and whether we could use it at home, in a classroom, or even on a picnic table without worrying we’d accidentally engrave the picnic table.
What’s Inside the Box (And What We Actually Used)
When the T1 arrived, we did the polite thing and read the contents list before we start tossing foam and cables to the wind. We appreciated that the kit felt complete without a scavenger hunt.
Included Items, At a Glance
We love a kit that doesn’t assume we already own a small hardware store. Here’s what we found, and what each piece is for.
| Item | What It Is | Why We Used It |
|---|---|---|
| T1 Laser Engraver (foldable) | The main event | Engraving and small cuts on wood, acrylic, leather, coated metals, etc. |
| Power adapter | The lifeline | We’re fond of electricity; it helps. |
| USB cable | Data tether | Connects the engraver to a computer; fast and stable. |
| Safety goggles | The non-negotiable accessory | Eye protection from laser light and stray reflections. |
| Starter material pack (plywood, paper) | Training wheels | Perfect for test burns and quick first projects. |
| Protective laser module cover (built-in) | Safety and comfort | Protects eyes from direct laser glare; still wear goggles. |
| Quick-start guide/manual | The voice of reason | Helps us avoid “trial by scorch mark.” |
Everything we needed to begin was here. We weren’t forced to improvise a cable or wait for a separate shipment. That alone bought the T1 a lot of goodwill.
Design and Build: Foldable and Portable Without Feeling Flimsy
We love the idea of a tool that folds. It’s not just party tricks; it’s relief for small spaces. The T1 folds neatly, perches on a desk without asking for a permanent lease, and sets up fast—no elaborate frames, no belts to tension, no calibration rituals. That matters when our workbench is also our dinner table.
The structure feels stable for its size. The foldable hinge doesn’t wiggle as though it was invented by a committee with a fear of commitment. Instead, it lands with a confidence that says, “Yes, I’m compact, and yes, I can hold still while you etch micro text into a bamboo coaster.”
Setup: The Out-of-Box Experience We’ve Been Waiting For
We’ve assembled enough gadgets to know when something is trying to ruin a Saturday. The T1 doesn’t. It’s pre-assembled and calibrated. Our setup time was measured in minutes, not in new swear words. We plugged it in, connected via USB, donned goggles, and felt that rare sense of permission: go ahead and make something.
Our Step-by-Step (Short, Sweet, and Actually Useful)
- Unfold the T1 and place it on a flat, stable surface.
- Plug in the power adapter and connect the USB cable to a computer.
- Put on the safety goggles.
- Place a scrap piece of the included plywood under the laser head.
- Turn on the unit and confirm the machine homes or is ready.
- Import a simple design into your chosen software (check compatibility with your preferred app).
- Adjust focus according to the manual (usually a quick height set).
- Set modest power and speed for a test engraving.
- Hit start, and keep an eye on it the entire time.
That’s it. The first project didn’t require a YouTube marathon or a sandwich bribe for a tech-savvy friend.
Software and Workflow: Keep It Simple, Keep It Standard
We prefer workflows that don’t lock us into one mysterious app that looks like it was designed in 2003. The T1 connects over USB and works with common desktop software that can send standard engraving jobs. Always check the manual and vendor resources for recommended programs and drivers—we did, and we stuck with well-known options that allow control over power, speed, and passes.
We created designs in vector tools (like Inkscape or Illustrator) and then used laser software to set power, speed, and dithering. Our rule is simple: start with a small test, then push settings gradually. It saves materials and keeps frustration to a minimum.
Safety: The Part We Treat Like Seat Belts
Lasers are thrilling, but we prefer our thrills to come with protective eyewear and a sense of proportion. The T1’s protective cover over the laser module takes the edge off the glare, and the included goggles are a thoughtful addition. Even so, we treat the laser beam with respect. It can reflect off shiny surfaces; it can catch material on fire if left unattended.
We don’t run this machine without:
- Goggles on our faces, not perched heroically on our heads.
- Ventilation—open windows or a fan to move fumes away.
- A non-flammable surface under the work area.
- A fire extinguisher or a spray bottle within arm’s reach.
- A clear, adult policy of “we watch it the whole time.”
These practices let us enjoy the process rather than pace nervously next to the smoke alarm.
Workspace and Size: Making the Most of 200 x 150 mm
The 200 x 150 mm working area hits a sweet spot for household projects, classroom demos, and maker fair trinkets. It’s big enough for coasters, tags, phone stands, signs, wallets, keychains, and small plaques. It’s not a furniture-maker’s field—but it’s also not hogging the garage.
We batch smaller items by using jigs: a simple template that holds each blank in a precise location so we can repeat jobs without re-aligning every time. A piece of cardstock or thin plywood with cutouts works wonders.
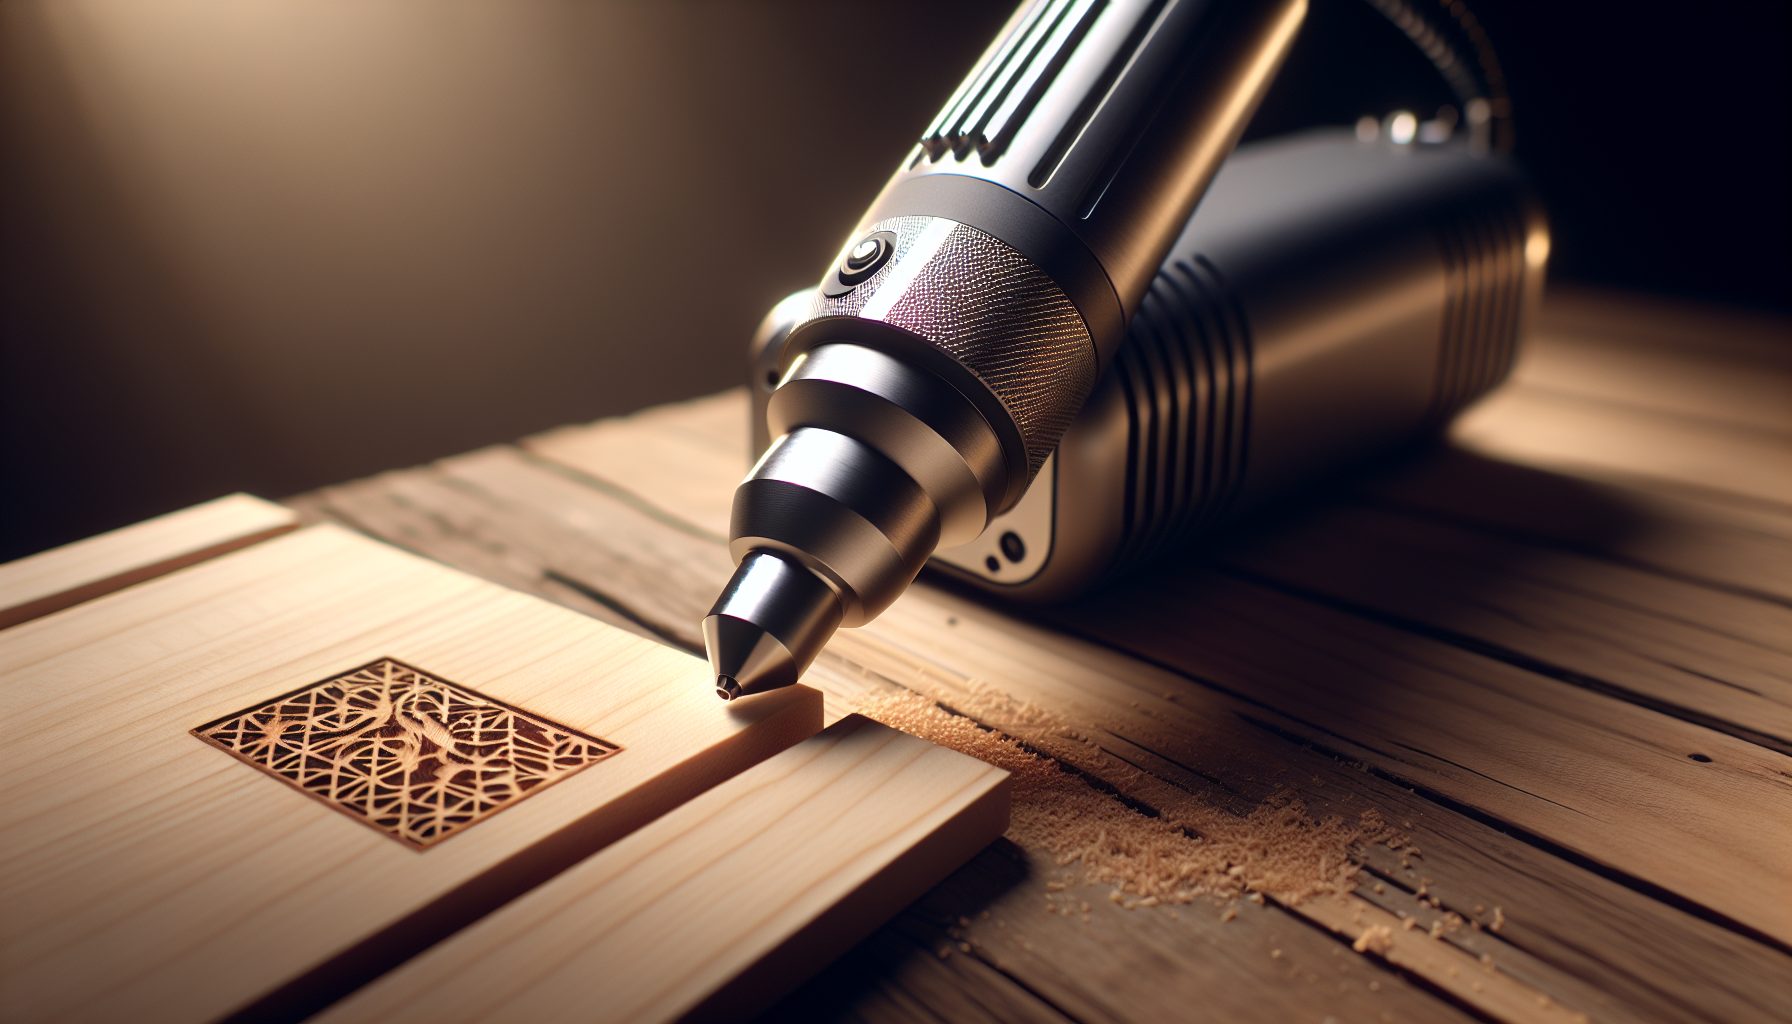
Performance: What the 3W Laser Actually Does
A 3W diode laser isn’t about brute-force cutting of thick hardwoods; it’s about tidy, precise engraving and cutting thin materials when you don’t mind multiple passes. That’s perfect for custom gifts, prototypes, and personal branding. With a steady machine and a careful approach, we got crisp engravings on wood, leather, cardstock, and coated metals.
We love the level of control: we can tune speed, power, and passes to achieve different looks—dark burns on birch plywood, clean marks on leather, delicate etching on coated metal business cards. The 0.01 mm precision translates into fine lines and text that don’t look like they were drawn by a caffeinated squirrel.
Materials: What Worked, What Needed Finesse
We tested popular materials we actually use. Results vary by grain, finish, and humidity, but the T1 handled itself well.
Wood
Engraving wood is the T1’s home turf. Plywood and hardwoods engrave cleanly; softwoods show higher contrast with less power. Resin-rich woods may need faster speeds to avoid excessive charring. Cutting thin sheets (think 1–2 mm basswood or balsa) is realistic with multiple passes.
Acrylic
Opaque and matte acrylic engraves nicely; transparent acrylic is trickier for diode wavelengths but can still yield visible surface marks if you use paint or masking techniques. Cutting very thin black acrylic is possible in multiple passes, though we reserve acrylic cutting for small shapes rather than elaborate sculptures.
Leather
Vegetable-tanned leather engraves beautifully. We keep the power conservative to avoid harsh burnt edges and the fragrance of a campfire jacket. Faux leather varies, and we test on a hidden corner first.
Coated Metal
The T1 marks coated, anodized, or painted metal surfaces well—great for keychains, tags, and business cards. Bare metal generally requires different wavelengths or marking sprays, so we keep it to coated items for reliable results.
Paper and Cardstock
Paper is a joy to engrave—clean, precise, and very forgiving. We keep power low and speed high to prevent cut-through unless that’s the goal. Cardstock makes excellent greeting cards and packaging prototypes.

Suggested Starting Settings (And Our Don’t-Panic Policy)
Every material and finish is a personality test. We always run a small test grid to find the sweet spot. Here are general starting points we’ve used as a baseline for a 3W diode laser like the T1. Your results may vary; adjust gradually and document your winners.
| Material | Task | Starting Power | Starting Speed | Passes | Notes |
|---|---|---|---|---|---|
| Birch Plywood (3 mm) | Engrave text/logo | 60–80% | 1200–2000 mm/min | 1 | Increase speed to reduce char; mask with painter’s tape for crisp edges. |
| Basswood (1–2 mm) | Cut simple shapes | 90–100% | 100–300 mm/min | 3–8 | Multiple passes; clamp material flat to avoid warping. |
| Leather (veg-tan, 1–2 mm) | Engrave | 30–60% | 1200–2000 mm/min | 1 | Ventilation helps; test first to avoid overburn. |
| Opaque Acrylic (black) | Engrave | 70–100% | 800–1200 mm/min | 1–2 | Transparent acrylic needs masking or paint for contrast. |
| Coated/Anodized Aluminum | Mark logo/text | 80–100% | 800–1500 mm/min | 1–2 | Produces high-contrast marking on coatings; not for bare metal. |
| Cardstock | Engrave | 10–30% | 1500–2500 mm/min | 1 | Very low power prevents cut-through. |
| Cardstock | Cut | 40–60% | 600–1200 mm/min | 1–2 | Use a sacrificial mat to protect the desk. |
We go light on the first pass and then lean in if needed. It’s an antidote to disappointment and singed edges.
Precision, Line Quality, and Real-World Detail
The claimed 0.01 mm precision shows up as confidence in tiny text, tight corners, and delicate shading. We etched 6–8 pt font on wood and it remained legible—a small victory, but we celebrated anyway. Lines stay consistent across the 200 x 150 mm area, assuming the machine is on a solid surface and the material is flat.
For image engravings, dithering techniques like Stucki and Floyd–Steinberg give pleasing results at appropriate resolution. We’ve had success at 254–318 DPI equivalents, with higher DPIs sometimes producing muddy burns depending on the wood’s character. The T1 lets us experiment without spending hours on setup.
Everyday Use: Noise, Smell, and Domestic Tranquility
We won’t pretend there’s no odor. Wood smells like a campfire, leather smells like a campfire with a leather jacket, and acrylic smells chemical. But the T1 itself is quiet—mostly stepper motor hum and the tiny fan in the laser module. Ventilation matters; a window and a small fan make a big difference. If we’re working at night, we tape an air filter near the work area and keep the peace.
Portability: Home, Classroom, Studio, Outdoors
We folded the T1, tucked it under an arm, and moved it between a kitchen table and a classroom with more ease than we expected. It’s not featherweight, but it’s manageable. For outdoor projects, we used a stable table, an extension cord, and common sense about wind and dust. We also brought a small box to corral parts—there’s nothing like chasing a plywood coaster across a patio mid-engrave to humble a person.
Real Projects We Loved Making
We promised ourselves we wouldn’t engrave everything in the house. We did not keep that promise. Here’s what turned out best:
- Personalized coasters in birch plywood with family names and questionable slogans.
- Leather key fobs with inspirational words that sound more convincing when embossed in cowhide.
- Anodized aluminum tags for toolboxes and plant markers (our herbs now have branding).
- Cardstock greeting cards with cutout patterns that made us look like we planned ahead for someone’s birthday.
- A small acrylic sign for the entryway (opaque acrylic for crisp contrast).
The T1 handled all of these without drama, and our favorite projects were the ones we finished on a weeknight without rearranging furniture.
Accuracy in Practice: Repeatability and Alignment
We tested repeatability by engraving a grid, re-zeroing, and running it again. The alignment held. That matters for projects requiring multiple passes or part flips. Using jigs or tape borders, we got consistent placements and batch runs that didn’t drift into the “why is this one crooked?” zone.
We also used framing functions in our software to preview the bounding box. It’s not just convenience; it saves materials and helps us keep designs centered even when the materials aren’t perfectly rectangular.
Table: Key Specs That Matter Day-to-Day
We keep this cheat sheet close because it answers the “can it do this?” question quickly.
| Feature | What We Know | Why It Matters |
|---|---|---|
| Laser Power | 3000 mW (3W) | Good for detailed engraving; cuts thin materials with multiple passes. |
| Working Area | 200 x 150 mm | Great for small projects, signs, tags, coasters, and batch jobs. |
| Precision | 0.01 mm (manufacturer-stated) | Fine detail, small text, crisp graphics. |
| Design | Foldable, portable | Easy to store and carry; sets up quickly. |
| Safety | Built-in protective cover + goggles included | Lower glare and safer operation; still wear goggles. |
| Materials | Wood, leather, acrylic, coated metals, paper, fabric | Versatility for common DIY projects. |
| Setup | Pre-assembled, calibrated | We were engraving within minutes. |
| Connectivity | USB | Stable wired connection with typical desktop software. |
| Starter Pack | Plywood, paper included | Test and first projects right away. |
Strengths and Trade-Offs: The Honest Bits
We appreciate tools that do what they say without hiding the asterisks. The T1 delivers convenience and capability, with reasonable expectations around what a 3W diode laser can handle.
What We Loved
- Truly portable and folds away when not in use.
- Ready out of the box—no belt tensioning or calibration puzzles.
- Clean engraving on wood, leather, and coated metals.
- Good precision for text and fine graphics.
- Safety goggles included, plus a protective laser module cover.
- Starter materials provided so we get to “fun” faster.
Where We Adjusted Expectations
- Cutting thick wood is not the mission here—thin sheets only, with multiple passes.
- Transparent acrylic engraving requires masking or workarounds for contrast.
- Ventilation is still required; a fan or open window is essential.
- The working area is intentionally compact; larger projects need tiling or different hardware.
None of these are dealbreakers; they’re simply the physics of small diode lasers.
Classroom and Group Use: Our Advice for Smooth Sessions
Teachers and workshop leaders, we see you. The T1’s portability and quick setup make it a great classroom tool with a few ground rules:
- Supervision is continuous. No “we’ll just pop out for a minute.”
- Goggles for everyone within line-of-sight.
- Use materials with predictable behavior (birch plywood, cardstock) for demos.
- Prepare a test grid per material and make it part of the lesson.
- Ventilation first, then enthusiasm.
- Consider using pre-cut blanks to keep sessions focused on design and settings.
We’ve found that once people watch their first engraved monogram appear, they ask better questions and treat the tool with more respect.
Maintenance: The Small Routine That Prevents Big Problems
We like machines that reward a little care with a lot of reliability. The T1 asks for simple habits:
- Wipe the laser window gently with lens-safe wipes if you see residue.
- Keep rails and moving parts dust-free with a soft brush or air.
- Check for snug connections if you move it frequently.
- Keep a log of settings that worked well; future you will be grateful.
Most issues we’ve had with lasers in general come from neglected cleaning and wobbly work surfaces. We choose prevention over troubleshooting whenever possible.

Troubleshooting: The Greatest Hits and Easiest Fixes
- Engrave looks faint: Increase power slightly, reduce speed, or refocus. Some woods need more energy than others.
- Char or soot buildup: Increase speed, reduce power, or use masking tape. Wipe gently after engraving.
- Lines look fuzzy: Check focus height and make sure the material is flat and clamped.
- Misalignment between passes: Confirm the machine is on a solid surface; avoid bumping the work area middesign.
- Software won’t connect: Re-seat the USB cable, check drivers, and make sure only one program is talking to the machine.
When in doubt, re-run a small test square. It tells the truth faster than a forum thread.
Project Planning: From Sketch to Finished Piece
We plan by working backward from the final object. If we’re making a set of six coasters, we design a jig that holds six disk blanks, test one engraving, then run the set with the same settings. For leather, we reduce power and increase speed to keep edges neat. For coated metal, we favor clean vector art with high contrast.
We also think in layers: cut lines separate from engrave lines, each with its own settings. We label each layer clearly (“Cut at 100%, 5 passes” versus “Engrave at 60%, 1 pass”) so we don’t accidentally slice where we meant to sketch.
Tips to Get the Best Results
- Mask with painter’s tape to limit soot on wood. Peel slowly for clean edges.
- Do a small power/speed test grid on a scrap of the same material before big jobs.
- Use lightweight clamps or magnets to keep materials flat without intruding.
- Frame the job area in software to make sure it’s aligned where you expect.
- Keep notes: material type, finish, humidity if you’re fancy, and settings. Build your own library.
These tricks aren’t glamorous, but they make our finished pieces look like we knew what we were doing from the start.
Using the T1 for Small Business and Gifts
We’ve done runs of keychains, nameplates, and coasters on compact machines, and the T1 is well-suited for that. The key is consistency—uniform blanks, jigs, saved presets, and a dedicated workflow. If you’re selling items, sample different woods and finishes to give clients a clear choice. And keep turnaround realistic; multiple-pass cutting takes time.
For gifts, the T1 shines. A monogram on a leather wallet, a QR code for a wedding playlist on acrylic, a wooden bookmark engraved with a favorite quote—these hits don’t require a factory, just good taste and a few minutes of practice.
Ventilation and Smell: The Straight Talk
We like honest air. Wood and leather smell smoky; acrylic can smell sharp. Even with the T1’s small footprint, we never operate it without moving air out of our noses’ jurisdiction. If you’re in an apartment, a simple window fan pulling air out of the room helps. Activated carbon filters can reduce lingering smells. And we store our materials in sealed bins to keep the place tidy and less aromatic.
What Sets the T1 Apart in Daily Life
The foldable design is the real differentiator. It’s not only easier to store; it quietly changes our habit patterns. We bring it out more often. We make more small things. We say “sure” more freely when someone asks for a quick personalized gift. We’re more likely to test and tinker because we don’t have to move heaven and earth (and two tables) to do it.
Limitations to Know Before You Buy
We’d rather set clear expectations than nurse secret disappointment.
- It’s not for thick cutting. If you want 6 mm hardwood cutting in one pass, this isn’t your tool.
- Transparent acrylic is finicky without masking or paint tricks.
- You will need ventilation. There’s no workaround for physics.
- The 200 x 150 mm area is meant for small to medium projects. Large signs require tiling or a different machine.
If those boundaries make sense for your projects, the T1 is very satisfying.
Safety Reminders We Keep in Our Pocket
- Never look directly into the laser; always wear the included goggles.
- Never leave the machine unattended when it’s running.
- Keep flammables away from the work area.
- Keep a fire extinguisher handy. A spray bottle is good; a proper extinguisher is better.
- Use a stable, non-reflective surface. Shiny metal can reflect laser light unpredictably.
If you print anything from this review, let it be that list.
A Few Favorite Settings Libraries to Build
We made simple 50 x 50 mm “test tickets” with grids of speed and power settings and etched them onto the materials we use most—birch, basswood, leather, and coated aluminum. We wrote the winning combo directly on the test ticket with a pen and taped it to the material bin. It’s not glamorous, but it’s faster than hunting through old project files like a raccoon looking for leftovers.
Our Batch Workflow for Small Sales
- Design once, use many: Logos as vectors, sizes saved for common blanks.
- Create a jig: Cut a tray from thin plywood with recesses for blanks.
- Calibrate once: Save the job origin, then don’t move the jig or the software canvas.
- Run a test on one blank before committing daylight and sanity to a dozen.
- Clean and package right after engraving to avoid smudges and scratches.
With this setup, the T1 hums along like a tiny factory that fits on a desk and doesn’t raise our electricity bill.
When We Reach for the T1 vs. Other Tools
- T1 for precise engraving on small goods, flat materials, and quick personalization.
- Scroll saw or craft cutter for large shapes or vinyl decals.
- CO2 laser (if available) for thick acrylic cuts or large batches requiring speed.
For most home and classroom needs, the T1 covers 80% of what we want to make at a fraction of the footprint and fuss.
Value: What We’re Paying For (Besides Happiness)
We’re paying for time saved on setup, space saved in storage, and confidence gained as beginners get real results on day one. The T1’s all-in-one kit matters—we didn’t buy add-ons before our first project was plausible. And the included safety goggles are a grace note that says, “We want your eyes intact.”
We couldn’t put a value on the fun of putting our name on everything, but it’s substantial.
Frequently Asked Questions We Wish We’d Asked Sooner
Can it cut hardwood?
Thin sheets, yes, with multiple passes. Dense wood fights back. We stick to engraving on hardwoods and cutting thin, laser-friendly sheets.
Does it engrave bare metal?
Not reliably. It marks coated or anodized metals well. Bare metal typically needs different wavelengths or marking compounds.
Is it safe for kids?
Under adult supervision, yes. Goggles on, hands off the moving parts, ventilation in place, and an adult next to the machine at all times.
Do we need special software?
Use a compatible laser control program that supports your operating system and the machine’s communication method. Check the manual; we used common options that offer power and speed control and vector/raster support.
What about maintenance?
Keep optics clean, dust off rails, and store it folded when not in use. That’s 95% of it.
Is Wi-Fi required?
No. USB is included and reliable. If wireless control is on your wish list, check the manufacturer’s guidance or consider third-party solutions, but we’re content with a cable.
Final Polishing: How We Clean Up Finished Pieces
Wood often benefits from a light sanding with fine-grit paper and a wipe with a microfiber cloth. We remove any masking tape slowly and at an angle to preserve crisp edges. Leather gets a gentle brush and, if desired, a conditioner. Acrylic usually just needs a careful wipe. If we’re sealing wood, we use a clear finish and test on a scrap first to make sure it doesn’t darken the engraving in undesirable ways.
The Verdict: What We Tell Friends Who Ask
We tell them this: The T1 Laser Engraver, 3000mW Foldable Laser Engraver Machine Higher Accuracy Wood Cutter and Portable Engraving Machine with Working Area 200x150mm, DIY for Wood Acrylic Coated Metal is the easiest way we’ve found to get into laser engraving without redesigning our living space or our personality. It folds. It’s friendly. It engraves the things we actually want to engrave. It cuts thin materials when we’re patient, and it lets us focus on our creative choices instead of our tool’s idiosyncrasies.
If your goals are customized gifts, small business runs, prototypes, classroom demos, and personal projects that involve wood, leather, acrylic, coated metals, and paper, the T1 is a delightfully competent companion. If you need to cut thick hardwood or crank out large signage, you’ll want a different class of machine. For the rest of us—the folks with a kitchen table and a head full of ideas—it’s exactly what we hoped for: a portable studio that takes us from “we should make something” to “we made this” in an evening.
Bottom Line: Why We’re Keeping It Within Arm’s Reach
- We can store it anywhere, use it anywhere, and set it up instantly.
- The included safety gear and starter materials mean we start right away.
- The precision and control satisfy our inner perfectionist.
- It’s versatile enough for our favorite projects and forgiving enough for our mistakes.
- We get to say “yes” to more creative impulses without clearing a weekend.
That, to us, is a winning combination: friendly, capable, and ready when we are.
Disclosure: As an Amazon Associate, I earn from qualifying purchases.