?Have you ever stood in front of a tiny project—an heirloom spoon, a wedding favor, a wooden business card—and wondered whether a portable laser or a small CNC machine would treat it more kindly?

Portable Laser Engraving Vs CNC Engraving For Small Jobs
This article compares portable laser engraving and CNC engraving for small jobs in a way that’s practical, slightly opinionated, and not afraid to tell you that choosing a machine is like choosing a dog: both will demand attention and occasional medical bills. You’ll get technical comparisons, step-by-step workflows, cost scenarios, safety checklists, and the kind of little advice you only get when someone has tried to engrave a zucchini at midnight.
What Are Portable Laser Engravers?
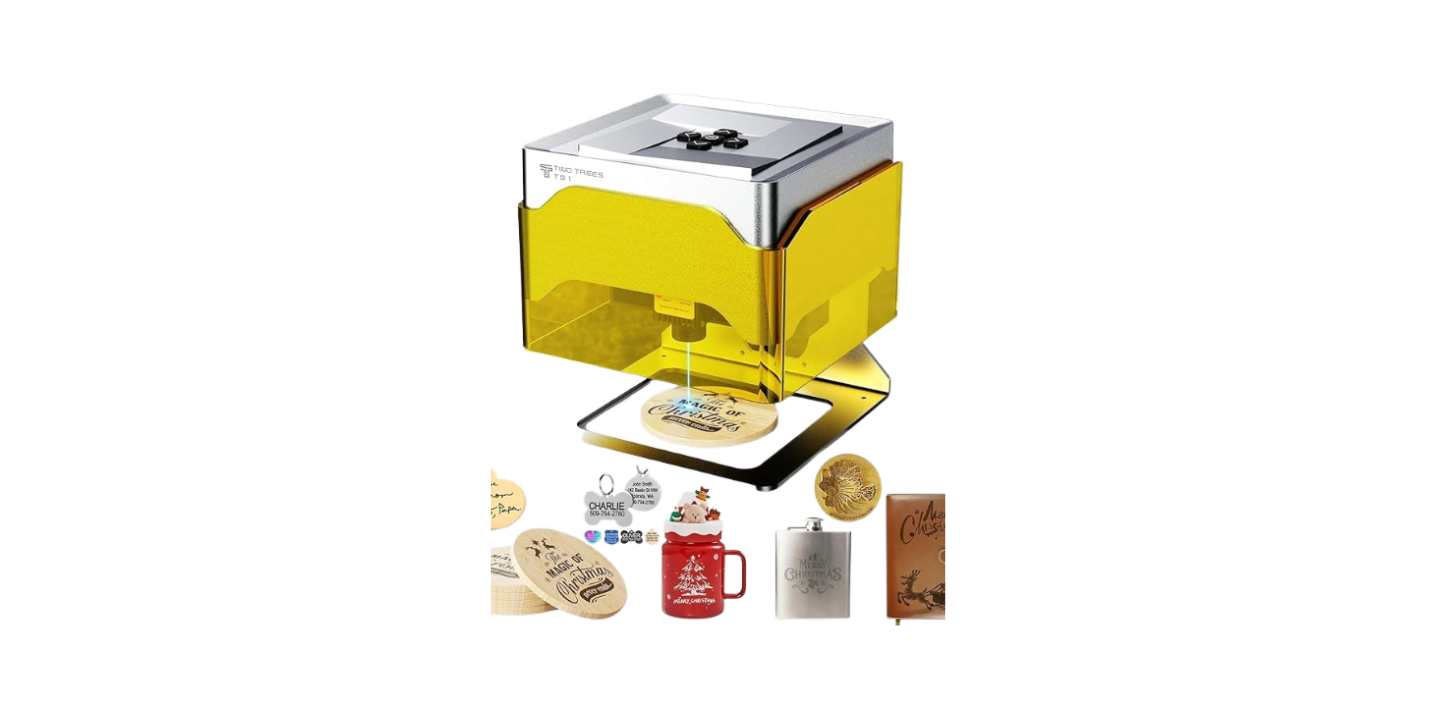
Portable laser engravers are compact devices that use focused light to remove material or change surface color. You often find them in handheld formats or small benchtop units, and they’re designed to be taken to the object or to move across the workpiece with minimal setup.
You’ll see portable lasers marketed for on-site marking, personalization, repair shops, makers, and people who like gadgets they can carry in a tote bag. They work best on surfaces where precise, repeatable burns, ablations, or color changes matter more than deep cuts.
How Portable Laser Engravers Work
Portable lasers use a concentrated beam of light—commonly diode, fiber, or CO2—to vaporize, char, or chemically alter the surface of a material. You control power, speed, and sometimes pulsing patterns to get the desired effect.
Components you’ll handle include the laser head, a focusing lens, control electronics, and a motion aid or guide if the unit isn’t entirely handheld. Software typically prepares vector or raster files and sends commands via USB or Wi-Fi.
Materials You Can Engrave with a Portable Laser
Different lasers behave differently with materials. This table outlines common results and helpful notes.
| Material | Typical Result | Notes |
|---|---|---|
| Wood (various) | Darkened engraving, good contrast | CO2 and diode lasers work well; plywood may char unevenly |
| Acrylic | Clear or frosted engraving | CO2 excels; edge finishes vary |
| Anodized aluminum | Clean color removal with fiber lasers | Requires fiber or specialized laser for best results |
| Stainless steel | Marking, not deep engraving | Fiber lasers or laser marking additives needed |
| Leather | Darkened engraving, crisp lines | Watch for scorching and odors |
| Glass | Frosted engraving (etching) | CO2 works; masking helps to reduce chips |
| Stone, ceramic | Light etching possible | CO2 ok for surface etching; depth limited |
| Plastics (some) | Melting or vaporization | Check for toxic fumes (PVC is hazardous) |
| Paper, cardboard | Crisp cuts or engraving | Use low power to avoid burning through |
Advantages of Portable Laser Engravers
You’ll appreciate their portability, minimal fixturing, and ability to personalize objects without moving them to a shop. They are often quieter than routers and can operate without the physical contact that could distort delicate items.
- Fast setup and quick proofs
- High detail on surface designs (fine text, photos)
- Minimal mechanical stress on the workpiece
- Low tool wear—no dull bits to replace
Limitations of Portable Laser Engravers
You’ll run into limits when you need depth, certain materials, or large-scale production speed. Lasers can also require good ventilation and may produce unpleasant fumes or soot.
- Limited ability to remove deep material
- Requires ventilation or fume extraction
- Not suitable for reflective metals unless you have a fiber laser
- Surface finish may require post-processing for some applications
What Are CNC Engravers?
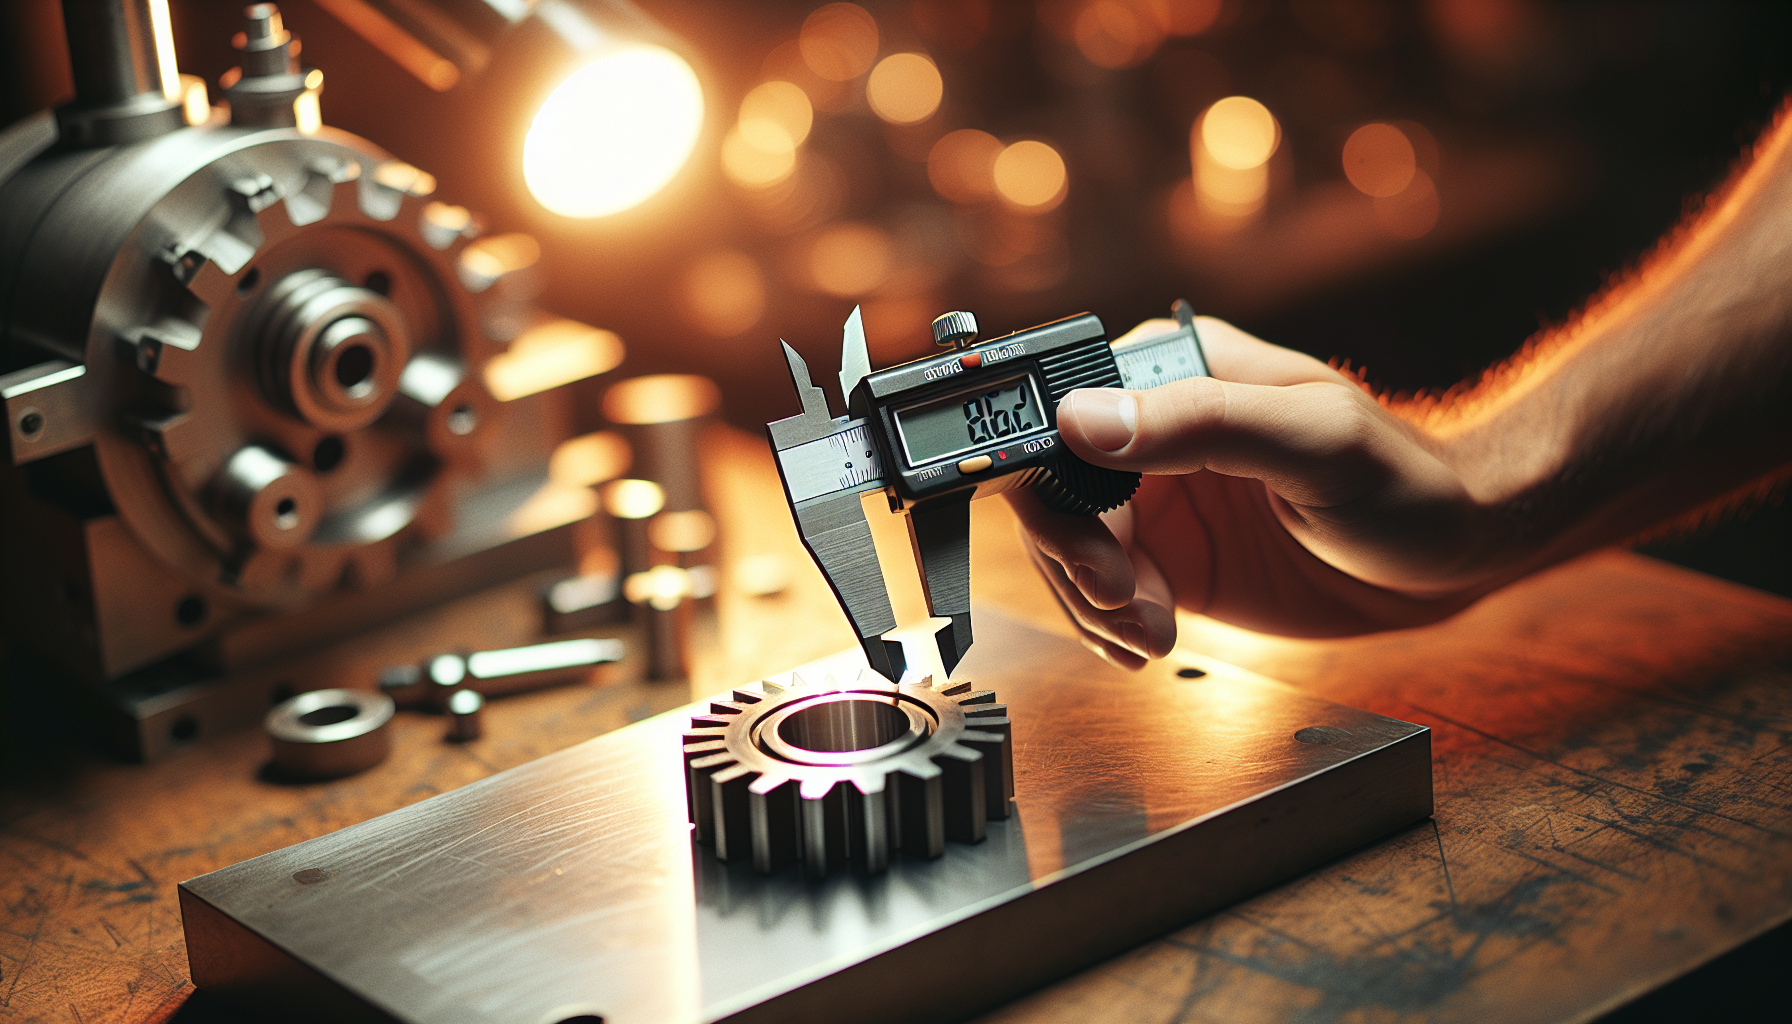
CNC engraving involves a rotating cutting tool that physically removes material. Small CNC machines—desktop routers, mini mills, and 3-axis engravers—are common for small jobs and are preferred when depth, tactile relief, and mechanical tolerances matter.
You’ll encounter CNC machines in maker spaces, small shops, and businesses that need to produce durable, repeatable parts or carved aesthetics that a laser can’t match.
How CNC Engraving Works
CNC machines follow toolpaths generated from vector files or CAM programs. A spindle or router carries a cutting bit that squeezes through material at controlled speeds and depths, producing grooves, channels, and reliefs.
Key components you’ll interact with include the spindle, collet and bits, CNC controller, motors, and an endstop or homing system. You’ll clamp or fixture the workpiece so the cutter can do its job without moving the substrate.
Materials for CNC Engraving
CNC machines are versatile for materials where you can physically remove chips. This table gives you a short guide.
| Material | Typical Result | Notes |
|---|---|---|
| Wood | Deep relief, 3D carving | Router bits leave tool marks—sanding needed |
| Aluminum | Functional engraving, shallow pockets | Requires rigid setup and appropriate cutters |
| Brass, copper | Shallow engraving possible | Slower feed rates and good coolant recommended |
| Plastics (acrylic, HDPE) | Clean cuts; deeper pockets | Watch for melting with slow chips evacuation |
| MDF, HDF | Smooth surface, cheap prototype material | Generates fine dust—use a dust shoe |
| Stone (soft) | Shallow engraving with special bits | Slow and abrasive on tooling |
| Foam, wax | Rapid prototyping, 3D models | Easy to cut; excellent for patterns |
Advantages of CNC Engraving
You’ll find CNC machines excel when you need mechanical precision, depth, and durable engravings. They’re your go-to for parts that must hold tolerances or for designs that must be felt as well as seen.
- Ability to cut and carve deep, three-dimensional shapes
- Works on a wide range of non-reflective metals and plastics
- Predictable material removal and repeatable tolerances
- Easier to get functional parts (joints, mating surfaces)
Limitations of CNC Engraving
CNC engraving requires more setup, clamping, and raw space. It’s typically louder and produces dust or chips that must be managed.
- More time-consuming setup and fixturing
- Tool wear—bits need replacing
- Generates chips and dust; requires cleanup and extraction
- Less suited for ultra-fine surface contrast (unless specialized tooling is used)
Key Factors to Consider for Small Jobs
You’ll want to weigh a few crucial factors when choosing between a portable laser and a CNC for small jobs. A smart choice starts by matching the machine’s strengths to the nature of your projects.
Each factor below matters differently depending on whether your goal is visual personalization, functional parts, or a mixture of both.
Portability and Setup Time
If you go to craft fairs, visit a client, or work in multiple spaces, portability matters. Portable lasers typically require less setup—you can mark a finished object on-site without fixtures; CNC machines usually need a stable bench and a clamped part.
You’ll save time with a portable laser for on-site personalization; you’ll not save time if your job needs depth, where a CNC’s clamped setup is unavoidable.
Precision and Detail
Lasers offer fantastic 2D detail and photo-quality raster engraving. CNC machines give you predictable dimensional precision in 3D.
You’ll choose a laser for fine surface text and images. You’ll choose CNC when tolerances, embossed/debossed textures, or mating parts are the priority.
Material Compatibility and Finish
Each machine loves different materials. Lasers are great for organic, coated, or combustive surfaces; CNCs are the choice when you need to remove material cleanly and create 3D forms.
You’ll check material safety—certain plastics release hazardous gases with lasers, while metal milling requires proper tooling and, often, coolant.
Speed and Throughput
For small, shallow marks on many items, lasers can be faster because they don’t require clamping. CNCs are often slower for shallow marks but win when you need multiple deep passes.
You’ll time your workflow: if you’re doing dozens of shallow engravings per day, a laser might be more productive; if you’re making a few parts with pockets and joints, a CNC is more efficient.
Cost: Initial and Per-Job
Budget is personal. A small portable diode laser can be affordable, while a good fiber laser or a high-quality CNC will cost more upfront. But don’t forget consumables and maintenance.
You’ll factor in costs like power, replacement bits or lenses, fume extraction, and software. A small comparison table helps here.
| Cost Item | Portable Laser (entry-level) | Small CNC (entry-level) |
|---|---|---|
| Typical purchase price | $200–$2,500 | $900–$6,000 |
| Consumables | Minimal (lenses, occasional controller parts) | Bits, collets, spindle maintenance |
| Required additional gear | Ventilation, masks | Clamps, dust collection, coolant for metals |
| Running costs | Low | Moderate to high depending on tooling and shop setup |
| Skill/training needed | Low to moderate | Moderate to high |
Noise, Dust, and Safety Concerns
Lasers create fumes and potentially toxic vapors; CNCs kick up dust and chips that require physical protection. You’ll consider where you’re working and what you can accommodate.
You’ll prepare appropriate PPE: respirators for laser fumes, dust masks and shields for CNC chips, and eye protection for both. Ventilation or extraction is non-negotiable.
Side-by-Side Technical Comparison
This table offers a concise head-to-head comparison so you can quickly see which machine answers which question.
| Feature | Portable Laser | Small CNC Engraver |
|---|---|---|
| Portability | High | Low to moderate |
| Setup time per job | Short | Moderate to long |
| Surface detail | Excellent (2D) | Good (depends on bit size) |
| Depth capability | Limited | Excellent (multi-pass depth) |
| Materials (metals) | Limited (fiber only) | Good with proper tooling |
| Material removal | Vaporization/chemical | Mechanical chip removal |
| Ventilation needs | High (fumes) | High (dust/chips) |
| Noise level | Low to moderate | Moderate to high |
| Consumable costs | Low | Moderate |
| Learning curve | Low to moderate | Moderate to high |
| Repeatability | High for surface marks | High for dimensional parts |
| Safety complexity | Laser-specific PPE, fume control | Mechanical PPE, dust control |

Typical Use Cases and Project Ideas
You’ll want concrete examples so you can imagine yourself making things instead of reading another FAQ. Below are ideas that match each technology’s sweet spot.
Ideal Small Jobs for Portable Laser Engraving
You’ll find lasers delightful when you need to personalize objects quickly and attractively.
- Engraving names or logos on finished wooden or acrylic items
- Marking metal tools or jewelry with light markings (if you have the right laser)
- Personalizing leather wallets or bookmarks
- Etching glassware for events
- Touch-up marking on-site for repair or calibration
Ideal Small Jobs for CNC Engraving
If your job needs substance as well as style, the CNC will likely be the better partner.
- Creating shallow molds, prototypes, or stamps
- Engraving metal or wood parts where depth matters
- Making inlay pockets, dovetails, or functional fixtures
- Carving detailed reliefs in wood for plaques or signs
- Producing custom buttons, knobs, or jigs
Workflow and Best Practices for Small Jobs
Whether you pick a laser or a CNC, a repeatable workflow saves time and reduces mistakes. You’ll benefit from scripting your process and making checklists.
Below are tailored step-by-step workflows to help you make a good job out of a small job.
Setting Up a Portable Laser for a Small Job
You’ll want to control variables so every piece comes out as expected.
- Prepare the file: vector for cuts, raster for images; check resolution and contrast.
- Clean the work surface: remove oils or residues that affect the mark.
- Secure the item if needed: magnets, double-sided tape, or a jig.
- Set focus and test power/speed on a scrap: start low and increase.
- Run the job and monitor for fumes or unexpected behavior.
- Post-process: wipe away soot, sand or seal as needed.
You’ll always keep a small scrap for tests; treat it like a safety blanket.
Setting Up a CNC for a Small Job
CNC setup is more deliberate but also more forgiving in some ways because you can touch the workpiece.
- Prepare the CNC CAM: select bit, feeds, speeds, and passes.
- Choose and secure the proper tooling: check collet tightness.
- Clamp the workpiece; zero the axes precisely.
- Run a dry run (no spindle) to verify toolpath.
- Turn on the spindle and run the job while watching for chatter or tool issues.
- Deburr, sand, or finish the engraved area.
You’ll be obsessive about fixturing because it’s what keeps the machine from pinching your creation into an unfortunate shape.
File Preparation and Software Tips
You’ll save time learning how to clean files and organize layers. Vector paths should be ordered logically; raster images need proper contrast and DPI.
- Use vector formats (SVG, DXF) for outlines and cuts.
- Use high-contrast bitmaps (300+ DPI) for photo engravings.
- Keep a library of settings for materials you frequently use.
- Test small before committing to a batch.
You’ll also invest time learning one piece of software well—it’s the craftsman’s equivalent of knowing how to peel an orange without getting juice on your shirt.
Safety Checklist
Safety is the boring but vital part. You’ll be glad you read this when you avoid headaches, lung irritation, or worse.
- Wear appropriate eye protection: laser-rated goggles for lasers, safety goggles for CNC.
- Use a respirator for fumes and fine dust; N95 is a minimum for dust.
- Ventilate lasers: fume extractor or direct outside venting.
- Enclose or shield moving parts on CNC to prevent accidental contact.
- Keep a fire extinguisher nearby—lasers can ignite, and wood dust is shockingly flammable.
- Use appropriate gloves when changing bits, but not while operating machinery (risk of entanglement).
- Never leave a job unattended, especially with a laser running on organic materials.
You’ll also label materials that are unsafe for laser work (e.g., PVC) to avoid the dangerous illusion that everything plastic is fair game.
Maintenance and Longevity
You’ll keep machines running longer if you treat maintenance like a small ritual. Both laser and CNC machines reward regular attention.
For portable lasers:
- Clean lenses and mirrors weekly or per manufacturer guidelines.
- Check cooling fans and filters.
- Inspect cables and housing for wear.
For CNC engravers:
- Replace or sharpen bits as wear shows.
- Lubricate linear rails and bearings.
- Tighten belts and screws periodically.
- Clean chips and dust after each session.
You’ll log maintenance tasks so you can show the machine affection when it asks for it.
Cost Examples and ROI Scenarios
Numbers clarify decisions. These scenarios are simplified estimates but should help you think financially.
Scenario 1: Hobbyist personalization
- Portable diode laser ($400). Consumables: negligible. Extraction: DIY fan ($50). You’ll make occasional gifts and small sales; break-even is not the point—fun is.
- Small CNC ($1,200). You’ll need bits ($50), clamps ($30), dust collection ($200). Cost higher, but you can make furniture accents and parts.
Scenario 2: Small business side hustle (50 items/month)
- Portable CO2 laser (entry-level, $3,000). Fume extractor ($800). Consumables, maintenance $20/month. Faster throughput for wood/acrylic branding—payback within months if margins are decent.
- Small CNC ($4,500). Dust collection, tooling, and jigs ($1,000). Better for producing small batches of functional parts. Payback depends on parts complexity and pricing.
Scenario 3: Industrial-quality marking (metal tags)
- Fiber laser (portable head or bench) ($10,000+). Best for metal marking. Long-term ROI for heavy metal marking needs.
- CNC milling to mark metal may require additional tooling and longer processing times; more suitable if you need physical reliefs.
You’ll estimate pricing per unit by factoring machine lifespan, throughput, materials, labor time, and overhead. A spreadsheet is your friend here—sorry to be that person.
Decision Guide: Which Should You Choose?
You’ll make a practical choice by asking yourself these questions and following the guidance.
- Does the job require depth or functional features? If yes, choose CNC.
- Is portability and on-site work essential? If yes, choose a portable laser.
- Are you engraving photos or very fine text? If yes, choose laser.
- Will you work with metals extensively? If yes, consider a fiber laser or a CNC with proper tooling.
- Do you have tight space or noise restrictions? If yes, a portable laser may fit better.
- Is budget the main constraint? For entry-level personalization, a small diode laser is the cheapest path.
You’ll likely end up with both if you become the sort of person who collects tools the way some people collect small dogs. Each machine complements the other.
Practical Tips When Buying or Renting
Whether you’re buying used or renting for a weekend, you’ll want to check a few key things before committing your money.
- Test on your material: bring a sample and run a test.
- Ask about support and spare parts availability.
- Check software compatibility with your files.
- Evaluate airflow and extraction options for lasers.
- Look for community feedback and user groups—these will save you money and time.
- Consider warranty and return policies; machines are complicated and sometimes dramatic.
You’ll also factor in shipping and setup, which are easily forgotten but often the most expensive part.
Final Thoughts
Choosing between a portable laser and a CNC for small jobs is like choosing between two very different friends. One will charm you with immediacy and surface finesse, while the other will stick with you through structural labor and heavy lifting. You’ll pick based on what you make more of, where you work, and how much ritual you’re willing to commit to maintenance.
You’ll probably compulsively try to engrave the same thing on both machines just to see the difference, and that’s a perfectly reasonable form of education. Whether you favor the crisp kiss of a laser or the confident bite of a cutter, you’ll end up with projects that look like they were made with intention. Keep a notepad for settings, respect safety, and remember that machines are tools—not oracles. You’ll get better results by practicing, testing, and learning one material at a time.
If you want, share a brief description of the small jobs you expect to do and your budget, and you’ll get a tailored recommendation that won’t try to sell you a fiber laser when a diode will do.