Have we ever wanted to fit a tiny workshop onto a coffee table without losing the coffee?


Why We Reached for the CNCTOPBAOS CNC 3018-PRO
We’ve had our eye on desktop CNCs that promise hobby-grade fun without industrial-grade heartbreak. The CNCTOPBAOS CNC 3018-PRO Wood Router Kit 3 Axis USB DIY Mini Engraver Milling Engraving Machine Cutter Plastic Acrylic PCB PVC Carving GRBL Control 300x180x45mm is a mouthful in name and a handful in features. We expected a small machine with adequate precision, decent materials, and software that didn’t require a summoning circle. What we found was a tool that—when treated kindly—can be a reliable roommate with a few idiosyncrasies, like the roommate who alphabetizes spices and labels the milk.
What We Wanted in a Desktop CNC
We wanted a CNC router that fits these everyday wishes:
- Solid frame that doesn’t wobble like a folding chair at a picnic.
- Familiar, open-source control (GRBL) so we’re not trapped in software purgatory.
- Beginner-friendly assembly with room to grow into tougher projects.
- Compatibility with wood, plastics, and basic soft metals for tinkering and actual making.
The 3018-PRO ticked many boxes without ticking us off.
CNCTOPBAOS CNC 3018-PRO Wood Router Kit 3 Axis USB DIY Mini Engraver Milling Engraving Machine Cutter Plastic Acrylic PCB PVC Carving GRBL Control 300x180x45mm
Unboxing and First Impressions
Pulling the parts out of the box felt a bit like assembling a smart IKEA shelf, but for people who hoard End Mills. The machine greets us with resin side plates, aluminum alloy worktable, and stainless-steel screws—all neatly packaged and ready to become more than the sum of their bags.
The Build Sets Its Own Mood
- The resin frame pieces keep weight down and costs approachable. They’re stiffer than they look, though we wouldn’t lean on them during an argument.
- The aluminum alloy workbench looks the part: straight enough, tough enough, and a pleasant surface for clamps.
- Stainless steel screws always make us feel like we’re treating the machine right, as if leaving flowers by a gravestone reading “Here lies Rust.”
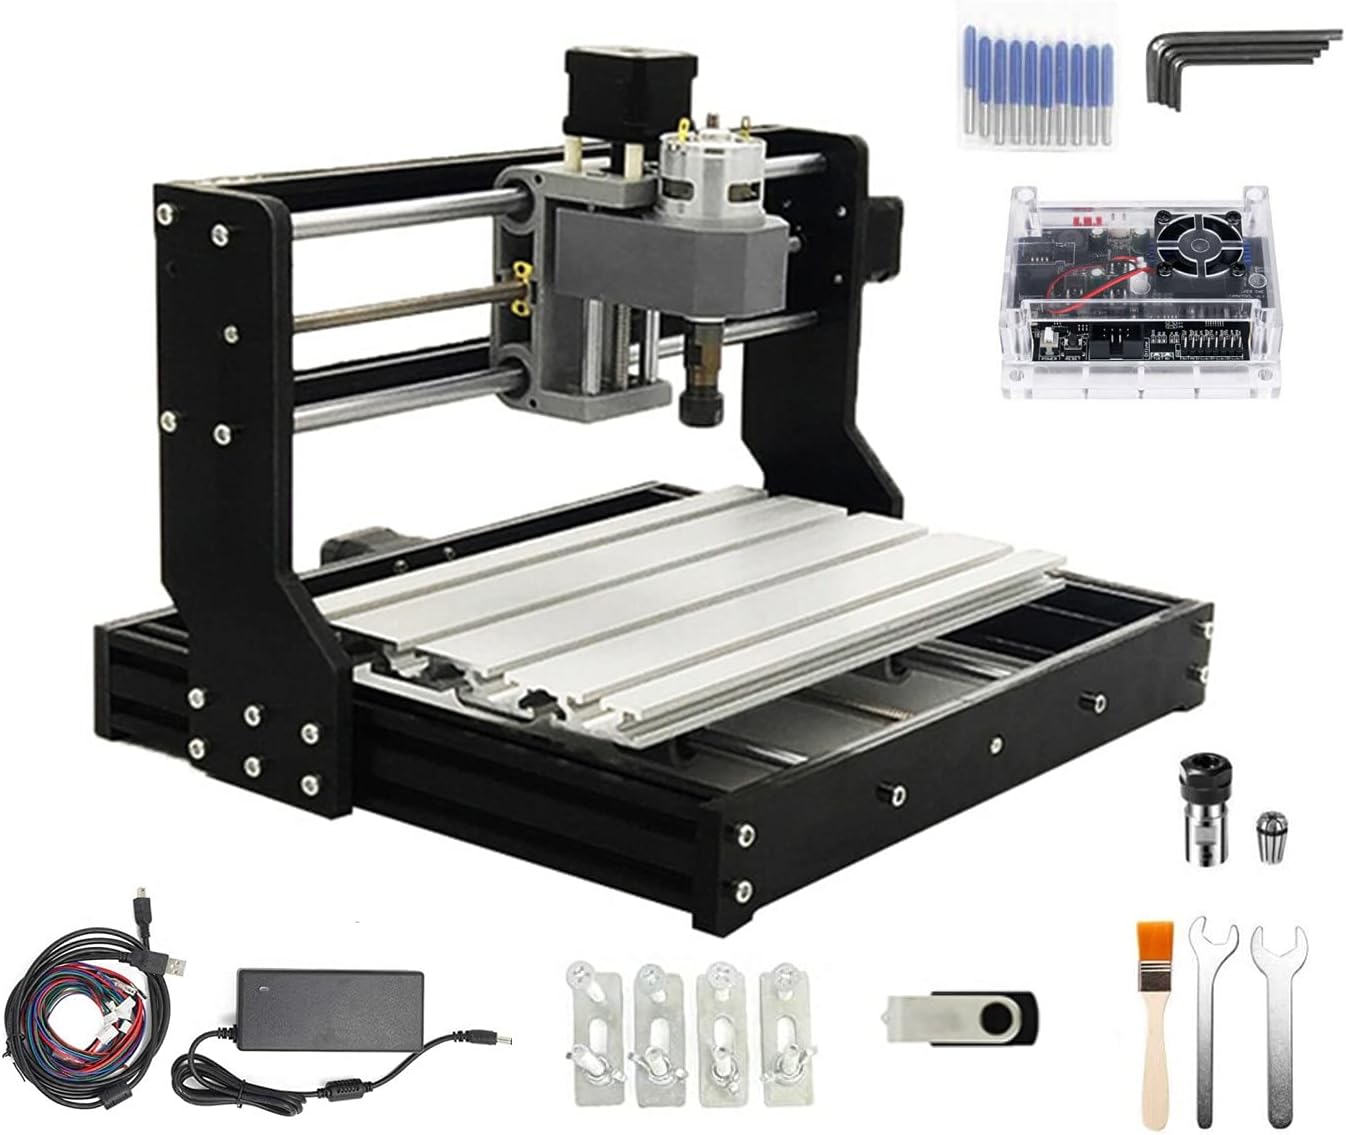
What’s in the Box
- Pre-cut resin frame sides
- Aluminum workbench (T-slot style)
- Lead screws and guide rails
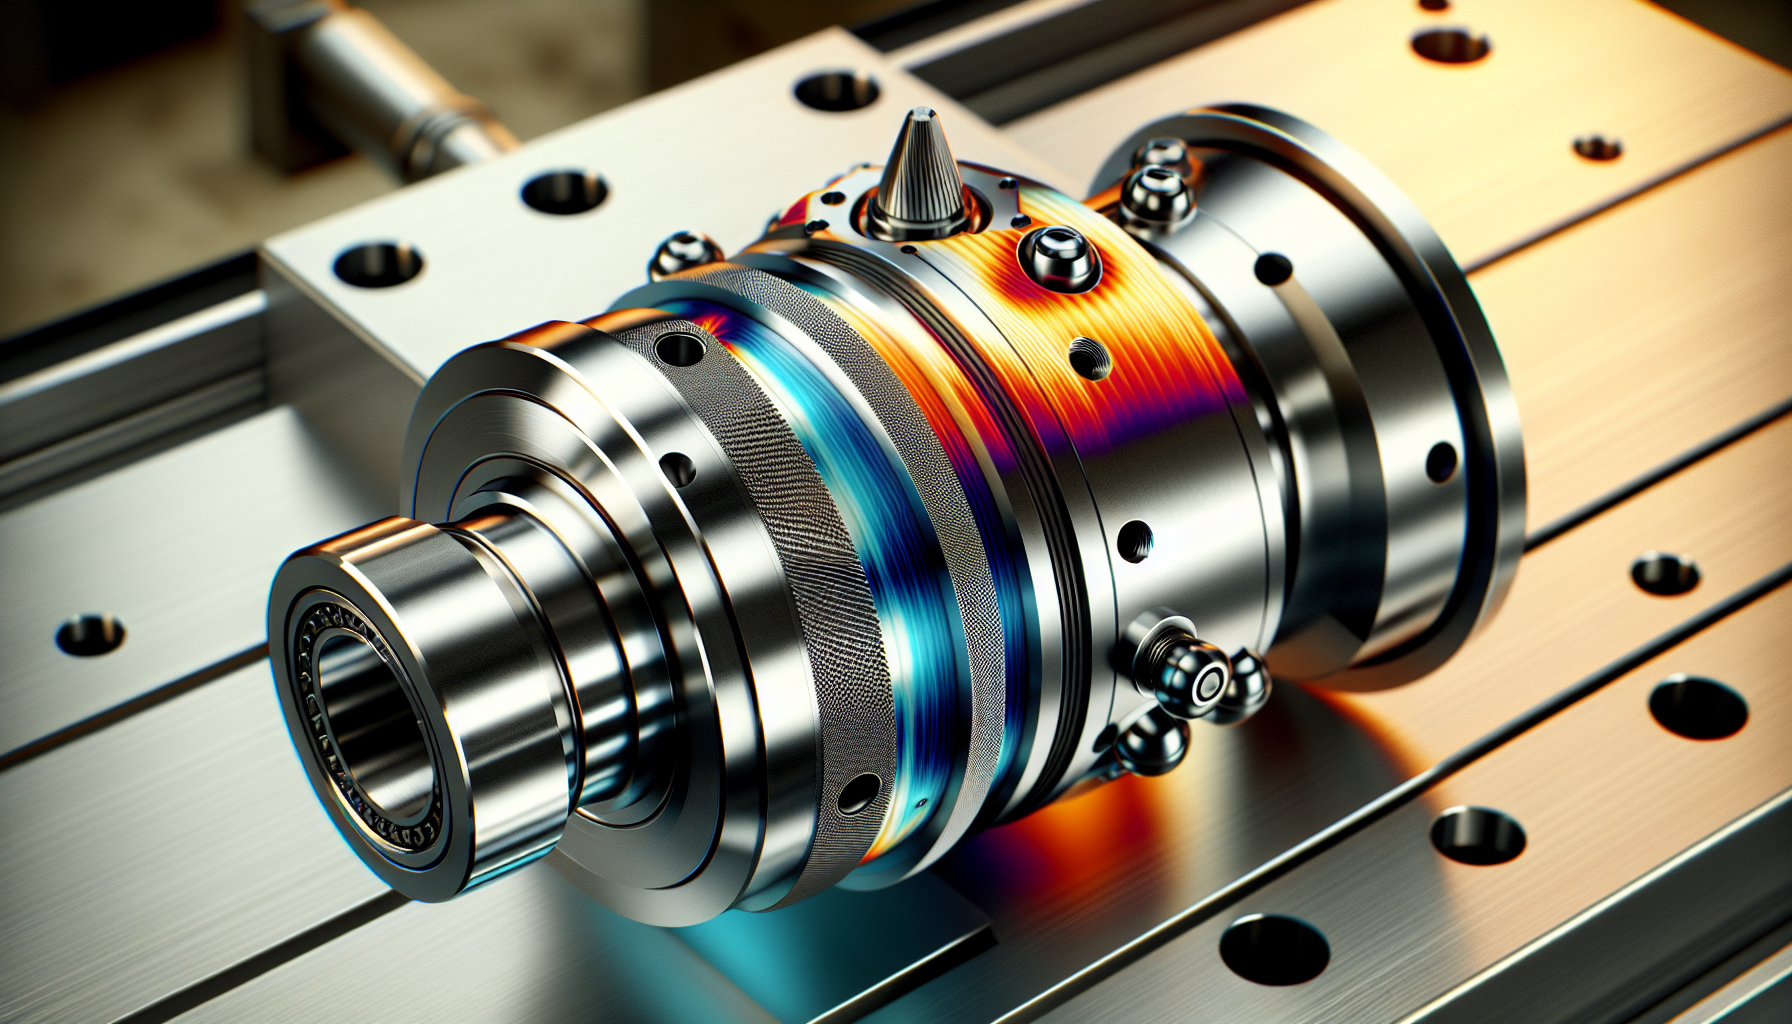
- Spindle motor (775, 120W, 24V rated 10,000 rpm, board supports up to 20,000 rpm)
- NEMA17 stepper motors (1.33A, 42x42x34mm, 0.3 N·m, 43 oz-in)
- Upgraded GRBL 1.1f control board with ports for E-stop, offline controller, probe, and limit switches
- 4G USB flash drive with drivers, GRBL software, manual
- Tools, brackets, power supply, and wiring
We appreciated the logical packaging and clear labeling. It feels accessible without feeling cheap.
Assembly Experience
We put on the polite determination we save for flat-pack furniture and started assembling. It took us about two hours with breaks to decide if the machine should live on the desk or gain custody of the dining table.
Step-by-Step Notes We Wish We’d Known
- Leave every screw slightly loose until the frame is squared. Tightening as we go tends to produce a parallelogram, which is lovely in geometry and less lovely in accuracy.
- Align the lead screws carefully so they don’t bind. If we feel gritty resistance when moving an axis by hand, something’s off. A tiny shim (paper thin) under a motor or bearing can change everything.
- Take your time with the spindle mount. A misaligned spindle will turn straight lines into modern dance.
- Check the gantry for parallelism along the workbed by moving the Z assembly from left to right and measuring the gap from a fixed reference point. Consistent spacing is an act of love.
Pitfalls That Are Easily Avoided
- Overtightening acrylic-like plastics is a universal mistake. Even though the frame sides are resin, we treat them like porcelain just to be safe.
- Wire management matters. We used a few extra zip ties to keep cables from sneaking into moving parts like they were planning a heist.
Specs That Matter, Without the Guesswork
Here’s the machine in a nutshell—albeit a generously sized nut.
Technical Overview Table
| Feature | Detail |
|---|---|
| Model | 3018-PRO |
| Type | USB Port Desktop CNC Router |
| Working Area | 300 x 180 x 45 mm (11.8 x 7.1 x 1.8 in) |
| Frame Size | 420 x 350 x 270 mm (16.53 x 13.78 x 10.63 in) |
| Frame Material | Resin outer frame |
| Workbench | Aluminum alloy |
| Screws | Stainless steel |
| Spindle | 775 motor, 120W (12–36V), 24V ≈ 10,000 rpm; board supports up to 20,000 rpm |
| Stepper Motors | NEMA17, 1.33A, 42 x 42 x 34 mm, 0.3 N·m, 43 oz-in |
| Control Board | Upgraded GRBL 1.1f with casing, power button, E-stop port, offline controller port, probe port, X/Y/Z limit ports, fan port |
| Software | GRBL-based; USB flash drive includes installer, manual, GRBL software |
| OS Compatibility | Windows XP SP3, 7, 8, 10, 11 (32/64-bit) and Linux |
| Materials (Spindle) | Wood, plastic, acrylic, PVC, PCB, soft metals (copper, aluminum), similar |
| Materials (Laser module) | Kraft paper, wood, leather, and more (with optional 12V 3-pin 0.5W–20W module) |
We love that the board is GRBL 1.1f. It means we can use the wide ecosystem of senders and CAM options without becoming a software therapist.
Control Electronics and Firmware
The heart of this unit is an upgraded GRBL 1.1f controller with ports for grown-up safety and convenience. It’s like getting the deluxe trim without paying for heated cupholders.
What the Board Adds to Our Life
- Outer casing to protect the board. We like fewer crumbs in our electronics.
- Power button that actually clicks satisfaction into the room.
- E-stop connector: once we wire a mushroom switch, we can stop everything faster than our neighbor stops a conversation.
- Offline controller port: for USB-stick projects or an offline controller accessory (not always included).
- Probe port: set Z-zero with a touch plate and the smugness of being precise.
- X/Y/Z limit switch ports: a gentle way to tell the machine “that’s enough now.”
- Fan port and enhanced spindle drive: better cooling and the ability to support higher RPMs.
Connectivity and Software
- USB cable to PC, and we’re off. The included 4G USB flash drive has the drivers, GRBL control software, and user manual.
- We tested on Windows 10 and Linux. Both worked fine with standard GRBL senders like Candle, UGS, bCNC, or OpenBuilds CONTROL.
- CAM-wise, we used Easel, Carbide Create, Fusion 360, and FreeCAD. The machine doesn’t judge our software choices, which is refreshing.
Performance and Accuracy
Performance sits where we expected for a 3018-class router. With careful setup and conservative feeds, the machine produces clean engravings in wood and plastics and reasonable cuts in soft metals. We’re not carving aerospace parts, but we can make beautiful fixtures, signs, badges, and prototype PCBs.
Spindle and Cutting Power
The included 775 spindle is a 120W brushed motor. At 24V, a listed 10,000 rpm is typical, and the board can support up to 20,000 rpm if we upgrade the spindle. In real use:
- Wood and acrylic cut cleanly with 1–2 mm depth per pass using 1/8″ or 3 mm end mills.
- PVC machines well; we keep the chips clearing to avoid melting.
- PCB traces can be milled with a V-bit—slowly, because precision matters more than speed.
- Aluminum requires shallow passes (0.1–0.3 mm), decent lubrication or a wax stick, and patient feeds. It is possible, but we adjust expectations and keep a vacuum handy.
We noticed better cut quality when we minimized runout by properly seating the collet and bit. A small error at the spindle tip becomes a big voice in your part.
Stepper Motors and Motion
The NEMA17 steppers are modest in size but do their job. With 0.3 N·m torque, they’re ideal for light routing. When the feed is too aggressive, the motors tell us by skipping steps—a polite boundary rather than a tantrum. We learned to tune acceleration and max feed in GRBL settings to match our comfort level.
Work Area and Rigidity
A 300 x 180 x 45 mm area is enough for most small projects: coasters, small signs, inlays, badges, PCB prototypes, and aluminum nameplates. Rigidity is fair for the class; we keep passes shallow in metal and don’t torque the clamps like we’re changing a tire. We get our best results when we treat the machine like a precision instrument instead of an angry garden tool.
Materials and What We Made
This machine is happy in wood, happier in plastic, and polite but cautious with soft metals. It knows its lane, and that lane is craft, prototyping, and learning.
Wood
Softwood and hardwood both carve well. We had success with:
- Signs in basswood and pine using 60-degree V-bits.
- Pocketing in maple with 1/8″ upcut end mills at 0.5–1 mm depth per pass.
- Inlays in walnut with fine detail when the machine is squared and the bed is flat.
Acrylic
For acrylic, sharp O-flute bits shine. We set high RPM, lower feed, and shallow passes. To avoid melting:
- Increase chip load slightly.
- Keep chips clearing with a gentle air puff or frequent pauses.
- Use conventional milling if you see edge welding.
PVC and Plastics
PVC cuts like butter if butter didn’t smear. We prefer single-flute bits at steady speeds. The finish can be beautiful, but chip evacuation is key.
PCB Engraving
This is a sweet spot. We used a 30-degree V-bit to trace copper-clad boards:
- Set Z-zero with a probe or paper method at multiple points.
- Use auto-leveling in your sender if supported.
- Small stepdowns (0.05–0.1 mm) prevent gouging and heartbreak.
Soft Metals: Copper and Aluminum
Aluminum is an honest test. We used small depth of cut (0.1–0.2 mm), high RPM, and a conservative feed. We kept a wax or a light mist handy and accepted that slow is smooth, smooth is acceptable. Copper cuts more easily but still likes respect.
Laser Engraving With an Optional Module
The control board supports 12V, 3-pin PWM engraver modules from 0.5W up to 20W. If we swap the spindle for a laser module:
- We can mark leather, wood, kraft paper, and some coatings.
- Always use proper eyewear and safety shields. A desktop laser is still a laser, not a candle.
Noise, Heat, and Dust
We’re not bringing nightmares to our neighbors, but it’s not whisper-quiet. The 775 spindle produces a whine. Cutting noise depends on material and bit choice. Dust-wise:
- Wood fills the air with tiny snow that gets everywhere. We recommend a small printed dust shoe and a shop vac.
- Acrylic and PVC produce chips that stick to our socks and personal philosophy. A grounded vacuum helps with static.
- Heat hasn’t been a problem with the included fan and airflow. We avoid covering the controller with anything cozy.

Safety and Reliability
This is still a machine that cuts things. We treat it with respect.
- We wired an external E-stop to the provided port. It’s like a seatbelt: you hope you never need it, but you feel better wearing it.
- We enabled limit switches so inevitable fat-finger moments don’t slam the gantry into the frame.
- We never leave it unattended when cutting—especially with plastics that can melt or smoke.
Reliability-wise, no missed beats during our tests. The GRBL board held stable. A loose connector once gave us the silent treatment on an axis, easily fixed with a push and a promise to be more attentive.
Calibration and Tuning
Setup makes or breaks small CNCs. We spent an extra hour on calibration and saved ourselves ten hours of fixing parts later.
Squaring and Tramming
- Square the gantry with a machinist square or a carefully cut test piece.
- Tram the spindle by adjusting mounts so a surfacing pass produces even marks left-to-right. We used a cheap dial indicator and developed an unearned confidence.
Backlash and Steps per Millimeter
- Use GRBL’s $100, $101, and $102 to fine-tune steps per mm. We ran a 100 mm test in X and Y with a steel ruler and adjusted until the machine’s idea of 100 mm matched ours.
- Tighten anti-backlash nuts snugly but not too tight. If motion feels gritty, back off.
Feeds and Speeds That Worked for Us
These are starting points, not commandments:
- Pine with 1/8″ upcut: 10,000–12,000 rpm, 400–600 mm/min, 0.8–1.2 mm per pass
- Acrylic with 1/8″ single O-flute: 12,000–16,000 rpm, 300–500 mm/min, 0.5–1.0 mm per pass
- PCB with 30-degree V-bit: 8,000–12,000 rpm, 100–200 mm/min, 0.05–0.1 mm per pass
- Aluminum with 1/8″ single flute: 12,000–16,000 rpm, 120–250 mm/min, 0.1–0.2 mm per pass, light lubrication
We leaned on the sound of the cut. If it sounded like a blender full of bolts, we slowed down. If it sounded like nothing, we risked rubbing instead of cutting.
Software Workflow
This is a friendly ecosystem. GRBL is the common language; our only job is to speak clearly to it.
CAD/CAM Choices
- Easel is quick and welcomes artistic shapes.
- Carbide Create offers a nice middle ground for 2.5D.
- Fusion 360 gives fine control, tool libraries, and good CAM strategies—useful if we’re pushing aluminum.
- Inkscape with plug-ins works for simple logos and v-carving.
GRBL Senders We Like
- Candle (GRBLControl): simple, reliable, includes a visualizer.
- Universal Gcode Sender (UGS): works on many platforms, robust macro support.
- OpenBuilds CONTROL: polished interface, friendly probing, and a forgiving aura.
We store proven feed and speed recipes in a simple spreadsheet. It saves us from repeating the same mistakes with renewed optimism.
Projects We Tried
We made a handful of things that reminded us why small CNCs feel magical.
Small Sign in Maple
- Tool: 60-degree V-bit for letters, 1/8″ end mill for pocketing
- Notes: A light pass for finishing makes the lettering crisp. Maple smells like we’re making breakfast.
PCB for a Microcontroller Breakout
- Tool: 30-degree V-bit for traces, small drill bits for holes
- Notes: Auto-leveling was our best friend. We kept the copper dust under control with a quick vacuum between steps.
Acrylic Keychain Batch
- Tool: 1/8″ O-flute
- Notes: Blue painter’s tape plus CA glue as a fixture method worked wonders. We got that frosty edge that looks store-bought.
Aluminum Nameplate
- Tool: 1/8″ single flute
- Notes: Shallow passes, slow feeds, and a light lubricant. We felt oddly proud, like we’d done a small brave thing.
Upgrades and Mods
We love machines that accept upgrades without a custody battle. This one encourages thoughtful tinkering.
Spoilboard and Clamps
- A sacrificial MDF spoilboard with threaded inserts turns workholding from improvisational dance into a choreographed routine.
Z-Probe Plate
- The probe port is there—use it. A $10 touch plate removes guesswork and removes human error from the Z-zero ritual.
Limit Switches
- Install simple mechanical switches for homing. It’s like giving the machine a sense of direction.
Cable Management
- Add drag chains or zip-tied sleeves to keep wires from flirting with the spindle.
Spindle Upgrades
- If we want higher RPM and better bearings, consider upgrading. The board supports up to 20,000 rpm spindles. Keep in mind added weight affects the Z-axis.
Laser Module
- A 12V 3-pin PWM module (0.5W–20W) transforms it into a competent engraver for leather, wood, kraft paper, and treated metals.
- Safety first: proper eyewear, shields, and never unattended operation.
Comparisons and Context
It sits squarely in the 3018 family—machines with a 300 x 180 mm work area meant for light-duty precision.
Against Other 3018 Variants
- The resin frame is lighter than some all-aluminum versions. It’s easier to move, though slightly less rigid. For wood and plastics, the difference is negligible; for aluminum, it asks for a gentler touch.
- The upgraded GRBL 1.1f board with casing, power button, and extra ports is a win. Not all rivals include this combination, especially the fan port and enhanced spindle drive.
- The inclusion of a 4G USB flash drive with software and manual is a courtesy we wish everyone offered.
Who It’s For
- Hobbyists who want to learn CNC without burning a hole in their bench or their wallet.
- Makers who enjoy small functional parts, signs, PCBs, and art.
- Students and teachers who want repeatable projects with real-world CAD/CAM skills.
Who It’s Not For
- People who need to hog out aluminum like a full-size mill.
- Production environments where speed matters more than the pleasure of making chips.
Maintenance and Daily Habits
Our maintenance routine is boring and effective—like brushing teeth, but for machinery.
- Wipe rails and lead screws with a clean cloth.
- Apply a light machine oil or dry lube to screws and slides weekly, more if cutting metals.
- Check couplers for set-screw tightness. They loosen at the least convenient moments.
- Vacuum the controller area. Dust can be as destructive as gossip.
- Keep collets clean and replace them if they feel loose or scored.
Troubleshooting: The Greatest Hits
We made mistakes so you don’t have to. Or you still will, but with better jokes.
- Lines out of square: Re-square the frame. Loosen, align, tighten slowly in a crisscross pattern.
- Rough edges in acrylic: Increase RPM, use a single-flute bit, reduce feed slightly, and improve chip clearance.
- Lost steps: Lower acceleration ($120–$122), reduce feed, check for binding, and secure workholding better.
- Z is inaccurate: Recalibrate $102, check the coupler tightness, and make sure the bit isn’t creeping up in the collet.
- Electrical hiccups: Reseat connectors, check for cable strain, ensure the power supply is stable, and keep USB cables away from stepper wires.

The Learning Curve That Feels Worth It
We found the learning curve gentle enough to keep us engaged but steep enough to feel like we’re developing a skill. The manual on the included USB is usable, and the GRBL community answers questions faster than we can finish a cup of tea.
Value and Cost of Ownership
Price-wise, it sits comfortably in the entry-level desktop CNC category. Considering the upgraded control board, a respectable spindle, and a decent work envelope, the value is strong. Consumables—bits, collets, materials—are the predictable costs. We get better outcomes with decent bits; cheap dull tools are a false economy that burns time and patience.
Quality-of-Life Tips We Wish We Knew Sooner
- Surface the spoilboard first. It levels the playing field—literally.
- Use a marker to write current GRBL settings on a card taped to the frame. Future you will send a thank-you card.
- Keep a dedicated “CNC bin” with wrenches, collets, feeler gauges, and a brush. The machine appreciates our tidiness.
- Name your clamps. They get lost less often when they feel seen.
Pros and Cons
What We Loved
- Open-source GRBL 1.1f with real-world quality-of-life ports: E-stop, probe, limit switches, fan.
- Compact footprint with a workable 300 x 180 x 45 mm area.
- Decent component materials: resin frame, aluminum table, stainless screws.
- Good multi-material capability: wood, plastics, PCB, soft metals with patience.
- Included USB with software and manual—no hunting in the void.
- Upgrade path: laser module, spindle, switches, spoilboard, cable management.
Where We Made Compromises
- Rigidity is good for the class but still 3018-class. Aluminum is possible but slow and delicate.
- The 775 brushed spindle is fine for starters but not whisper-quiet or ultra-precise under heavy loads.
- Assembly requires care to achieve squareness and avoid binding—beginners can do it, but patience is mandatory.
- Dust control isn’t built-in. We added a makeshift dust shoe and a shop vac, and suddenly life improved.
Frequently Asked Questions We Asked Ourselves
- Can it run on Linux? Yes. With GRBL senders like UGS or bCNC, it works well.
- Does it support an offline controller? The board has the port. Some packages include the handheld controller; others don’t.
- Can we swap in a laser module? Yes, 12V 3-pin PWM modules from 0.5W–20W are supported. Use safety goggles and proper shielding.
- What bits should we start with? A 1/8″ upcut, a 1/8″ single-flute for plastics and aluminum, a 60-degree V-bit for text, and a 30-degree V-bit for PCBs. That quartet handles most beginner projects.
- How accurate is it? With careful setup, ±0.1 mm is realistic in wood and plastics; tighter tolerances are possible for small features in PCB work.
Our Workflow for a First Project, Start to Finish
- Design: Draw a simple sign in Carbide Create with text and a border.
- CAM: Assign a V-carve operation for the letters and pocket the border with a 1/8″ end mill.
- Material: Clamp down a surfaced MDF spoilboard and a piece of pine with painter’s tape plus CA glue.
- Zeroing: Use a touch plate on Z, center X and Y on the workpiece, and set GRBL zeros.
- Cutting: Run at modest feeds. We stand by with the vacuum and watch for chip buildup.
- Finishing: Sand lightly, add oil or varnish, and pretend we’ve been making heirlooms for years.
It’s repeatable, and we learned something at each step without needing a therapist to talk us through the CAM toolpaths.
Durability and Long-Term Thoughts
After extended weekend sessions, nothing broke, nothing drifted wildly, and nothing smoked. The frame stayed true, the lead screws still feel smooth, and the controller didn’t overheat. We think this 3018-PRO will live a long, productive life if we keep up with light lubrication and avoid using it as a shelf for heavy books.
How It Fits into a Small Workshop
The footprint is small enough to coexist with a laptop and a cutting mat. We put a rubber mat under the machine to reduce vibration and neighborly suspicion. A small parts drawer next to it keeps bits and wrenches from rolling away like they were escaping responsibility.
Teaching and Learning Angle
For classrooms, maker clubs, or home learners, the CNCTOPBAOS CNC 3018-PRO is approachable. The GRBL ecosystem means we can teach CAD/CAM basics and G-code fundamentals without reinventing the course every semester. PCB milling makes electronics classes very hands-on. Safety is teachable and enforceable with the E-stop and clear procedures.
The Intangibles: What It Feels Like to Use
There’s a small joy in watching a machine trace our lines, especially the first time the toolpath looks exactly like the sketch. The sound becomes familiar, like the purr of a pet that occasionally yowls when it hits a knot. We felt proud of small successes—clean lettering, crisp PCB traces—and those wins add up.
The Bottom Line
The CNCTOPBAOS CNC 3018-PRO Wood Router Kit 3 Axis USB DIY Mini Engraver Milling Engraving Machine Cutter Plastic Acrylic PCB PVC Carving GRBL Control 300x180x45mm occupies a sweet spot for beginners and enthusiastic tinkerers. It’s sturdy where it counts, friendly in its software, and straightforward to assemble if we’re willing to measure twice and tighten once. Its upgraded GRBL 1.1f control board with ports for E-stop, probing, limit switches, and a fan feels like someone at the factory actually uses these machines too.
It won’t bulldoze through aluminum, and that’s fine. It will reward careful setup, good bits, and practical expectations with clean results in wood, plastics, and PCBs—and it will teach us something honest about making along the way. As a first CNC or a compact companion for small projects, it’s an easy one to recommend.
Our Verdict
If we want a capable desktop CNC that respects our space, our budget, and our learning curve, this 3018-PRO is a smart choice. The machine feels thoughtfully put together, the control electronics are better than typical for the class, and the upgrade paths keep it interesting. We’ve made enough successful parts to convince us it’s not just a stepping stone—it’s a keeper that earns its spot on the bench.
Disclosure: As an Amazon Associate, I earn from qualifying purchases.