Can we write this with a wry, conversational, gently self-deprecating voice rather than imitating a specific living author? We can, and we will.
")
.")
What we were hoping to make with this CNC router
We wanted a dependable bench-top machine that doesn’t wobble like a toddler on roller skates and doesn’t ask us to earn a degree in mechanical engineering just to cut a rectangle. We wanted to carve signs, pocket parts in plywood, mill acrylic panels without turning them into confetti, and try small-batch projects without dedicating half the garage to industrial equipment.
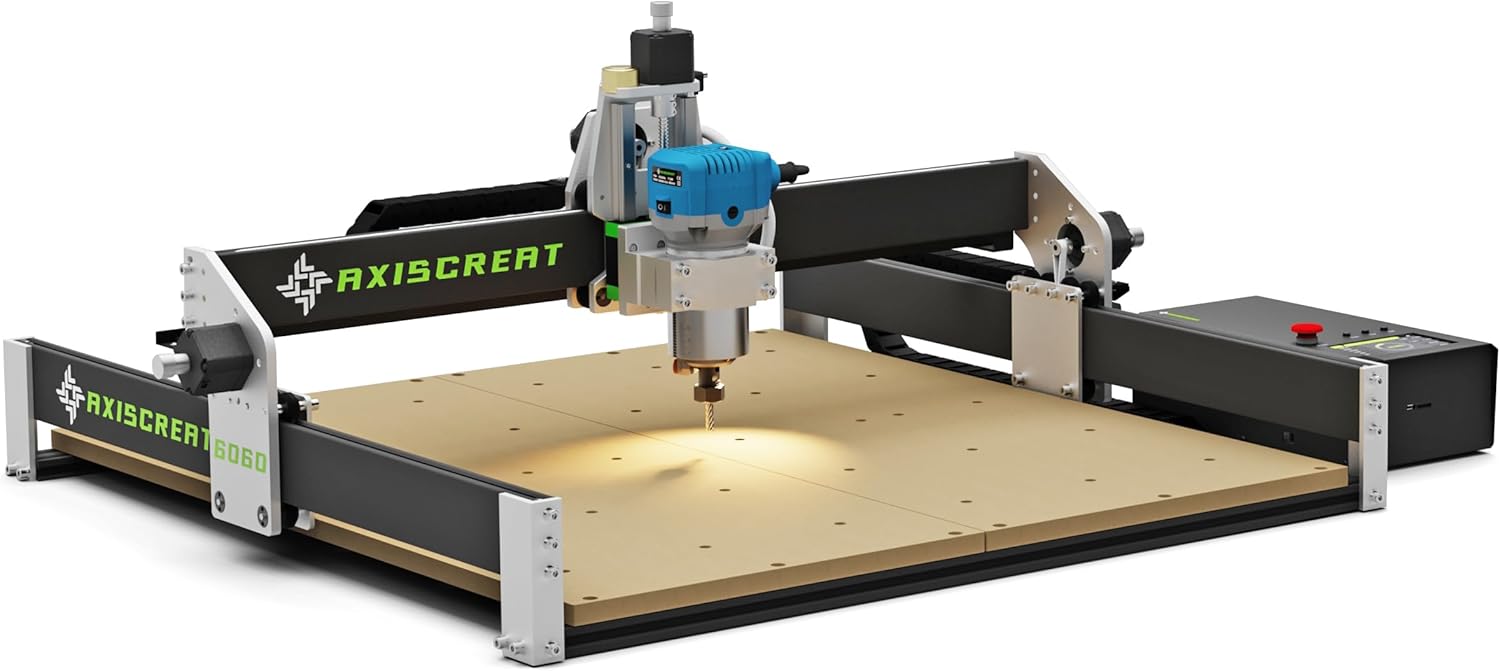
The “CNC Router Machine, 3-Axis All-Metal with Steel Wheel Engraver Milling Machine, 500W Trimmer & Linear Rail Driven, Working Area 15.75”x15.75”x2.95”, Acrylic Cutting Milling, GRBL Control (4040 PRO)” arrived promising the right mix of sturdiness, power, and sanity. We set out to find where it shines, where it gets fussy, and what kind of projects feel realistic on day one.
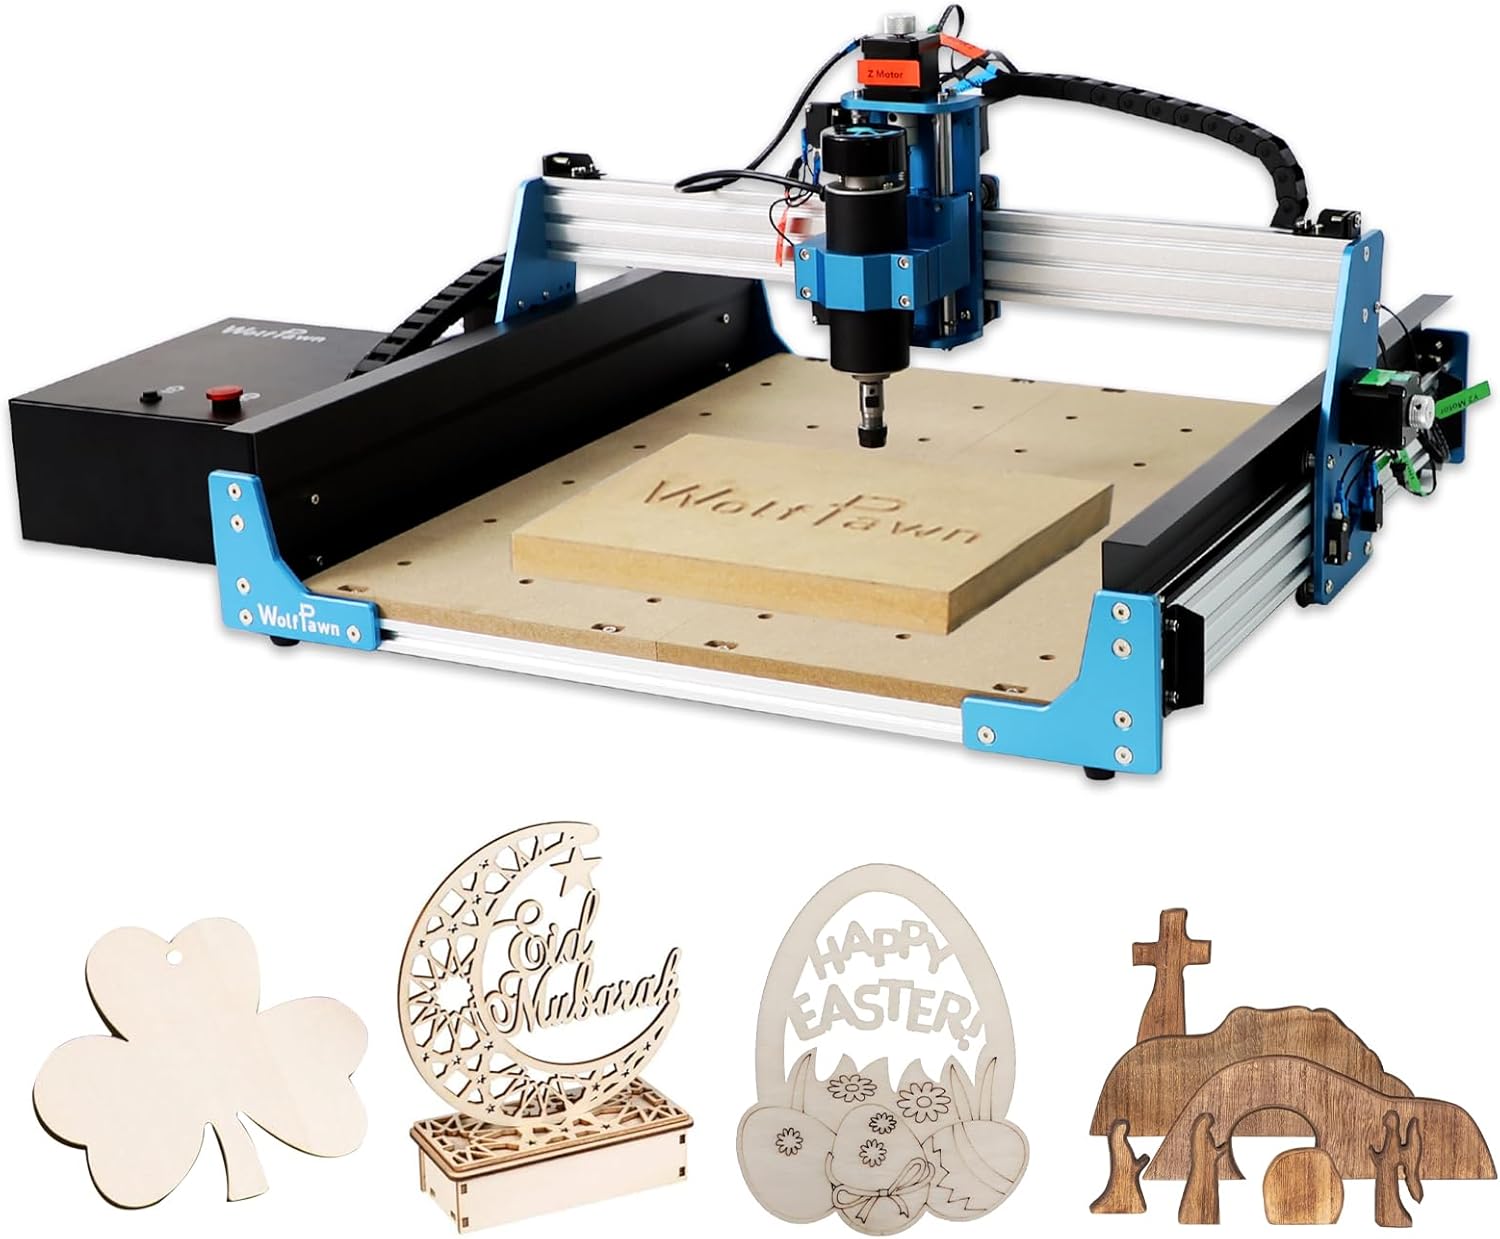
CNC Router Machine,3-Axis All-Metal with Steel Wheel Engraver Milling Machine,500W Trimmer & Linear Rail Driven,Working Area 15.75”x15.75”x2.95”,Acrylic Cutting Milling,GRBL Control (4040 PRO)
Quick verdict
After living with the 4040 PRO, our verdict is that it’s a stout, user-friendly router perfect for woodworking and acrylic jobs that fit within its 400 x 400 x 75 mm workspace. The 500W spindle has enough muscle for sensible, repeatable cutting, and the all-metal frame inspires confidence when the toolpath gets real.
We recommend it to beginners and committed DIYers who want reliable results without babysitting a machine that sulks at every knot in the wood. It’s not a metal shop in a box, and it doesn’t pretend to be, but it’s an honest, capable workhorse for wood and plastics when set up properly.
Unboxing and first impressions
We braced ourselves for a mountain of parts and an existential crisis. Instead, the packaging was tidy, the frames were pre-assembled where it matters, and the control box felt reassuringly deliberate. No loose bolts rattling around like an ominous maraca.
The all-metal frame has that satisfying heft that says someone overbuilt this on purpose. When we tightened the first bolt, we could feel we weren’t negotiating with flimsy sheet metal or novelty plastic. We were bolting together a real machine.
What’s in the box
We counted the essentials: pre-assembled frame sections, the 500W spindle, belts pre-tensioned on the X/Y V-wheels, the Z-axis carriage with its linear guide and leadscrew, the control box with labeled ports, cabling, and the dust baffle. There’s also a 4GB flash drive, which sounds quaint in the age of clouds, but turns out to be exactly what we needed.
That flash drive carries the instruction manual, tutorial videos, and starter files, and it saved us the ritual of downloading drivers from websites that look like they were built during a different era of the internet.
The all-metal frame: first feel
Lift the gantry, and you’ll understand the promise of “structural stability.” The frame is aluminum and steel where it counts, and the assembly tolerances feel purposeful. There’s an ease in knowing the chassis doesn’t flex like a folding lawn chair when you change directions rapidly.
That matters a lot because any movement that isn’t intended shows up as chatter, rough edges, and the kind of inconsistency that turns tidy projects into why-did-we-do-this adventures.
Control box, e-stop, and home button
We like the independent control box. It’s cleaner for cable management and makes the emergency stop button feel like a proper safety instrument rather than a decoration. We’ve hit that mushroom-shaped button when we meant to hit something else, and we’re fairly sure it saved a bit of material and some dignity.
The home button is equally important. When we accidentally vacuumed the USB cable off the table (it happens), it was nice to return to a known position quickly without unraveling our sanity.
Assembly experience
We finished the assembly in under 20 minutes, partly because so much was already pre-built and partly because we’ve made enough mistakes on other machines to follow instructions with the humility of seasoned learners. The step-by-step manual is clear, and the hardware bags are labeled like someone actually thought about the person opening the box.
There’s something deeply soothing about a build process that has zero “gotchas.” Finger-tight, then square, then torque. Done.
Pre-assembled components make it easy
The gantry and base sections slide together and square up with minimal coaxing. Belts are in place. The Z-axis carriage arrives mounted on its linear guide with the TR8-2T screw installed. We still checked each major fastener because we’re us, and thread-locker is a friend we like to keep close.
The V-wheels roll smoothly with no gritty crunch or embarrassing flat spots. That smooth travel on the rails is the kind of small mechanical win that translates into real-world precision during motion.
Wiring and software setup
Cables are keyed and labeled, which prevents the infamous “why is the Y axis moving like the X axis’s less-talented cousin” moment. We connected the limit switches, spindle, and stepper motors according to the manual with no head-scratching.
On the software side, this is a GRBL 1.1F machine, so it’s ready to run with UGS, Candle, LightBurn, and Fusion 360. We started with Candle for jogging and test files, then moved to UGS for a bit more control, and eventually into Fusion 360 for CAM toolpaths. If that sounds like a progression, it is—and it’s beginner friendly.
First power-on and homing
We powered up, hit home, and watched it establish itself like a dog circling its bed. The limit switches behaved, the axes shuttled to their corners without protest, and the spindle spun up smoothly. We stood there for a moment like proud parents, then clamped down a scrap of plywood and let it cut air above the stock.
Once we verified motion and direction, we dropped the Z to kiss the surface and ran the starter file from the flash drive. Clean cut. No smoke. No emergency stop-shaped handprints on the table.
Build and mechanics
The 4040 PRO’s metal frame, belt-driven X/Y with V-wheels, and a Z-axis on a linear guide with a TR8-2T leadscrew make for a predictable, forgiving system. It’s not the heaviest, but it’s rigid enough to hold tolerances in woodworking and plastic work that make us happy.
There’s a genuine difference between machines that ignore inertia and those that count it carefully. This one counts it.
Frame and gantry stiffness
The aluminum profiles and steel V-wheels eliminate a lot of wobble during direction changes. We found the gantry robust enough for a 500W spindle and the forces associated with reasonable feed rates. If you push a monstrous bit through hardwood at heroic depths of cut, any machine will throw a tantrum. But if you respect the physics, the frame meets the moment.
We also appreciate how squaring the machine is straightforward. Four corners. Pinch the diagonals. Tighten. Test with a square. Repeat once, for pride.
Motion system: X/Y belts with V-wheels
Belt drives tend to get unfair reputations. These run clean, with positive engagement, and the V-wheels ride smoothly. If your belts are tensioned correctly, you’ll get good accuracy and repeatable performance without the maintenance load of fully linear rail systems.
We like to check belt tension monthly. A gentle pluck should give a consistent feel, not spaghetti on Sunday and piano wire on Monday.
Z-axis: linear guide plus TR8-2T screw
The Z-axis rides on a linear guide with nice, predictable motion, and the leadscrew provides the torque and precision that matter when you surface a spoilboard or machine deep pockets. It’s an upgrade from cheaper systems that push plastic and hope for the best.
Z wobble is the enemy of crisp edges. This configuration squashes it nicely, assuming you don’t try to turn this into a metal mill. It’s a router; treat it like one and it will reward you.
Spindle: 500W trimmer
The 500W spindle is not a toy. It makes chips fast enough to be entertaining but stays within the stability envelope of the frame. We ran 1/4-inch and 1/8-inch end mills without drama and found that conservative stepdowns keep temperatures manageable in acrylic.
It’s air-cooled, so it sings a little at speed, but it doesn’t scream like a banshee. We kept cut depths sensible and paid attention to chip evacuation, and the spindle gave us good surface finishes and happy bearings.
Working area and real-world fit
The working area is 15.75 x 15.75 x 2.95 inches (400 x 400 x 75 mm). For signs, small instrument parts, inlays, trays, boxes, jigs, acrylic panels, badges, and original gift ideas that look suspiciously like real products, this is a sweet spot.
We like that it fits on a bench with enough room left over for a laptop, a vacuum hose, and a coffee mug we will definitely knock over at some point.
The 400 x 400 x 75 mm envelope
In practical terms, the height limit means you’ll want to think through workholding on taller pieces and consider low-profile clamps. For most flat work, it’s more than enough. For short runs and prototypes, we didn’t wish for more space nearly as often as we expected.
Also, it’s a convenient size for cutting panels from 16×16-inch squares you can prep on a table saw without rituals.
Workholding and spoilboard tips
We love a simple MDF spoilboard surfaced true to the machine. Threaded inserts or T-track slots keep things low-profile. If you can, plan your program to avoid the clamps like your fingers depend on it—because they do.
Tape-and-glue holds fantastically for thin acrylic and delicate inlays. Blue tape on the spoilboard, blue tape on the workpiece, CA glue between them, and then pry the assembly apart with a thin putty knife when done. It’s neat, tidy, and surgical—until the glue runs low, so keep extra.
Software and control
GRBL 1.1F compatibility means we get a well-trodden path and plenty of community support. It also means you’ll spend more time making toolpaths and less time debugging exotic control quirks.
We used Candle for quick jogs and test cuts, UGS for day-to-day sending, and Fusion 360 for CAD/CAM once we got serious. LightBurn is an option if you’re integrating laser work, although that’s a separate adventure.
GRBL 1.1F: stable and familiar
Homing, soft limits, feed holds, overrides—these are all standard features in GRBL 1.1F, and they behave as expected. Jog increments are easy to set, and macros simplify zeroing routines. The machine responds like a willing partner, not a code-gobbling goblin.
We made a habit of saving our GRBL settings as a backup. It’s the digital equivalent of labeling the breaker box. Future us always says thank you.
CAD/CAM choices: UGS, Candle, LightBurn, Fusion 360
- Candle: Friendly for first runs and quick jobs. The preview window is a comfort blanket.
- UGS: Rock-solid sender with predictable behavior and macro support.
- Fusion 360: Powerful, with 2D and 3D toolpaths that take you from basic contours to pocketing, chamfers, and adaptive strategies suited to this machine.
- LightBurn: Great if you expand into laser attachments or mixed workflows with engraving templates.
We found that a simple 2D contour or pocket operation in Fusion 360 is a perfect first “real” project. Save 3D tricks for later, when toolpath zeal meets machine capability.
")
Performance in materials
This is where the 4040 PRO earns its name. If you stick to wood and acrylic, you’ll get clean cuts and respectable speeds. We set expectations accordingly and avoided steel or aggressive aluminum work, because that’s not the design intent.
Our rule: cut smart, not brave.
Wood: plywood, pine, hardwoods
In plywood, we used a 1/4-inch upcut end mill at moderate speeds and shallow passes to avoid tear-out and glue-layer drama. For hardwoods like maple or walnut, a 1/8-inch end mill with modest stepdowns produced crisp details without overloading the spindle.
Surface finishes were impressive when we increased chip load slightly to keep the bit from rubbing. If you’re new to the concept, think of it as making sure you’re cutting chips, not making dust. Chips cool the bit. Dust just hangs around like a bad decision.
Acrylic: cutting and milling
Acrylic cutting and milling is a highlight. The key is sharp O-flute bits, modest spindle RPM, and steady chip evacuation so the plastic doesn’t re-melt and weld itself to the cutter like a clingy summer romance.
We had excellent results using single-flute bits, relatively slow RPMs, and faster feed rates than felt intuitive. This keeps chip thickness up, friction down, and edges chip-free. A gentle final finishing pass at a small stepdown polished edges nicely.
Foam, MDF, and other friendly materials
We also tried MDF and EVA foam because sometimes we prefer a project that feels like cutting butter instead of wrestling a watermelon. The machine handles them beautifully, though you’ll want dust control in MDF because the powder gets everywhere, including places you didn’t know existed.
We kept to materials the machine is designed to handle reliably: wood, MDF, and plastics. We didn’t push into metal because nothing about the setup encourages it, and a happy machine is one used within its lane.
Accuracy, repeatability, and surface finish
For a belt-driven X/Y with a guided Z, accuracy and repeatability were strong. We hit within ±0.2 mm on test squares without obsessive calibration, and tighter when we tuned belting and steps per millimeter. That’s more than fine for woodworking and acrylic projects.
Surface finish depends on bit sharpness, rigidity, and feeds and speeds choices. We found it easy to get clean edges that look like they belong on products, not prototypes.
Test cuts and calibration
We ran a calibration routine with 100 mm moves and adjusted steps/mm in GRBL based on real-world travel. Then we cut a 50 x 50 mm square and measured with calipers. After a couple of light tweaks, our squares looked square and measured like them too.
Tramming the spindle relative to the table improved surfacing results. If your spoilboard shows ridges after surfacing, that’s a sign the spindle isn’t perfectly perpendicular. A minute or two of shimming can make your surfaces satisfyingly glassy.
Bit selection and starter settings
Here are conservative starter settings that treated us well. These are not commandments; they are friendly suggestions to begin safely and adjust by ear, chip formation, and cut quality.
- 1/4-inch upcut in plywood: 16,000 RPM, 800 mm/min, 1.5 mm stepdown, 40% stepover
- 1/8-inch downcut in hardwood: 18,000 RPM, 600 mm/min, 1.0 mm stepdown, 35% stepover
- 1/8-inch single-flute O in acrylic: 12,000 RPM, 900 mm/min, 0.6 mm stepdown, 30% stepover
- 1/16-inch end mill for detail work in hardwood: 18,000 RPM, 350 mm/min, 0.5 mm stepdown
What matters most: crisp chips, not dust; confident sound, not chatter; and temperatures that won’t sizzle your fingerprints off the workpiece when you touch it afterward.
Dust management and cleanliness
The included dust baffle helps keep chips roughly where they belong—which is not in your shoes or the dog’s tail. It won’t replace a proper dust shoe or a shop vacuum, but it reduces the confetti effect and gives the workspace a better baseline of order.
Cleanliness isn’t just about tidiness; chips and dust cause heat buildup and can sabotage surface finish. Clean paths make for clean parts.
Dust baffle in practice
We noticed the baffle significantly reduces the radius of debris scatter, especially during hardwood pocketing. Acrylic chips still have enthusiasm, so pair the baffle with a vacuum nozzle parked nearby for best results.
After each job, a quick pass with a brush and vacuum keeps linear components happy. Chips have a way of sneaking into places where they can pretend to be grinding paste.
Chip evacuation
If you’re running acrylic, active chip evacuation is your friend. A gentle blast of air or a vacuum nozzle near the cutter helps prevent melting and improves edge clarity. We made a quick 3D-printed bracket to hold a small nozzle; if you don’t have a printer, a bit of old coat hanger wire and tape will accomplish the same slightly chaotic miracle.
Noise and vibration
It hums, it whirs, it makes the kind of noise you’d expect from a 500W spindle. It’s far from the loudest machine in a woodshop but not something you’d run during a conference call unless you want your colleagues to ask if you’re building a hovercraft.
Vibration stays manageable when the machine is mounted to a sturdy, flat bench. We recommend rubber pads or a dense foam layer between the machine and the bench to reduce sympathetic resonance.
What we heard
At moderate RPMs and conservative feed rates, the machine has a steady tone. Push hard with the wrong bit, and you’ll hear chatter, which is your cue to adjust stepdowns or change tools. Acrylic cutting at dialed-in settings actually sounded calmer than plywood at times.
If the spindle note changes abruptly, pause and investigate. It’s usually either chips building up or a clamp that crept into the path like a mischievous raccoon.
Simple ways to quiet things down
- Use a quality, sharp bit. Dull cutters scream like kettle whistles.
- Add mass to your bench. Sandbags are cheap and oddly satisfying.
- Keep belts properly tensioned. Loose belts slap and sing.
- Avoid running at resonant RPMs. A small RPM nudge can change everything.
Safety and reliability
We used the e-stop more than once out of pure respect for the unexpected. When you mis-measure a stock or a CAM mistake sneaks through, slamming that big red button becomes an act of self-care. The home button, meanwhile, is our daily reset ritual.
Mechanical reliability was strong during our tests. Belts held tension, V-wheels rolled smoothly, and the Z-axis behaved without drama.
Emergency stop and home routines
Our habit: before each job, home the machine, then jog to your work zero, and re-check Z with a piece of paper or a touch plate. After the cut, home again. This keeps the machine’s internal sense of space aligned with your sanity.
We also pause mid-job occasionally to vacuum chips and check the bit. The e-stop is for emergencies; the feed hold is for grown-up decisions.
Independent control box benefits
We don’t love having stepper drivers buried under a gantry where heat builds like a sauna. This control box keeps electronics cool and accessible. The labeled ports are intuitive, and the power switch is placed where we won’t mistake it for a light switch at 2 a.m.
Good cable management also reduces accidental unplugging, which we learned the very real way when we snagged a cable and the Y axis pretended it was on vacation.
Maintenance
Maintenance on the 4040 PRO is simple and infrequent if you stick to a light schedule and don’t feed the machine beach sand. We wrote ourselves a checklist so we wouldn’t forget, then promptly lost the checklist, then made a new one on a sticky note that lives on the control box.
Be good to the machine, and it will be good to you.
Lubrication and belt tension
- Wipe rails and V-wheels with a clean cloth; avoid over-lubricating V-wheels so you don’t create a dust magnet.
- A light application of dry PTFE lube on the Z leadscrew keeps motion smooth.
- Check belt tension monthly; adjust to a firm, even feel across X and Y.
Over-tensioned belts will wear bearings prematurely. Under-tensioned belts will give you accuracy that looks like it had a couple of late nights.
Spindle care and consumables
Brush the spindle vents clean, especially after MDF. If your spindle uses brushes internally, plan to replace them occasionally based on usage hours (consult the manual). Always store bits carefully; dull and chipped tools are the fastest path to heat, noise, and bad surfaces.
A cheap loupe is a small luxury. Inspecting a cutting edge up close feels suspiciously like competence.
Customer support and documentation
The 4GB flash drive is a humble hero. Clear instructions, video guides, and sample projects make the learning curve more like a pleasant hill rather than a cliff.
When we contacted support with a question about GRBL parameters, the response was straightforward. The manual’s last page lists the support channels and makes it easy to provide the details they need.
What’s on the flash drive
- PDF manual with assembly and setup instructions
- Video tutorials on installation, homing, and first cuts
- Sample G-code files to prove that yes, it works and you didn’t assemble a sculpture
- Links to recommended software and driver sources
We wish every machine shipped with this combo of hand-holding and empowerment.
Getting help when you need it
We appreciate having support info consolidated. If something goes sideways—and at some point it always does—knowing who to contact reduces the urge to blame the machine, the weather, and our ancestors.
Provide your order info, a short description, and a photo or two. Clear problems get clear fixes.
")
Who this machine is for
We think of the 4040 PRO as a solid bench router for makers who value stability, easy assembly, and compatibility with popular software without the tax of high-end industrial systems. It’s a good first CNC that you won’t outgrow the second you cut your first clean pocket.
It’s also a steadily reliable second machine for those of us who like to run production on one unit while prototyping on another.
Beginners and DIY enthusiasts
If you’re new to CNC, this is friendly. The machine comes together in minutes, the control system is familiar, and the workspace is ample for most early projects. The safety features are not afterthoughts.
You’ll learn good habits without being punished for small missteps. That’s a rare, valuable combination.
Hobby woodworkers and small shop tinkerers
For those of us who do occasional furniture builds, kitchen upgrades, tool inserts, and gift projects, the 4040 PRO is a competent partner. Custom cutting boards, inlaid signs, organizer trays, and jigs practically suggest themselves.
It’s small enough to fit among other tools without forcing a domestic real estate negotiation.
Who should look elsewhere
If your heart is set on cutting thick aluminum plates or surfacing steel, this is not your machine. Also, if you need a full-sheet router, you already know this format won’t cut it—literally and figuratively.
Ambition is admirable. Matching tools to tasks is even better.
Specifications and highlights at a glance
We like a clear table when our brain is juggling bits, belts, and acrylic chips. Here’s a compact snapshot of the 4040 PRO and our take on each item.
| Category | Detail | Our take |
|---|---|---|
| Model | 4040 PRO | Right-sized for benches and busy lives |
| Working area | 400 x 400 x 75 mm (15.75 x 15.75 x 2.95 in) | Fits signs, trays, panels, and small runs |
| Frame | All-metal, aluminum and steel components | Rigid enough for accurate woodworking and acrylic |
| X/Y motion | 2GT belt with V-wheels | Smooth, reliable, easy to maintain |
| Z motion | Linear guide with TR8-2T leadscrew | Stable and precise for depth-critical cuts |
| Spindle | 500W trimmer | Plenty of power for wood and plastics |
| Control | GRBL 1.1F | Stable, widely supported, beginner-friendly |
| Software | UGS, Candle, LightBurn, Fusion 360 | Covers jogging, sending, and full CAM |
| Safety | Independent control box, e-stop, home button | Practical and confidence-inspiring |
| Setup | Pre-assembled components | Under 20 minutes to first jog |
| Dust control | Included baffle | Helps; pair with a shop vac for best results |
| Included media | 4GB flash drive with guides and videos | Useful, especially offline |
Pros and cons you can actually use
Honesty doesn’t hurt, assuming we can keep the list civil. Here’s what stood out in hands-on use.
| Pros | Cons |
|---|---|
| Sturdy all-metal frame resists flex | Not intended for metals; stay in wood/plastics |
| 500W spindle balances power and control | Belt tension needs occasional checks |
| Z-axis linear guide + leadscrew improves finishes | Dust baffle isn’t a full dust shoe |
| GRBL 1.1F works with popular software | Working height requires low-profile clamps for tall parts |
| Under-20-minute assembly is real | Noise level is shop-appropriate but not whisper-quiet |
| Independent control box with e-stop | No enclosure included; plan your chip control |
| Clear manual and videos on 4GB drive | You’ll want to add your own workholding accessories |
Project results we liked best
Our favorite projects were modest in size but high in satisfaction. A walnut inlay sign with crisp corners. A stack of acrylic light panels, each identical and burr-free. A custom drawer organizer that made us feel like we had our lives together for at least an afternoon.
Repeatability is the quiet hero here. We could run three, four, five pieces and have them match without measuring each one like a suspicious art appraiser.
Wood projects that shine
- Inlay signs with 1/8-inch downcut bits for clean top edges
- Charcuterie boards with chamfers and engraved logos
- Instrument panels and small jigs for shop projects
- Router templates for hand tools and repeatable curves
The surfaces came out smooth with a finishing pass, and pocket floors looked predictable enough that we didn’t feel tempted to resurface them by hand.
Acrylic projects that don’t stress you out
- LED edge-lit signs with crisp contours
- Switch panels, covers, and simple enclosures
- Template guides and router accessories
- Decorative panels with polished edges after a final pass
We stayed patient with feeds and made sure the chips left the party as quickly as they arrived. Acrylic gave us shiny edges when we earned them.
Tips we wish we knew on day one
We kept notes so future us would be a little smarter. Here’s the shortlist that saved time and material.
- Surface your spoilboard early. It pays off in every project afterward.
- Label your bits by material. A “wood 1/8” and an “acrylic 1/8” live different lives.
- Use tape-and-glue for thin acrylic; clamps get finicky and in the way.
- Don’t baby the feed rate in acrylic—keep RPM moderate and feed confident.
- Save GRBL settings to a file the minute you’re happy with them.
- Put the vacuum on a switch you can slap from where you stand.
- Keep a small square and feeler gauges nearby; they fix little sins before they spread.
- Light passes, more passes. The machine rewards patience more than bravado.
Frequently asked questions we asked ourselves
We’re very good at interrogating our tools and, occasionally, ourselves. Here are the hits.
Can it cut aluminum?
We kept our work to wood and plastics because that’s where the machine is designed to be excellent. While adventurous users may attempt very light aluminum passes on similar machines, it’s not what this unit is built to excel at. We preferred the predictable, clean results in wood and acrylic.
How accurate is it for small parts?
With proper calibration and belt tension, we were within ±0.1–0.2 mm on typical features, which is plenty for woodworking and acrylic assemblies. Careful users can tighten that further with meticulous setup.
Is assembly really under 20 minutes?
Yes. Unboxing adds time, but the assembly itself is fast thanks to pre-assembled major components. If you skip snacks, you’ll finish faster. We didn’t skip snacks.
What software should we start with?
Candle for first cuts, UGS for daily sending, and Fusion 360 for creating CAM toolpaths. If you need to engrave in ways that suit a laser workflow, LightBurn has a friendly interface for that purpose.
How bad is the dust?
Manageable with the baffle and a shop vacuum. MDF demands special attention because it creates superfine dust. We used a dust mask and looked like practical people making good choices.
Do we need to tram the spindle?
It helps. You’ll know by surfacing the spoilboard. If you see ridges, a little tramming goes a long way toward perfecting top surfaces.
What bits should we buy first?
- 1/4-inch upcut for roughing and general contours in wood
- 1/8-inch downcut for clean top edges in plywood/hardwood
- 1/8-inch single-flute O for acrylic
- 60-degree V-bit for engraving and chamfers
That small lineup will cover 80% of what you’ll want to do initially.
A practical table of starter settings and use cases
These conservative starting points gave us pleasant outcomes. Adjust to taste, always with test cuts first.
| Material | Tool | Spindle RPM | Feed Rate | Stepdown | Stepover | Notes |
|---|---|---|---|---|---|---|
| Plywood | 1/4” upcut | 16,000 | 800 mm/min | 1.5 mm | 40% | Blue tape + CA glue or clamps; watch for voids |
| Hardwood | 1/8” downcut | 18,000 | 600 mm/min | 1.0 mm | 35% | Finish pass for polished edges |
| MDF | 1/4” upcut | 16,000 | 900 mm/min | 2.0 mm | 45% | Dust control is essential |
| Acrylic (cast) | 1/8” single-flute O | 12,000 | 900 mm/min | 0.6 mm | 30% | Air/vac assist to clear chips |
| Acrylic (extruded) | 1/8” single-flute O | 10,000 | 700 mm/min | 0.5 mm | 30% | More heat-sensitive than cast |
| Foam | 1/8” upcut | 12,000 | 1500 mm/min | 3.0 mm | 50% | Great for prototypes and patterns |
We repeated test cuts until chip formation, sound, and finish got friendly with each other. Once you find your machine’s sweet spot, write it down where your future self will actually see it.
The small pleasures of a reliable machine
There’s a certain peace that comes from knowing a tool is going to do what you ask without a dramatic subplot. We set up a job, we clamp, we zero, we hit go, and the result looks like what we designed rather than an abstract commentary on our life choices.
We’re not saying it’s meditative, but we did notice our shoulders relaxing when the 4040 PRO got into its rhythm.
Where it surprised us
- Ease of assembly. We planned an afternoon; it took less than a lunch break.
- Acrylic edges. Cleaner than we expected without flame polishing.
- Repeatability. Running multiples felt responsible, not risky.
Where it behaved exactly as expected
- Wood pocketing. Crisp corners, no fuss with the right bit.
- Software compatibility. GRBL with UGS/Candle/Fusion 360 is a well-paved road.
- Maintenance. Short, simple, and predictable.
A few accessories that make life better
You don’t need a shopping spree on day one. But a few extras sharpen the experience.
- Touch plate for Z-zeroing
- Low-profile clamps and cam clamps
- Spoilboard with threaded inserts or T-tracks
- Shop vacuum with a small hose and switch
- Assorted end mills (1/4”, 1/8”, single-flute O, V-bit)
- Dry PTFE lube for the Z leadscrew
- Small square, feeler gauges, and a caliper you trust
We chose function over flash. Everything in that list earns its keep.
Longevity and the rhythm of use
We care about how a machine ages. After repeated projects, the 4040 PRO kept its composure. Belts remained steady with minimal retensioning, V-wheels stayed smooth, and the Z-axis didn’t loosen its personality.
We expect normal wear on consumables like bits and spindle brushes, but there were no ominous squeaks or creeping inaccuracies that signal a machine asking for retirement.
What regular use looks like
- Weekly: wipe rails, vacuum chips, check clamps and cables
- Monthly: check belt tension, verify steps/mm with a quick jog test
- Quarterly: surface the spoilboard if needed, re-square, and smile at a job well done
The consistency gives you permission to take on bigger projects without worrying that the machine will invent new problems midstream.
Value for the money
The 4040 PRO earns its keep by balancing sturdiness, usable power, and a setup time that respects our attention span. When we price a tool, we consider not just the initial cost but the total time we’ll spend creating what we actually care about. This router puts more of that time into making and less into fixing.
You could spend more, of course. You could also spend less and learn the precise cost of flimsiness. We think this model sits at a sweet point for doers who want competence without drama.
What we’d change if we could
It’s a strong package out of the box, but we can imagine a couple of factory add-ons making it even better. A more comprehensive dust shoe as standard would be nice. An optional enclosure kit for noise and chips would also nudge this toward perfection for small shops.
Those are wishes, not complaints. The current setup is honest and functional, and we like machines that meet us where we are.
Final reasoned thoughts
We measure tools by whether they help us finish projects with pride, not whether they can generate bragging rights in a forum thread. The CNC Router Machine, 3-Axis All-Metal with Steel Wheel Engraver Milling Machine, 500W Trimmer & Linear Rail Driven, Working Area 15.75”x15.75”x2.95”, Acrylic Cutting Milling, GRBL Control (4040 PRO) feels like the kind of tool you keep within easy reach because it earns trust quickly and keeps earning it.
We like the all-metal frame. We like the straightforward 500W spindle. We like the independent control box with its grown-up e-stop and home button. We like the 4GB flash drive because it made day one calm instead of chaotic. Most of all, we like the parts it made for us, which looked like the drawings for a satisfying change.
If you want a capable, stable, bench-friendly CNC for wood and acrylic, and you want it to be up and running before your coffee gets cold, this is a very good choice. It’s not about pushing boundaries. It’s about hitting your marks, again and again, until the project that lived in your head sits on your table. That’s what a good machine does: it turns intention into clean, repeatable reality, one careful pass at a time.
Disclosure: As an Amazon Associate, I earn from qualifying purchases.