Have we ever wished we could sign our names in metal the way we sign a receipt—quick, confident, and with a momentary fear that we’re spelling our own name wrong?


The Short Version: What We Found Ourselves Doing With This Laser
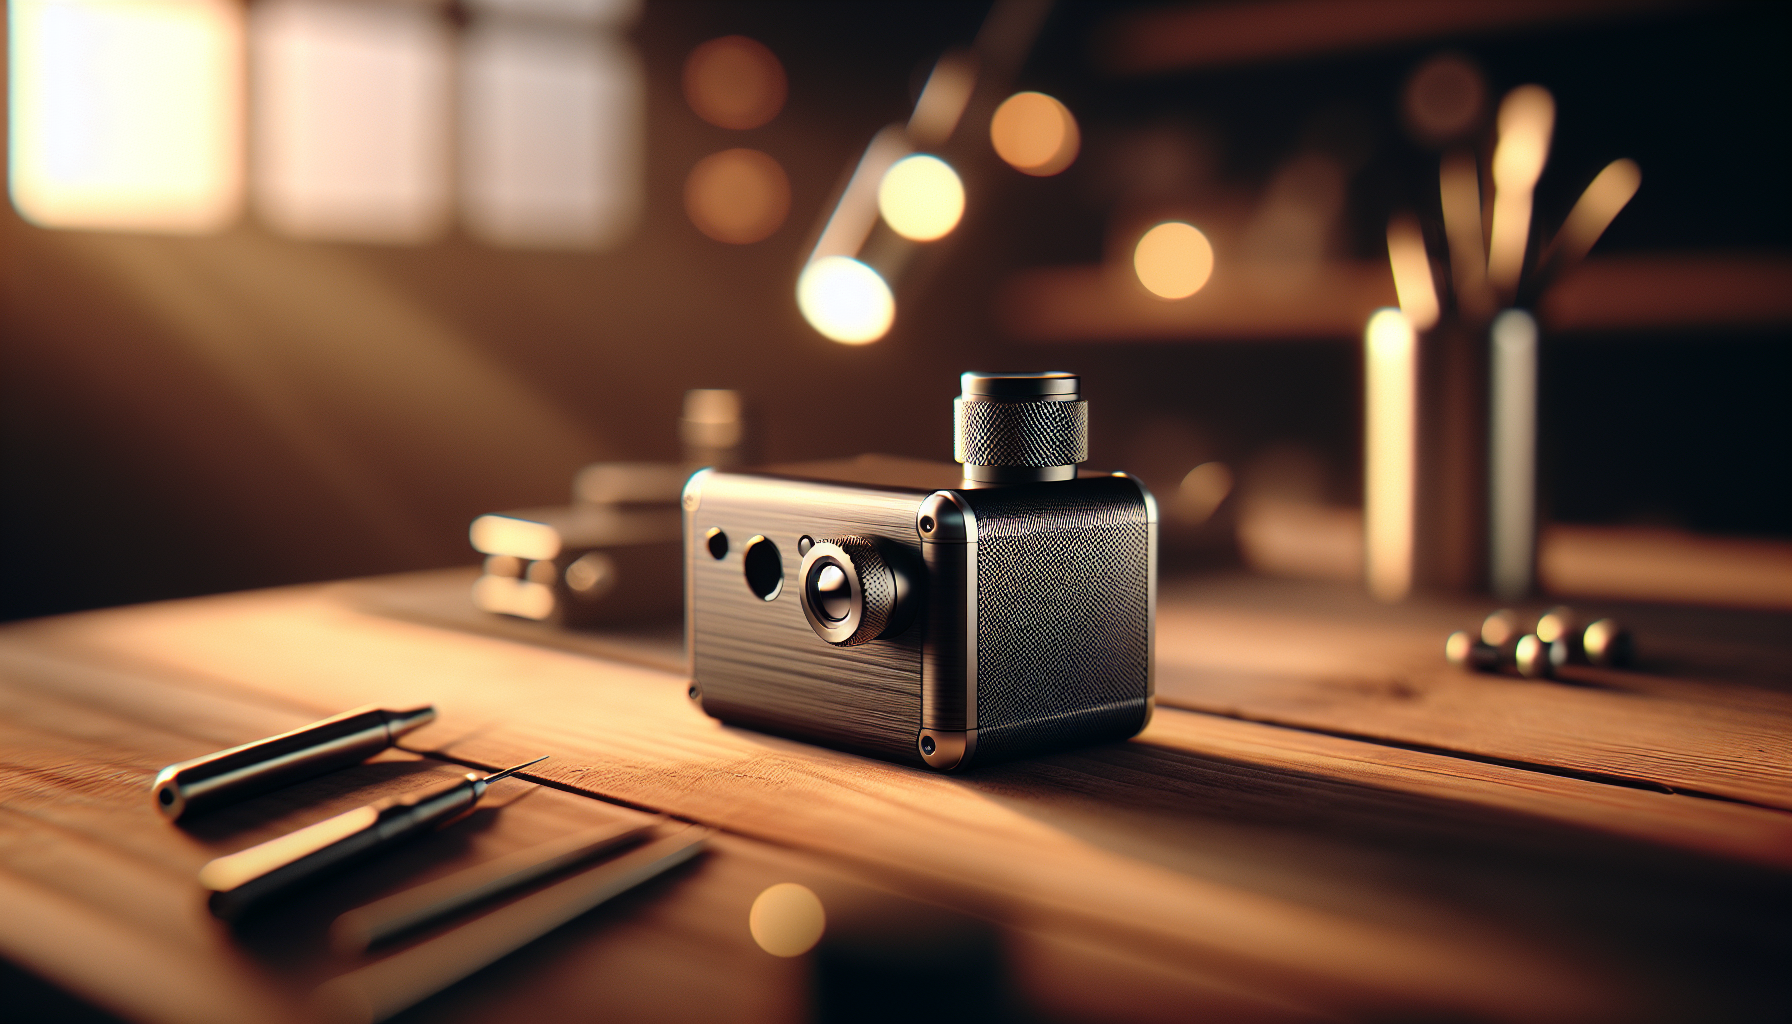
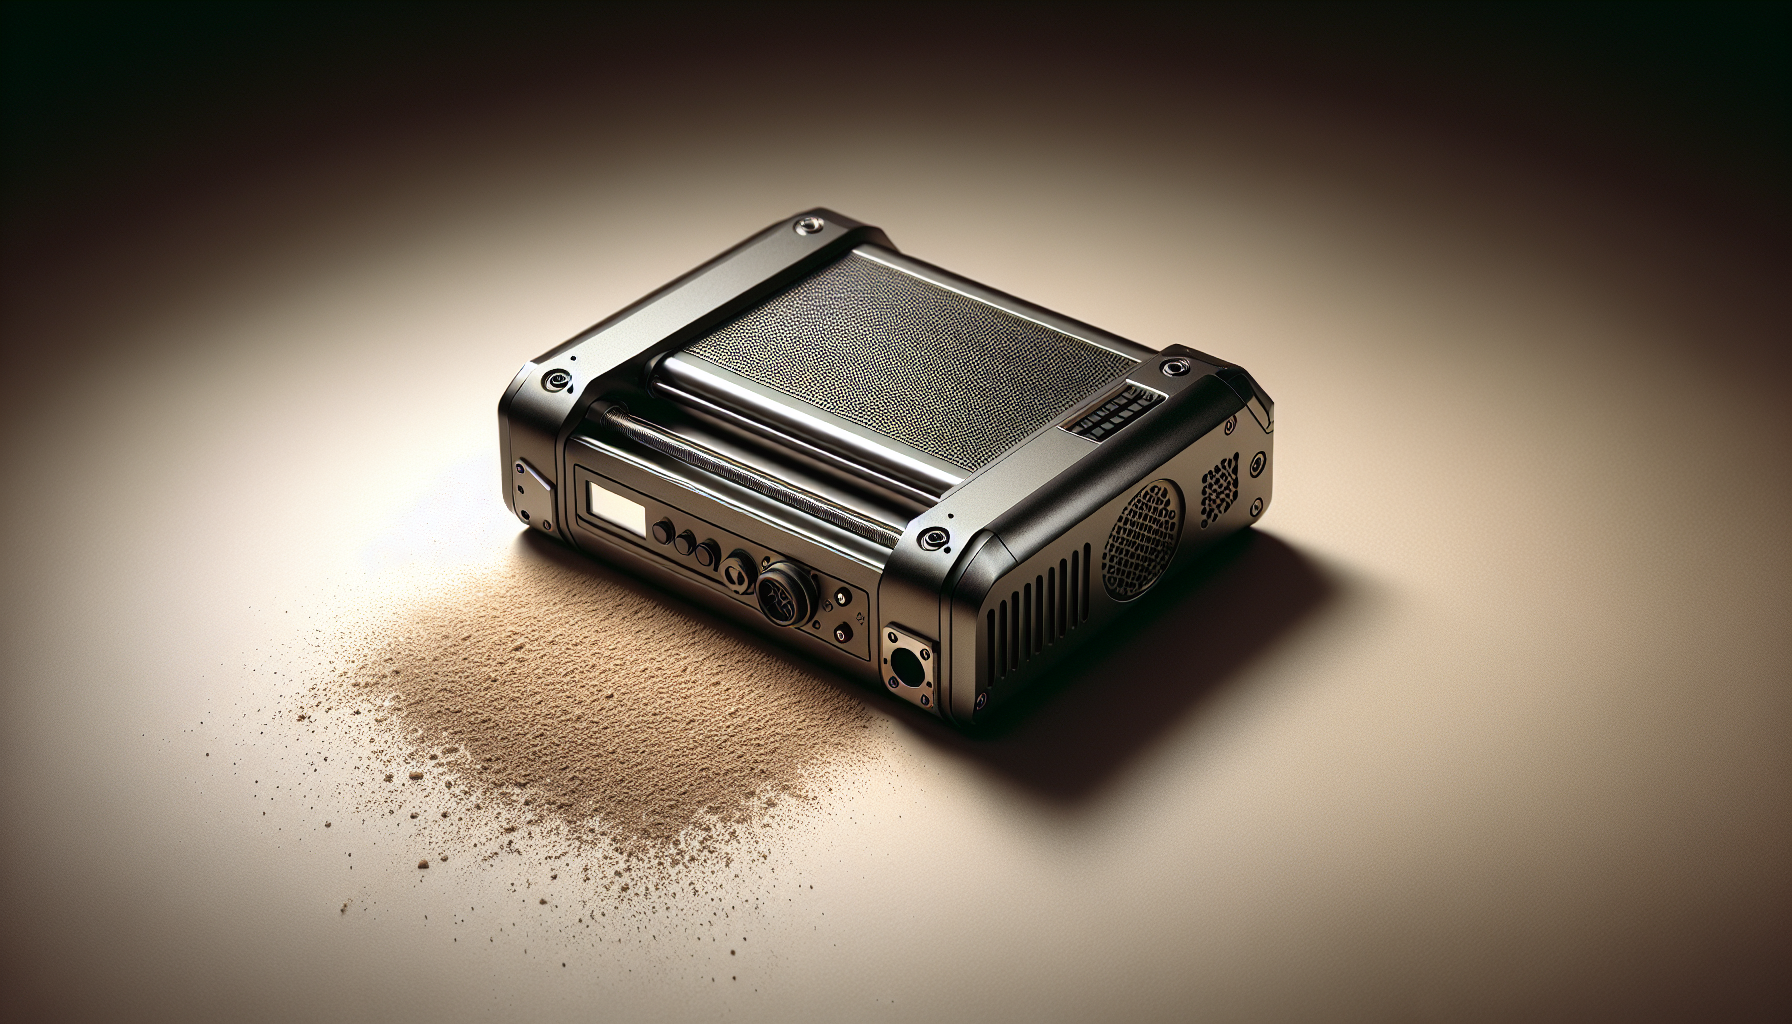
We brought the LYXC 20W Pro Portable Handheld Laser Marking Machine into our workshop expecting a neat engraving gadget and ended up rearranging shelves, suddenly labeling everything that sat still long enough. It’s portable, accurate, and—thanks to the OD4+ protective cover and a Class 1 output at 0.39 mW—surprisingly calm to use. The 1064 nm wavelength and MAX laser source are serious tools in an approachable format. We marked steel tools, aluminum cases, brass tags, and some plastics without the usual drama of mini industrial machines.
If we had to sum up what sets it apart, it’s three things: the distance sensor that stops us from misfocusing; the protective shield that keeps eyes and nerves relaxed; and the consistency that makes our smallest logos look like they were created by a very patient jeweler, not two people who lose pencils inside pockets.

LYXC 20W Pro Portable Handheld Laser Marking Machine with Distance Sensor OD4+ Protective Cover Class 1 Laser Output Power 0.39mW 100 * 100mm Lens Without Battery
What’s in a Name: Model, Power, and Those “20 Watts”
We’ll confess: we were mildly confused at first—“20W Pro” sounds like a tiny star in a box, yet the machine lists a Class 1 output power of 0.39 mW. Here’s the reasonable explanation: the internal marking source is around the 20W class for actual marking performance, but the accessible laser emissions under normal use are kept to Class 1 (0.39 mW) by design. That’s where the OD4+ protective cover and the controlled beam path step in. We get industrial-grade marking results while the outside world stays safe and uneventful.
Key Features We Kept Coming Back To
- OD4+ laser protective cover with wide viewing area
- Distance sensor model for accurate object detection and focus
- Infrared locator for precise positioning
- MAX laser source for stable output and clean marks
- 100 x 100 mm lens (compact, versatile marking field)
- Integrated lighting and exhaust fan
- Class 1 output (0.39 mW) and a 1064 nm wavelength
- 0.03 mm line width and 0.01 mm repeat positioning accuracy
- 110–220 VAC input, 145–250 W power consumption
- Operates from 0–40°C
- Portable handheld form factor, without battery
Specification Breakdown
We love a spec list, but we love it more when it’s translated into real-world meaning. Here’s the quick read.
| Spec | What It Means for Us |
|---|---|
| Laser class & output: Class 1, 0.39 mW accessible output | Safe to use as intended with protective cover; the internal marking capability is still powerful, but external emissions are contained. |
| Wavelength: 1064 nm | Works especially well on metals and many engineering plastics; the “fiber laser” territory most shops rely on for permanent marks. |
| Marking field: 100 x 100 mm lens | Big enough for logos, QR codes, and serials on panels, tags, tools, and jewelry. Compact for handheld stability. |
| Line width: 0.03 mm | Fine detail—tiny fonts, hairline vectors, sharp edges that don’t fuzz or smear. |
| Repeat positioning accuracy: 0.01 mm | Consistency for multi-part runs; we don’t have to babysit alignment with every piece. |
| Power consumption: 145–250 W | Reasonably efficient for a pro-grade marker; won’t trip normal circuits. |
| Input voltage: 110–220 VAC | Global-friendly; no transformer drama for standard sockets. |
| Operating temp: 0–40°C | Typical workshop range; no need to coddle it, but also not a polar expedition companion. |
| Protective cover: OD4+ with illumination and exhaust fan | Reduced laser exposure, clear view of the work, and improved air quality around the mark area. |
| Positioning: Infrared locator + distance sensor | Quick focus and alignment; cuts down on trial marks and ruined blanks. |
| Battery: Not included | Portable but plug-in; plan for an outlet or a proper inverter if you insist on field use. |
| Materials: Metals & non-metals (steel, aluminum, brass, plastics, leather) | Versatile enough to handle the main things we label, brand, and personalize. |
Build and Design: A Compact Tool That Acts Like a Serious Machine
The chassis feels purpose-built for handheld use: solid but not brick-heavy, balanced enough to keep our wrists from inventing new yoga poses. The working head is tidy, with the protective cover doubling as a kind of safety helmet and panoramic face shield. The integrated lighting isn’t a gimmick; it helps us see edge detail and surface texture so we can position the mark where it belongs, not where we remembered it being before coffee.
The OD4+ Protective Cover: A Calm, Green-Tinted Window to the World
We’re used to the usual mess of safety goggles that never fit, fog at inconvenient times, and always seem to be in another room during an emergency. Here, the OD4+ protective shield cuts laser radiation by a factor of 10,000 at the operating wavelength, without turning the workspace into a haunted cave. We can watch the marking process through a wide window, and the lighting helps us keep sight lines intact. It’s a considerate design choice that makes the machine feel civilized.
Safety note from us to us: we still keep protective eyewear near the bench, and we don’t let curious visitors lean into the action. Class 1 means safe during normal use—so we keep usage normal.
Distance Sensor and Infrared Locator: Our New Favorite Check-and-Balance
We were skeptical about a distance sensor. We’ve used focus jigs and shims, and there’s a certain pride in getting focus by “feel.” The sensor politely put that to rest by just being right, every time. Combine it with the infrared locator, and we can park a logo on a curved handle or line up a QR code on the flattest patch of a cast aluminum housing without constant trial marks. The system quietly boosts our confidence, and no one needs to know how necessary that is.
The Exhaust Fan: A Breath of Relief
Some plastics release fumes that smell like old electronics having an existential crisis. The built-in exhaust doesn’t pretend to replace a proper fume extraction system, but it seriously helps by clearing the view and nudging particulates away from the work zone. Our recommendation: keep a proper fume extractor or external ventilation nearby for plastics and leather, especially if we’re running longer sessions.
Setup and Operation: Plug, Position, Mark, Repeat
Setup was not an odyssey. We plugged it into a standard outlet, placed it on a stable surface, and gave it a test run with some scrap aluminum. The machine’s rhythm quickly made sense: hold and position, let the distance sensor confirm focus, adjust the alignment with the infrared locator, and fire the job. The beam does its clean, clinical thing while we watch the protective cover glow slightly and the engraving appears like a secret message developing in a darkroom.
Power and the Absence of a Battery
We’ll call this portable in the practical sense: it’s a compact, grab-and-go unit we can carry between benches or take to a client shop as long as there’s power. It’s not a battery device, and we didn’t miss that—batteries add weight, maintenance, and charging rituals, and honestly, we’re mostly near outlets. If field work is our reality, a good quality inverter or generator with clean output can be our friend, but we plan that intentionally.
Workflow and File Prep
We found it friendliest to prep vector graphics and QR codes in our usual design software, then send clean line art for marking. The machine supports common industrial mark types—serials, barcodes, QR codes, and logos. For photos, we’re realistic: 1064 nm fiber-based marking shines with vector line art and dithering patterns on metals. We keep images high-contrast and simplified for the best results.
If we’re marking part numbers or serialized codes, we standardize font choice and size early. The 0.03 mm line width makes tiny type legible, but resist the temptation to go sub-ant-sized unless we enjoy squinting and pretending it’s fine.
Positioning and Focus Rituals, Minus the Ritual
With the distance sensor handling focus, our main job is to square our workpiece and align graphics. The infrared locator makes that straightforward. For irregular objects, we often prop them up with a stable jig or soft vise. A simple tip we learned fast: make a habit of previewing the mark boundary (if the workflow supports it), then fire the job. The preview keeps us from tattooing the wrong side of a tray and then inventing a backstory.
Performance: What the Marks Actually Look Like
Here’s where the LYXC 20W Pro stands taller than its frame suggests. The MAX laser source outputs with a stability that shows up in uniform line density, crisp edges, and consistent depth across a surface. We can cut hair-thin lines and still end up with marks that read cleanly when scaled down. In metals, the effect has that nice satin quality—like a good pen line that doesn’t bleed.
Line Width and Tiny Fonts
We tested micro text, logo outlines, and fine hatching. That 0.03 mm line width let us render line art on a stainless plate that looked like a miniature architectural plan—the sort critics could annotate if they were very small or very dedicated. Our logos at 6–8 points remained legible on flat metal, and we didn’t need to cheat by switching to embossed styles.
Repeatability and Batch Consistency
With 0.01 mm repeat positioning accuracy, small runs maintain alignment. We batch-marked a set of aluminum parts with sequential codes and saw consistent placement across all of them. Comparison by eye was boring—in the best way. If we’re running simple fixtures, the machine plays nicely with them, making it easy to go beyond one-offs.
Speed and Practical Throughput
We weren’t racing the clock, but the throughput felt professional. We could do several small labels or codes per minute once positioned, and that included sensible breaks to clear out fumes between cycles. The exhaust helps keep things visual mid-mark, but we like to move completed pieces aside rather than risk stacking them near the working head like we’re building an altar to poor decisions.

Materials: What We Marked and What We Learned
- Stainless steel: Clean, high-contrast marks. With parameter tuning, we can nudge from dark engraving to lighter tonal effects. Certain alloys may permit color-tinting, but we treat that as a specialty trick, not a guarantee.
- Aluminum: Good clarity, especially on anodized aluminum where contrast pops. Bare aluminum marks cleanly with a bright/frosted look depending on settings.
- Brass: Crisp outlines, pleasing tone. We like it for tags and jewelry accents.
- Plastics: Many engineering plastics mark well, but we always test—especially for fumes. Some plastics produce odors that have us bargaining with the universe. Ventilation matters.
- Leather: Marking worked for branding and decorative logos, but we treat it as a light-touch material. We prefer test scraps first to dial in the look and avoid charring.
If the material reflects like a mirror, we angle it slightly or scuff lightly in an inconspicuous area. Nothing dramatic—just enough to keep the beam’s reflection from getting smug.
Safety and Sanity: Why the Design Choices Matter
Lasers can either make us feel like we’re handling the future, or like we need to fill out a questionnaire about our life choices. This unit keeps the ratio in favor of the future.
Class 1 Means… What, Exactly?
Class 1 is the safest classification for a laser system under normal operation. The accessible emission is 0.39 mW, which is below the threshold for retinal injury in typical viewing conditions. The protective cover, beam path, and interlocks are the heroes here. Our job is to keep things normal—use the cover, don’t bypass safeguards, and don’t stare into beams like we’re seeking enlightenment.
The OD4+ Protective Shield: Comfort and Clarity
OD4+ means optical density 4 or greater at the operating wavelength, which cuts down the laser’s energy reaching our eyes by a factor of at least 10,000. We’re not trying to turn this into an optics lecture; we just like that we can see what we’re doing without the emotional burden of imagination. The integrated lighting keeps the surface readable, and the exhaust pushes particulate away from our sight line.
Fumes and Air: Please Vent
Metal marking generates less fuss than plastic, but anything organic or polymer-based can release fumes we’d prefer not to breathe. The onboard exhaust is a helper; it’s not the only plan. In our space, a fume extractor and general ventilation make life better and noses less opinionated. For leather and plastics, ventilation is non-negotiable.
Noise, Heat, and Power: The Ambient Truth
Noise is present but not obnoxious—mostly fan noise and the hint of a high-frequency whine we’ve learned to interpret as “working.” Heat management is sensible; the unit doesn’t get scalding, and the exhaust helps keep things stable. Power consumption between 145–250 W makes it workshop-friendly, even alongside lights and a computer. If we’re determined to run it off a generator, we keep that generator clean and stable; lasers like good manners in their power supply.
Portability: Handheld, Yes; Pocket, No
The “portable handheld” tag is accurate. We can carry it, maneuver it, and use it on objects that would be awkward to bring to a benchtop unit. We like it for large panels, installed equipment, and those times a client refuses to send us the thing we need to mark. It’s also stable enough for tabletop work when the object fits under the cover neatly.
The only wrinkle is the absent battery. We don’t mind the cord, but we plan our routes so we’re not tripping, dancing, or inventing new choreography. A tidy cable path is our gift to future ankles.
Applications We Actually Enjoyed Doing
We can talk about part numbers and QR codes all day, and we do, but there’s also a small thrill in putting a tiny logo on a screwdriver and pretending we’re a bespoke tool house.
Manufacturing and Tools
- Serial numbers engraved on machined aluminum parts
- QR codes for asset tracking on stainless plates
- Company logos on tool bodies (because tools should know where they belong)
- Safety labels on brushed steel enclosures
Results were crisp and permanent, and the consistency meant we could match one batch to the next without playing forensic scientist.
Jewelry and Gifts
- Monogramming on brass tags
- Small symbols and quotes on steel pendants
- Simple line art on anodized aluminum charms
We used thin fonts and careful power levels. The fine line width kept everything looking intentionally delicate rather than accidentally timid.
Plastics and Panels
- Control panel labels on ABS housings (ventilation on, please)
- Branded marks on plastic cases
- Dataplates on laminated materials
We test each plastic composition, note fumes, adjust power and speed, and keep the exhaust in play. The OD4+ cover earns its keep again here by keeping the mark visible while we work.
A Word on Software, Files, and Good Habits
We keep vector files clean and scaled to actual size before sending them to the machine. Fonts are outlined; lines are closed. For QR codes and barcodes, we generate them at the size they’ll be marked, then test-scan before committing to the real piece. It’s remarkable how something that looks fine onscreen becomes a smudge in real life if the pattern density falls outside the scanner’s comfort zone.
For multi-part jobs, we create a simple naming convention and keep parameter presets labeled by material. “Alu_Anodized_MediumContrast” beats “That Setting That Worked That One Time.” Our future selves appreciate us when we do this, and they’re surprisingly vocal about it.
Maintenance and Care: Keeping It Friendly
- Keep the protective cover clean; smudges are not helpful when we’re trying to align tiny text.
- Periodically dust the vents and keep the fan path clear.
- Store the unit where it won’t collect the workshop’s entire pollen count: dry, stable temperature, and not underneath anything that might fall and decide to “collaborate.”
- For the lens and optics, we follow manufacturer guidelines. We don’t touch optics with bare hands or a mystical sense of intuition.
If something sounds wrong, smells wrong, or looks wrong, we pause. The machine doesn’t demand constant attention, but it responds well to considerate care.
Where This Machine Shines, Without Hyperbole
- We need portable, accurate marking on metals and compatible plastics.
- Safety is a priority, and we don’t want to suit up like astronauts.
- We value fine lines and small details—logos, tiny fonts, delicate patterns.
- We need to do short runs with repeatable placement.
- We prefer a tool that respects eyesight, lungs, and power bills.
Potential Limitations and Honest Expectations
- The 100 x 100 mm field is generous for marking but not for mural-sized designs. Large artwork will need tiling or creative layout.
- The unit is portable but tethered—there’s no battery. Field use requires power planning.
- Fume management is “assisted” not “solved”; for plastics and leather, we plan real ventilation.
- Mirror-polished surfaces can be fussy without a small tilt or surface prep.
- Photographic images can be done with dithering, but this isn’t a photo printer; vectors are the home turf.
Real-World Value: Where the Money Goes
Money follows reliability here. The MAX laser source gives stability; the OD4+ cover and Class 1 design reduce risk; the distance sensor and infrared locator save time and materials we’d otherwise ruin. If we do any amount of product marking, tool ID, or part labeling, the consistency alone pays dividends. And the peace of mind is worth more than it sounds like on paper.
We used to pad marking estimates for “setup, alignment, and miscellaneous fiddling.” After moving to this unit, that buffer shrank. We felt a little smug and immediately worried about jinxing it, like washing a car before it rains. It kept doing its job anyway.
Good Practices We’d Tell Our Best Friends
- Test on scrap first. Always. Even when we’re sure.
- Ventilate, especially for plastics and leather. Our sinuses will write us a thank-you note.
- Keep a simple jig kit: soft jaws, V-blocks, and a few shims.
- Outline your fonts in vector form and keep a template library for common parts.
- Use preview passes. A brief preview is faster than apologies to the boss, the client, or ourselves.
- Label parameter presets by material and finish. Organization does not stifle creativity; it simply stops us from repeating last week’s mistakes with flourish.
Who It’s For
- Small manufacturers and job shops that need clean marks on metal
- Repair technicians and installers who mark in place
- Makers and studios producing jewelry, tools, knives, and custom gifts
- Labs and workshops needing asset labels and serialized parts
- Anyone who appreciates accuracy and safety in a portable footprint
Who Might Want Something Else
- Those needing an oversized marking field for large panels in one pass
- Ultra-mobile operators who must mark without any access to power
- Users dedicated to heavy plastics marking without additional fume control
- Anyone expecting a photo-realistic engraver for images on every material
A Few Scenarios We Loved
- Marking a batch of stainless steel spatulas for a restaurant that swears kitchen tools vanish unless you label them like endangered species.
- Adding small QR codes to aluminum housings that link to digital manuals—no more guessing which firmware belongs where.
- Branding brass luggage tags with line-art logos that made us feel like we run a century-old travel company with pleasingly creaky floors.
- Serializing shop tools so they stop “visiting” other benches. The marks have a way of reminding people to return things. Like parentheses for the conscience.
Troubleshooting Without Tears
- Mark looks faint on aluminum: Nudge power up or slow the speed a bit; consider multiple passes at moderate settings instead of one aggressive pass.
- Lines look wider than expected: Double-check focus (distance sensor should help); make sure the surface isn’t wobbling or vibrating.
- QR code won’t scan: Increase size slightly, simplify the content, and ensure good contrast. Test on the intended scanner, not just our phone.
- Excessive haze or smoke near the mark: Increase ventilation; adjust exhaust direction; reduce power or increase speed if the material overheats easily.
- Slight ghosting or offset: Confirm the workpiece is stable; clamp if needed. Double-check that we’re not bumping the unit mid-mark.
Environmental and Safety Notes We Keep in Mind
- We responsibly dispose of any residues or filters in line with local regulations.
- We treat unknown plastics as potentially hazardous until proven otherwise.
- We don’t operate the unit around reflective clutter or random jewelry that wants to reenact a disco ball.
- We keep pets, kids, and chatty visitors outside the work area during marking. The machine is a professional tool, not a spectator sport.
Pros and Cons
Pros:
- Class 1 operation with 0.39 mW accessible output and OD4+ shielding keeps use calm and controlled
- Distance sensor and infrared locator simplify positioning and focus
- MAX laser source delivers reliable, crisp results on metals and many plastics
- Fine line width (0.03 mm) and repeat accuracy (0.01 mm) make tiny details achievable
- Integrated lighting and exhaust improve visibility and comfort
- Portable handheld design that doesn’t feel like a compromise
Cons:
- No battery—portable but power-dependent
- Fume management is assisted, not fully comprehensive
- 100 x 100 mm field requires tiling for larger designs
- Reflective surfaces may require slight angling or prep
- Photo engraving on mixed materials isn’t its star role
The Intangible: How It Changed Our Daily Work
Before this machine, the conversation around marking often devolved into sighing. Now, it’s closer to a planning session. We think about where we want marks to live, not whether we can pull them off. That’s a big shift for a compact tool. The built-in safety features lower the background anxiety, which, it turns out, is excellent for getting things done and not giving up halfway through a batch because faint marks ruined the mood.
We also noticed we were kinder to our own work. It’s easier to respect the edges of a design when the tool respects them too. A logo that looked fussy in our minds came out elegant on brass. A tiny serial code looked professional, not like a guilty confession.
Final Take
The LYXC 20W Pro Portable Handheld Laser Marking Machine with Distance Sensor, OD4+ protective cover, Class 1 output, and a 100 x 100 mm lens is a steady, capable companion that punches well above its weight in clarity and safety. It takes the right things seriously—eyes, air, alignment—and leaves us free to focus on the mark itself. We found ourselves trusting it quickly, which is not something we say about tools that could theoretically write on steel.
If our work involves permanent marks on metals and compatible plastics—logos, serials, QR codes, part IDs—this is the kind of machine that makes a shop feel more put together. It doesn’t demand heroics, and it does what it says with a minimum of drama. We still do our part with ventilation, careful prep, and a healthy respect for the beam. In return, it gives us crisp lines, confident positioning, and the quiet satisfaction of knowing our tools now carry our name a little better than we carry our pens.
Disclosure: As an Amazon Associate, I earn from qualifying purchases.