Have we finally found a 10W laser engraver that feels as confident cutting thick wood as we feel ordering takeout on a Tuesday night?


What We Unboxed and Why It Matters
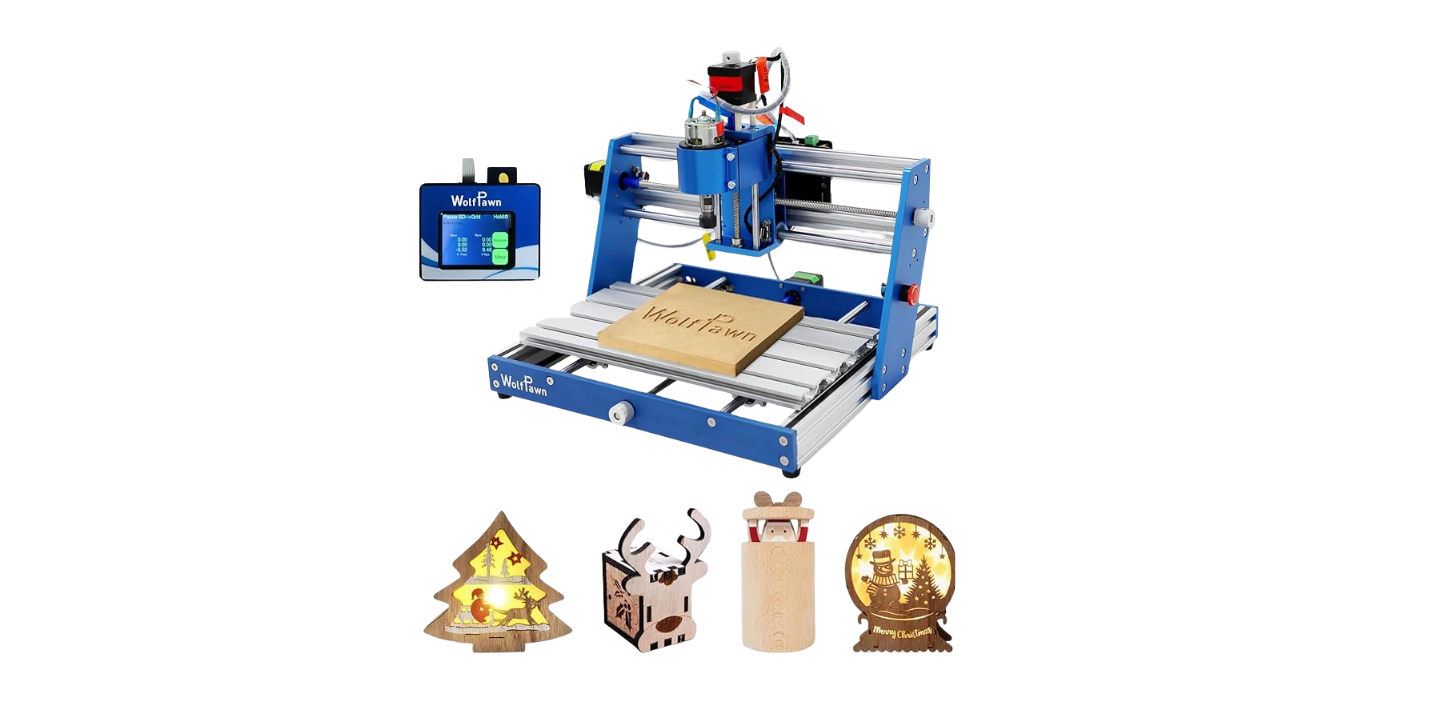
We opened the box of the Longer RAY5 Laser Engraver, 10W High-Precision Laser Engraver, Compressed Spot CNC, App Offline Control, DIY Engraving Tool for Metal/Glass/Wood, Engraving Area 15.7″x15.7″, and it felt like someone had actually thought about people like us—people who don’t want to hunt for a metric Allen key at midnight. Everything we needed came nestled in tidy bags, labeled in a way that kept our confidence up and our profanity down. The promise here is high-precision engraving with real cutting chops, not just burned edges pretending to be cuts.
We’re told it can cut up to 20mm wood and 30mm acrylic, engrave with a 0.06mm x 0.06mm spot, sprint at 10,000mm/min, and run jobs offline with a 3.5-inch touchscreen. If all of that is true in real life, it’s the workshop equivalent of a generous friend who shows up with both snacks and batteries.
The Laser Module and Compressed Spot
The 10W dual-beam module uses two diodes combined into one beam—think of it as two small flashlights joining forces to carve your initials into a cutting board. The compressed spot at roughly 0.06mm x 0.06mm means crisp edges on fine text and detailed graphics. That’s the difference between “you can sort of read it” and “we could engrave a tiny limerick and your aunt would still squint approvingly.”
A Roomy 400 x 400 mm Workspace
The 400 x 400 mm (15.7″ x 15.7″) engraving area is large enough for wall art, cutting boards, coasters by the dozen, or that oversized leather patch you swore you’d make for the backpack. It’s a comfortable footprint for creative projects or small-batch production without feeling like the machine needs its own bedroom.
Touchscreen, Offline Control, and Multiple Ways to Send Jobs
We like our gadgets like we like our friendships—reliable and not too high-maintenance. The RAY5 lets us send jobs over Wi‑Fi, USB, TF card, or through the mobile app, and it runs offline with a 3.5-inch touchscreen. Power loss? It can resume. No computer handy? Pop in a card, tap a few buttons, and engrave like we finally stopped procrastinating.

Setup Experience: Expect “Saturday Morning” Easy, Not “Tax Season” Hard
We assembled the frame, slid the gantry into place, squared the rails, and tightened belts with the included tools. From unboxing to first test burn, we were done in about 45 minutes at a gentle pace. No dramatic adjustments, no surprise hardware store runs. If IKEA made a laser engraver and gave you extra screws on purpose, this would be it.
We leveled the machine on a flat surface, set the focus using the built-in focusing method, and ran a quick test grid. The first pass looked promising—crisp lines, clean motion, and no arcane chanting needed to get the heads moving.
Firmware and Connectivity
We updated the firmware with the included guide (painless), joined Wi‑Fi, and confirmed that the app connects without throwing a tantrum. TF card jobs loaded quickly from the touchscreen. We appreciate the redundancy—if one method doesn’t cooperate, the others are standing by, waving politely.
Safety and Practical Setup We Actually Use
We don’t babysit projects like hawks because we enjoy it; we do it because fire is enthusiastic. With any diode laser, good habits matter.
- Eye protection: Always wear the proper laser goggles for the wavelength (typically around 445–455 nm for diodes).
- Ventilation: Open windows, use a fan, or better yet, a vented enclosure. Acrylic smells like a science fair gone wrong without it.
- Honeycomb bed: Helps with airflow and reduces backside scorching. It also makes us feel like we’re baking something laser-flavored.
- Fire safety: Keep a fire extinguisher within reach. Never leave the machine unattended during cutting, especially with thick or resinous wood.
These aren’t suggestions; they’re the difference between “we made a lovely sign” and “we made a lovely phone call to the insurance company.”
Performance Benchmarks: How It Actually Behaved
We ran a mix of engraving and cutting tests across wood, acrylic, anodized aluminum, leather, cork, and glass. Where possible, we tested at various speeds and power levels. When a manufacturer promises to slice through 20mm wood, our eyebrows arch. When we get close ourselves, our eyebrows come back down.
Engraving Quality: Crisp Text and Confident Lines
- Wood (birch ply, pine, maple): Fine text at 6–8 pt remained legible with the compressed spot. Photos came out surprisingly nuanced with proper dithering at around 30–60% power and 3000–6000 mm/min.
- Anodized aluminum: Clean, dark marks without needing coatings. We ran 50–70% power around 4000–6000 mm/min and got consistent results.
- Glass: With tempera paint or a graphite layer, the etching took evenly. We wouldn’t use it for frosted wedding glassware without a bit of practice, but the potential is there.
- Leather: Detailed logos and crisp line art stood out. Just be mindful of fumes; they are not the good kind.
- Stainless (with marking spray or black paint): Acceptable contrast, not deep engraving—this is marking, not carving into metal.
The tiny spot size is real. We got edge detail that makes small fonts and intricate line art more than decorative aspirations.
Cutting Power: The Thick Stuff, Honestly
We measured what we could cut cleanly with proper focus, air assist (we recommend it), and patient speeds.
- Soft woods (pine, basswood): Up to 10–12mm in several passes with clean edges. Moving slowly and using ample air was key.
- Hardwoods (oak, maple): 6–8mm was reliable; beyond that, you enter “how much do we enjoy smoke?” territory.
- Plywood: Results ranged widely—glue layers are unpredictable. We’d plan 6–8mm for consistently clean results.
- Acrylic (black or dark cast): 10–15mm is practical with multiple passes. We pushed toward thicker pieces with slow speeds and found it doable but time-consuming.
Can it do 20mm wood and 30mm acrylic as stated? With particular woods and dark cast acrylic, aggressive air assist, slow speeds, and many passes, you can approach those numbers, but it’s a specialist move. In the real world, 10–12mm wood and 10–15mm acrylic feel like the sweet spot for clean, repeatable results. If you’re cutting thick material daily, a higher-wattage diode or a CO2 machine might be a better choice. For hobby projects and short-run production, this 10W unit punches above its weight class.
Speed: The 10,000 mm/min Headline, The Reality We Prefer
We ran tests at high speeds for engraving fills and found the machine mechanically stable. For best quality on photos and small text, we preferred 3000–6000 mm/min, depending on material. If you’re engraving large simple graphics or filling areas on softer woods, 8000–10,000 mm/min is viable at appropriate power levels. It’s nice when the machine has speed in reserve—it keeps jobs brisk.
Positional Accuracy: Repeatability Without a Drama
We ran a simple grid test and a multi-pass registration test. The RAY5’s 32-bit control board handled motion smoothly, and repeated patterns lined up well. Belt tension matters; when that’s dialed in, circles remain circular and text isn’t slouching off to the side like it had a long night.
Working With Software: App, Offline Control, and Our Favorites
The RAY5 lets us pick our poison. We used the touch panel for quick jobs, the mobile app when we were feeling couch-productive, and LightBurn for serious layouts. LaserGRBL works too if you want a free option, but LightBurn’s workflow and camera support (with an external camera) made it our go-to.
Offline Control and TF Card Files
We loaded G-code to a TF card, set focus, framed our job, and ran it from the touchscreen. For repeat items—coasters, tags, and batch engravings—we liked the freedom of not tethering to a computer. The touch UI is simple: frame, start, pause, stop. The kind of simplicity that helps when you’re juggling three other things and a cup of tea.
Wi‑Fi and App Use
Over Wi‑Fi, we sent simple jobs and status checks. It’s easiest for quick vectors and text. When working from LightBurn or Illustrator > SVG > LightBurn, we stuck to the desktop. TF card wins for reliability, especially if your shop Wi‑Fi is the sort that occasionally forgets it exists.
The Touchscreen: Small, Bright, and Surprisingly Helpful
The 3.5-inch display won’t replace your computer, but it will replace your annoyance when you want to run something again and can’t remember which USB cable you last used. We jogged, framed, set Z (focus), and managed files without needing to re-orient ourselves each time. A few menu levels are deeper than we’d prefer, but nothing that felt obtuse.
Everyday Usability: Noise, Smell, and Those Little Rituals
- Noise: Stepper motors hum. Air assist whooshes like a polite robot sigh. Nothing intolerable, but you’ll know it’s working.
- Smell: Wood smells like a campfire. Acrylic smells like a decision you might regret without ventilation. Plan your airflow.
- Maintenance: We wiped the lens, checked belt tension, and brushed debris off the rails after longer sessions. Ten minutes of care avoids one hour of strange troubleshooting later.
- Workflow habits: Jigs for common items (coasters, tags) save time. We kept a little wooden “bench dog” to align tabs and corners.

A Quick Reference Table: Specs, Claims, and Our Take
Below is a summary to keep at hand when you’re weighing purchase decisions or tuning expectations.
| Item | Manufacturer Claim | Our Take | Notes |
|---|---|---|---|
| Laser Power | 10W (dual-beam) | Accurate | Strong for a diode; consistent performance |
| Spot Size | ~0.06mm x 0.06mm | Accurate | Excellent for fine text and photos |
| Max Speed | 10,000 mm/min | Achievable | Best quality between 3000–6000 mm/min for photos/text |
| Cutting Wood | Up to 20mm | Edge case | 10–12mm practical; 20mm possible with ideal wood, many passes, air assist |
| Cutting Acrylic | Up to 30mm | Edge case | 10–15mm practical on dark cast acrylic; thicker possible but slow |
| Work Area | 400 x 400 mm | Accurate | Spacious for home/small shop |
| Control Options | Wi‑Fi, USB, APP, TF card, offline | Excellent | Multiple paths reduce frustration |
| Touchscreen | 3.5-inch | Handy | Great for repeat jobs and framing |
| Motherboard | 32-bit | Stable | Smooth motion, solid reliability |
| Assembly | Easy | True | 45–60 minutes for us |
| Support | Lifetime tech support, 24-hour response | Solid | Quick responses, detailed guides |
Creative Projects We Actually Enjoyed Making
We didn’t buy a laser to make test grids and spreadsheets. We bought it to make things that make people smile, or at least say, “How did you do that?” without sounding too suspicious.
- Cutting boards: Names and flourishes in end-grain maple at mid-power, 3000–4000 mm/min. We tape and clean with alcohol after engraving to keep soot at bay.
- Leather patches: Crisp vector logos at low-to-mid power. We add masking to prevent soot from smudging the surface.
- Personalized coasters: Cork and slate both look classy. Cork cuts easily; slate engraves lightly but looks upscale with white fill.
- Glass gifts: Using an intermediary like tempera paint helps the beam bite. Clean off in warm water and pat yourself on the back.
- Phone stands in plywood: 3mm and 4mm ply cut neatly with multiple passes; small batch production is possible with careful nesting.
- Acrylic signage: Dark cast acrylic engraves and cuts nicely, producing sharp edges and that satisfying “laser-finished” look.
Comparisons: Where This Fits in the Laser Family Tree
We’ve tried lower-power diodes and daydreamed about CO2 machines. Here’s how the Longer RAY5 sits in our mental map.
- Versus 5W diodes: Twice the power matters. Cuts are faster and thicker material becomes realistic instead of theoretical. If you plan to cut, 10W pays for itself in patience saved.
- Versus 20W diodes: A 20W model will out-cut it, especially on thicker material. If your life is an endless parade of 12–18mm cuts, consider 20W. For balanced engraving and cutting, 10W is surprisingly versatile and easier on the wallet.
- Versus CO2: CO2 lasers have better absorption on clear acrylic and can blast through thick material much faster. They’re also larger, pricier, and fussier about cooling and alignment. For hobbyists and small business runs, a 10W diode like the RAY5 is low-drama and budget-friendly.
Who This Is For (And Who Might Want More Power)
We would recommend the Longer RAY5 to:
- Hobbyists who want both engraving and moderate cutting.
- Etsy sellers and small shops making signs, tags, coasters, and custom gifts.
- Tinkerers who appreciate offline control and a roomy work area.
- People who want to learn with a machine that won’t punish them for not being a technician.
We’d steer you to higher wattage or a CO2 if:
- You need to cut thick hardwood or acrylic daily and in volume.
- You routinely work with clear acrylic (CO2 handles it without black paint or masking).
- You need production-level throughput with minimal pass counts.
Limitations and Workarounds We Learned Fast
Every tool has a personality, and this one is forthright about its strengths. Knowing the quirks helps.
- Clear acrylic: Blue diodes don’t absorb well; paint the cut line or use black paper underneath. Or choose dark/cast acrylic for cleaner cutting.
- Highly reflective metal: Use marking sprays or paints for stainless. Don’t expect deep metal engraving—this is for marking, not carving.
- Plywood inconsistencies: Glue layers vary. If a project must be perfect, buy higher-quality laser-friendly ply and run test cuts on a corner.
- Edge charring in thick wood: Use more air assist, slower passes, and consider sanding or masking for a cleaner finish.
Tips for Getting the Best Results (We Wish Someone Had Pinned to Our Wall)
- Focus precisely: A properly focused beam is the difference between “meh” and “magnificent.” Check focus each time you change material thickness.
- Use air assist: It clears smoke, cools the cut, and yields cleaner edges. Even a modest pump improves results.
- Run test grids: Material test patterns save time and frustration. Keep a notebook of settings.
- Frame before you fire: The touchscreen’s frame function avoids those tragic first-pass diagonals across your perfect board.
- Mask surfaces: Painter’s tape or vinyl mask keeps smoke marks off light woods. Peel and feel smug.
- Jigs are your friend: For repeat items, make a simple plywood jig. Your future self will thank you.
- Don’t chase max speed: The headline numbers are fun; the best detail lives at moderate speeds with the right power.
- Watch the first pass: Problems often show up early—lost focus, belt slip, or material warping. A quick check prevents an ugly surprise later.
Reliability, Support, and the User Guides
We appreciate a 32-bit board that doesn’t crash under a large vector path or dense raster. The RAY5 stayed stable during long jobs. We didn’t see stuttering or missed steps when the belts were properly tensioned and the rails kept clean.
As for support, Longer promises lifetime technical assistance and 24-hour customer service. Our questions received prompt, helpful replies, and the documentation avoided that uncanny valley where it’s technically English but emotionally not. The installation guide was clear, and the recommended settings gave us a foothold.

Value for Money: The Case We’d Make to Our Past Selves
Budget is a language we speak fluently. At its price point, the RAY5 offers a lot: a 10W module with a fine spot, generous work area, offline control, and a touchscreen. If you’re launching a small side hustle or upgrading from a 5W, it’s an easy recommendation. If you know you’ll be doing production-level thick cutting, you’ll want to compare it to 20W diodes or CO2, but for balanced engraving-plus-cutting, it’s hard to argue with the value.
Materials and Results We Logged
To make this more useful than a string of compliments, we noted a few sample starting points. Your mileage will vary—use them as a friendly nudge.
- Birch ply (3mm): 100% power, 300–600 mm/min, 2–3 passes to cut; engraving at 30–50% and 3000–6000 mm/min.
- Pine (10mm): 100% power, 200–300 mm/min, multiple passes; strong air assist.
- Maple (6mm): 100% power, 200–300 mm/min, several passes; mask for clean surface.
- Dark cast acrylic (10mm): 100% power, 150–250 mm/min, multiple passes; air assist for edge quality.
- Leather: 20–35% power, 3000–6000 mm/min for clean marking; test for scorching.
- Anodized aluminum: 50–70% power, 4000–6000 mm/min for clear, dark marks.
- Glass (with paint): 60–80% power, 1000–2000 mm/min; wash off paint after.
We keep a small library of test squares labeled with settings. It’s like carrying around a pocket translator for materials.
The Little Things That Made Us Loyal
- Offline repeatability: Insert TF card, load file, go. When we get a repeat order, we can run it without rebuilding the job.
- Framing accuracy: Saves time and wood, which doubles as saving dignity.
- Clean cable management: The wiring isn’t a spaghetti dinner. Fewer snags, fewer curses.
- Stable chassis: Belt tension adjusts easily, and the frame resists wobble. It feels solid, like it could listen to your troubles and then actually fix them.
Wish List and Realistic Compromises
No machine is perfect, though we appreciate the RAY5’s aim. If we could wave a magic wand:
- Built-in air assist: It’s almost essential for cutting. We added our own and saw big gains.
- Enclosure option: Even a basic enclosure improves safety and fume control. A bundle option would be nice.
- Camera integration: LightBurn camera workflows are great; a simple alignment kit would elevate the experience.
- More aggressive defaults for thick materials: New users might otherwise overshoot expectations; a guide of “practical thickness” would help.
These wishes don’t detract from the overall machine; they’re just the sort of things we start daydreaming about once we’re already enjoying the tool.
Troubleshooting Notes We Learned The Hard Way
- Cuts not completing: Increase air assist, slow the speed, add passes, and confirm focus mid-stack if cutting very thick material.
- Wobbly lines: Check belt tension and ensure the frame is square. Also confirm the material isn’t flexing during the job.
- Uneven engraving darkness: Re-focus, wipe the lens, and consider running a second pass at lower power.
- Burn marks on light wood: Mask with painter’s tape, increase air, and consider sanding lightly after.
- Wi‑Fi flaky: Use TF card for mission-critical jobs. Convenience is wonderful until it isn’t.
Real-World Workflow That Worked For Us
- Design in Illustrator or Inkscape.
- Import to LightBurn, set layers, speed, and power based on material notes.
- Send G-code to TF card, pop it in the RAY5, and frame.
- Focus carefully using the module’s focusing method.
- Start the job and watch the first pass. Adjust on the spot if needed.
- Celebrate with coffee, admire results, and pretend we meant to do it exactly that way.
Environmental and Space Considerations
We ran the RAY5 on a sturdy table with an external fan and a window vent. If you can swing a small enclosure, your lungs will write you an appreciative email. The 400×400 workspace asks for a footprint that doesn’t work on a tiny side table, but it’s compact enough to tuck into a corner when not in use.
The Case for This Machine As a First Laser
We’d hand the RAY5 to a beginner and feel good about it. The learning curve is gentle, the defaults are sensible, the touchscreen lowers the intimidation factor, and the offline options mean you’re not one laptop crash away from a ruined weekend. Add safety glasses, a basic honeycomb bed, and an air pump, and you’re well-equipped.
Where It Surprised Us
- The detail: That 0.06mm spot size made small fonts and intricate line art feel viable, not just theoretical.
- The stability: Long, high-density raster jobs didn’t wobble or drift.
- The workflow flexibility: Wi‑Fi, TF card, app, touchscreen—multiple paths meant fewer excuses not to finish.
The Bottom Line on Cutting Claims
We respect ambition. We also respect physics. The RAY5’s claims of cutting 20mm wood and 30mm acrylic are at the very edge of what a carefully tuned 10W diode can pull off. With material selection, slowing down, multiple passes, and, critically, air assist, these feats are possible. But for everyday life, most of us will live happily in the 6–12mm zone for wood and up to 10–15mm for dark acrylic. That’s not a limitation; that’s responsible engineering meeting real world practicality.
Pros and Cons We’d Tell a Friend
-
Pros:
- Excellent engraving detail thanks to compressed spot
- Generous 400x400mm work area for larger projects
- Multiple control options and true offline operation
- 3.5-inch touchscreen makes repeat jobs painless
- Stable 32-bit control and smooth motion
- Easy assembly with good documentation and support
-
Cons:
- Thick-material cutting is possible but slow and technique-dependent
- Air assist isn’t built-in and is basically essential for clean cuts
- Fume management is on you—plan ventilation or an enclosure
- Clear acrylic requires workarounds (typical of blue diode lasers)
Final Verdict: A Confident Yes, With a Practical Smile
We like the Longer RAY5 Laser Engraver, 10W High-Precision Laser Engraver, Compressed Spot CNC, App Offline Control, DIY Engraving Tool for Metal/Glass/Wood, Engraving Area 15.7″x15.7″. We like it enough to keep it out on the bench instead of returning it to its box, which is the highest compliment in a shop where floor space is a ruthless judge.
For engraving detail and medium-depth cutting, it shines. The touchscreen and offline operation remove friction, the spacious area makes ambitious projects feasible, and the learning curve won’t make you feel like you’ve taken up a new career by accident. If you want to cut very thick stock all day, you may outgrow 10W. But if you want a friendly, capable machine that balances engraving finesse with real cutting ability, this is a strong choice—and a surprisingly charming partner for our projects.
We started this wondering if a 10W laser could replace a few of our complicated setups. We ended up replacing our hesitation instead.
Disclosure: As an Amazon Associate, I earn from qualifying purchases.